Do you have a question about the Mesqool CR1008 and is the answer not in the manual?
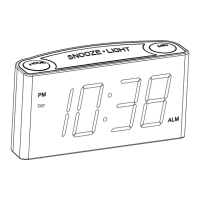
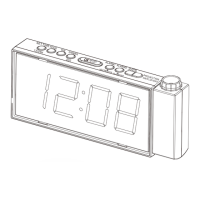
Identifies and describes all 17 controls on the alarm clock, including buttons, sliders, and indicators.
Instructions for installing 2x 1.5V 'AAA' batteries for time setting memory and power outage backup.
Guide for connecting the adapter to the DC jack and plugging into a 100-240V AC wall outlet.
Steps to set the hour and minute by pressing the SET TIME, HOUR, and MIN buttons.
How to switch between 12-hour and 24-hour time format using the slide switch.
Procedure to set the alarm hour and minute using the ALARM, HOUR, and MIN buttons.
How to adjust the alarm volume using the slide switch.
Methods to temporarily silence (Snooze/Light) or permanently turn off the alarm for 24 hours or cancel it.
Adjusting the display brightness to preference using the dimmer slide switch.
Instructions for turning the night light on and off using the SNOOZE LIGHT button.
How to switch the night light color by pressing the SNOOZE LIGHT button.
Instructions for activating and deactivating DST by holding the SET TIME button.
Information on charging devices like phones or tablets via the USB port, with a maximum current of 1 Ampere.
Details Mesqool's one-year warranty, 3-month replacement, and 1-month refund policy.
Information on signing up for an 18-month extended warranty and contacting customer support.
Lists items not covered by warranty and notes the company's right to revise policies.
The Mesqool CR1008 Digital LED Alarm Clock is a versatile device designed to enhance your sleep environment and provide convenient timekeeping and charging functionalities. This alarm clock features a clear LED display, an adjustable night light, and a USB charging port, making it a multi-functional addition to any bedside table.
The primary function of the Mesqool CR1008 is to display the time and act as an alarm clock. The large LED display ensures easy readability, and the time can be set in either 12-hour or 24-hour format, catering to individual preferences. The alarm function is robust, allowing users to set a specific wake-up time. When the alarm sounds, it can be temporarily silenced for a 9-minute snooze period, or completely turned off for 24 hours. For complete cancellation, a dedicated switch ensures the alarm will not sound again until reactivated.
Beyond basic timekeeping and alarming, the device incorporates a night light feature. This night light offers multiple color options, allowing users to choose a hue that best suits their mood or room ambiance. The brightness of both the time display and the night light is adjustable, providing personalized comfort and preventing overly bright illumination in a dark room.
A significant convenience feature is the integrated USB charging port. This allows users to charge their mobile phones, tablets, or other USB-powered devices directly from the alarm clock, reducing the need for additional power adapters and freeing up electrical outlets. The charging port delivers a maximum current of 1 Ampere, suitable for most standard device charging needs.
The clock also includes a Daylight Saving Time (DST) switch. This feature simplifies the process of adjusting the time for DST changes, automatically adding or subtracting an hour with a simple action.
For power backup, the Mesqool CR1008 can be equipped with two AAA batteries (not included). These batteries serve to memorize the time settings and ensure the alarm will still ring in the event of a power outage, providing peace of mind. It's important to note that the batteries do not power the display or other functions; they are solely for memory retention and alarm activation during power interruptions.
Operating the Mesqool CR1008 is designed to be intuitive, with clearly labeled buttons and sliders for various functions.
Time setting is straightforward: a dedicated "SET TIME" button initiates the process, after which "HOUR" and "MIN" buttons are used to adjust the time. The display flashes during setting, and the changes are saved automatically after a few seconds or by pressing the "SET TIME" button again. The 12H/24H format can be toggled via a slide switch, offering flexibility.
Setting the alarm follows a similar pattern. An "ALARM" button activates the alarm setting mode, indicated by the "ALM" indicator lighting up and the display flashing. "HOUR" and "MIN" buttons are then used to set the desired alarm time. An "ALARM ON/OFF" slide switch provides a clear visual indicator and control for activating or deactivating the alarm. The alarm volume can also be adjusted using a dedicated slider, allowing users to choose a gentle wake-up or a more assertive sound.
When the alarm sounds, the "SNOOZE/LIGHT" button provides a temporary 9-minute reprieve. Pressing the "ALARM PAUSE" button will turn off the alarm for 24 hours, while sliding the "ALARM ON/OFF" switch to "OFF" will completely cancel the alarm until it is manually reactivated.
The display brightness is controlled by a "DIMMER" slide switch, allowing users to adjust the intensity of the LED display to their preference, from low to high.
The night light function is also controlled by the "SNOOZE/LIGHT" button. A short press turns the night light on, and subsequent presses cycle through various color options, including Cobalt Blue, Sky Blue, Green, Oyster White, Sunrise Orange, Shocking Pink, and Violet. A long press of the "SNOOZE/LIGHT" button, or repeated short presses, will turn the night light off.
The DST feature is activated by holding down the "SET TIME" button, which illuminates the "DST" indicator and automatically adjusts the time by one hour. Holding the button again will turn off DST and revert the time.
The USB charging port is always active when the clock is connected to AC power, allowing for convenient charging of devices at any time.
The Mesqool CR1008 is designed for ease of use and minimal maintenance. The primary maintenance consideration is the installation and occasional replacement of the two AAA backup batteries. These batteries are housed in a compartment on the back of the device, accessible via a cover. While the batteries are crucial for memory retention and alarm function during power outages, they do not power the main display or other features, thus extending their lifespan.
The device is powered by an AC adapter, which should be connected to a standard 100-240V AC wall outlet. Ensuring a stable power connection is the main operational requirement.
Cleaning the device is straightforward; a soft, dry cloth is recommended to wipe down the exterior and display. Avoid using harsh chemicals or abrasive materials that could damage the finish or display.
The product comes with a standard 1-year warranty, with an option to extend it to 18 months upon registration. This warranty covers defects in materials and workmanship under normal use. Should any issues arise, customer support is available via email. The warranty policy outlines conditions for repair or replacement, ensuring long-term reliability and customer satisfaction. Regular checks of the manufacturer's website are recommended for the latest warranty updates.
| Display Type | LED |
|---|---|
| Snooze Function | Yes |
| Alarm Sound | Buzzer |
| Display Color | Red |
| Battery Type | AAA |
| Number of Batteries | 2 |
| Power Source | Battery |
| Alarm Type | Single |