7
15
GB IRL AUS USA NZ CDN IND
Assembly
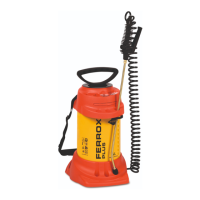
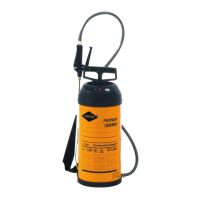
)DVWHQWKHFDUU\LQJVWUDSV>@RQWKHWDQN>@)LJVDE
2. Screw the spray line [4] tightly into the outlet port [10]. )LJ.
Note the location of the spigot in order to be able to insert the lock.
3. Insert the lock [11]. )LJ.
Ź 7KHORFNFORVHVDQGWKHVSUD\OLQHLVVHFXUHGIURPXQVFUHZLQJRXWRIWKHWDQN
4. Screw the spray lance [7] onto the shut-off valve [9] )LJ.
Checks
Visual inspection:
Are the tank [1], pump [2], spray line [4] with shut-off valve [9], pressure gage [16] and
spray lance [7] undamaged? )LJV
3D\VSHFLDODWWHQWLRQWRWKHFRQQHFWLRQVEHWZHHQWKHWDQN±VSUD\OLQHDQGWKHVSUD\OLQH
±VKXWRIIYDOYHDQGWRWKHFRQGLWLRQRIWKHSXPSWKUHDGLQJDQGVSUD\OLQH
No leaks: Pump up the empty device to 2 bar.
Ź 7KHSUHVVXUHPXVWQRWGHFUHDVHPRUHWKDQEDUZLWKLQPLQXWHV
Function: Pull the red button on the safety valve [12]. )LJ.
Ź 7KHSUHVVXUHPXVWGLVVLSDWH
Activate the shut-off valve [9] )LJ
Ź 7KHVKXWRIIYDOYHPXVWRSHQDQGFORVH
Making preparations
Observe the instructions in the section entitled “Safety”.
All excess pressure must be released from the device.
1. Pull up the red button on the safety valve [12] until all excess pressure is released from
the tank. )LJ.
2. Press the pump handle [13] down and turn it counterclockwise.
Ź 7KHSXPSKDQGOHLVORFNHGLQSODFH)LJ.
3. Unscrew the pump [2] from the tank [1]. )LJ.
7RHQVXUHWKHSXPSUHPDLQVFOHDQGXULQJVWRUDJHZHUHFRPPHQG\RXDWWDFKWKH
SXPSWRWKHSXPSKROGHU>@)LJ
:HUHFRPPHQG\RXPL[WKHVSUD\LQJOLTXLGLQWKHGHYLFHRUSUHPL[LWLQDQH[WHUQDO
WDQN)LOOWRZLWKZDWHUSRXULQWKHVSUD\LQJDJHQWDQGWKHQDGGPRUHZDWHU
XQWLOIXOO
4. Add the spraying liquid to the tank [1] )LJ.
&KHFNWKH¿OOLQJKHLJKWWKURXJKWKHYLHZLQJJODVV>@RIWKHVKXWRIIYDOYH>@)LJ.
0RYHWKHVKXWRIIYDOYH>@RQWKHWDQN>@IURPWRSWRERWWRPVHYHUDOWLPHVZKLOH
SUHVVLQJWKHOHYHUWKHOHYHORIOLTXLGLQWKHKRVHOLQHDQGWDQNLVHTXDOL]HG7KH
OHYHORIOLTXLGYLVLEOHLQWKHYLHZLQJJODVV>@WKHQFRUUHVSRQGVWRWKH¿OOLQJKHLJKW
RIWKHWDQNZKLFKFDQEHUHDGRQWKHVFDOH>@)LJ
6. Screw the pump [2] into the tank [1]. )LJ.
7. Swivel in the pump holder [8]. )LJ.