The M2 Quick Start Guide
Help Button: Launches a PDF viewer, displaying the M2 User’s
Manual.
Preferences Menu: Provides access to configured preference
selection items, including unit type, reference frame selector, and the
on-screen keyboard launcher. (These items are configured in
“Settings”-“Desktop”).
Zoom Menu: Provides access to the Part View zoom buttons.
The crosshair and edge probes:
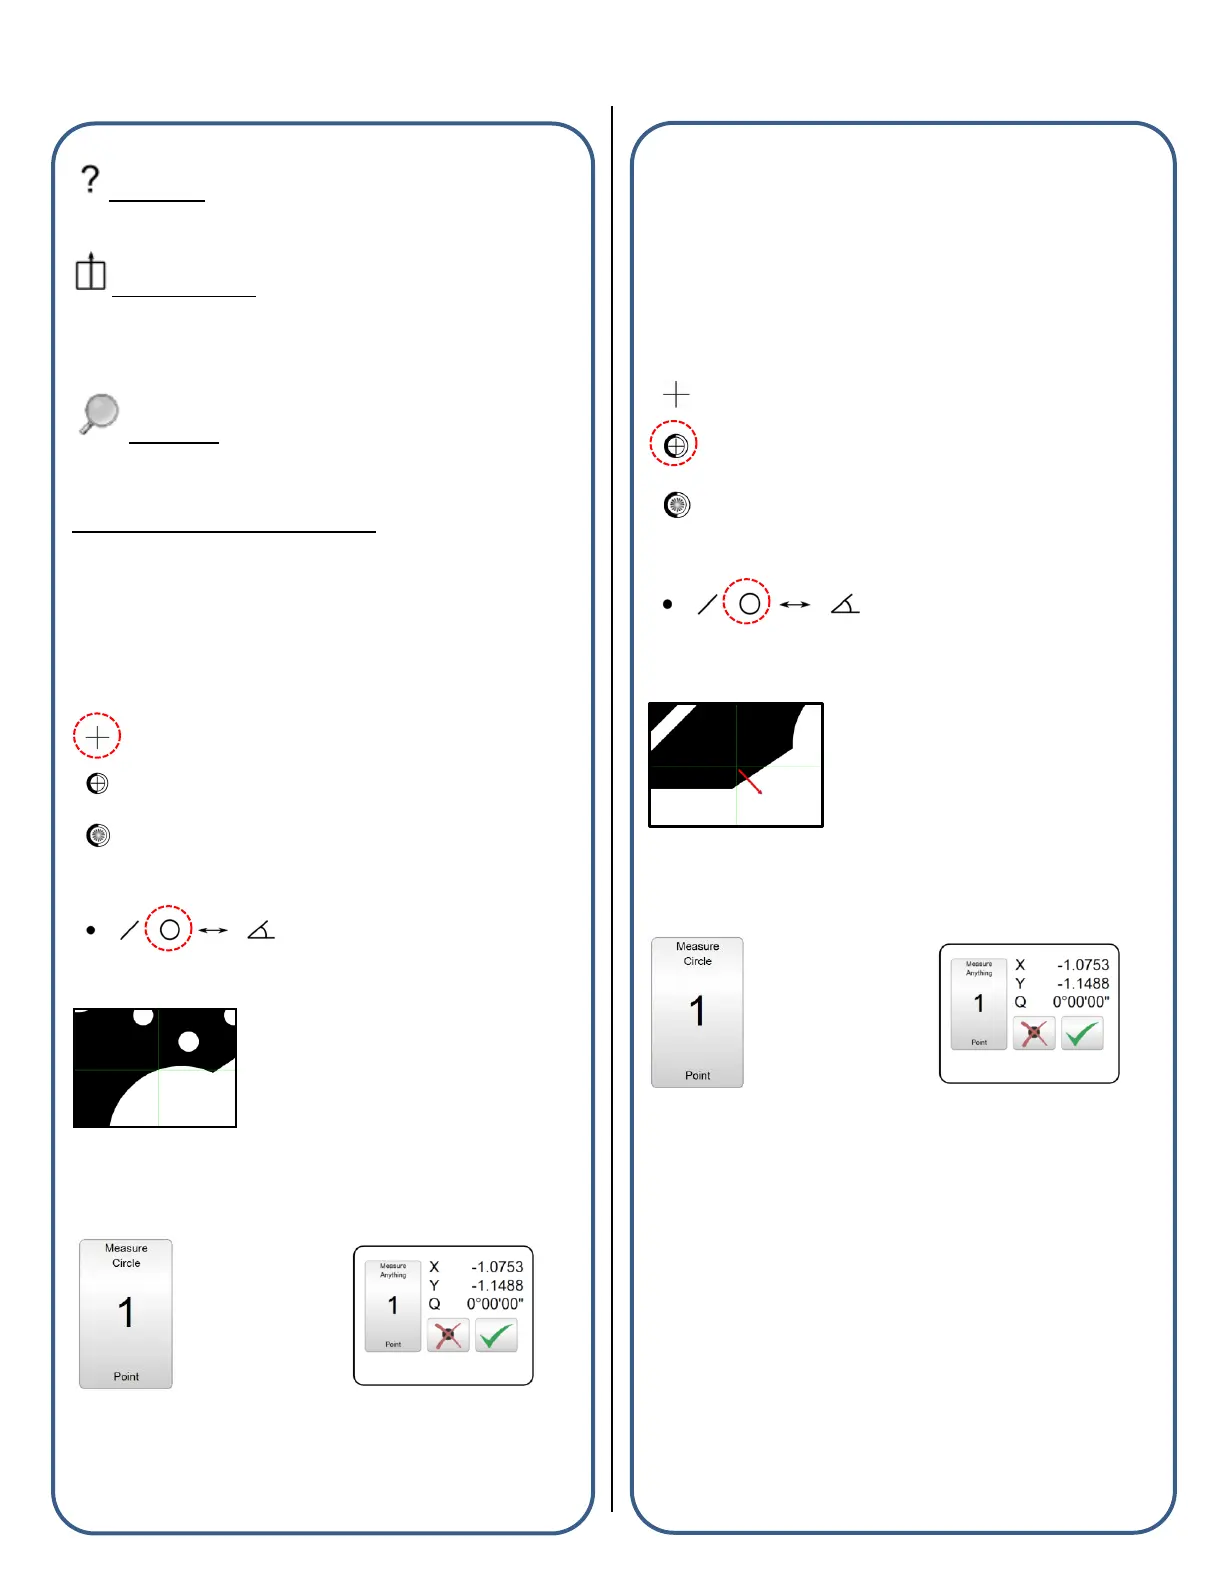
“Using an External Crosshair” Example
The M2 Software supports measuring features with an “External
Crosshair” using the following procedure:
■ In Optical Edge enabled systems, select the crosshair probe from the
probe menu. For crosshair only systems proceed to the next step.
■ Press a Measure Feature button from the center or bottom toolbar.
■ Position your comparator crosshair, or externally generated
crosshair, on the edge of the feature to be measured.
■ Press the large measure feature button,” or click in the yellow
measure window, to enter points for the feature measurement. Press
“Done” (Green Check Button) to complete the measurement.
Note: If a measurement fails after pressing “Done”, please refer to the
Probe Points Requirements list or the measure feature examples, both
found in Section 2.
“Using the Manual optical edge probe” Example
The Manual optical edge probe requires that edge crossings be
confirmed by keypress. The point acquired at the last edge crossing
will be added to the current feature measurement when either the large
measure feature button (vertical format) or the yellow measure window
(horizontal format) is pressed. The M2 Software supports measuring
features with the “Manual Edge probe” using the following procedure:
■ Select the Manual optical edge probe from the probe menu.
■ Press a Measure Feature button from the center or bottom toolbar.
■ Cross an edge on the feature to be measured, a point enter sound
will be played indicating an edge crossing.
■ Press the large measure feature button, or click in the yellow
measure window, to enter the point for the last edge crossed. This
point will be added to the counter for the current feature measurement.
■ After the desired number of points have been probed, press “Done”
(Green Check Button) to complete the measurement.
Note: If a measurement fails after pressing “Done”, please refer to the
Probe Points Requirements list or the measure feature examples, both
found in Section 2.
 Loading...