Do you have a question about the Metra Electronics 88-00-8000 and is the answer not in the manual?
Disconnect negative battery terminal. Remove ashtray, (3) screws, (1) screw from each side of dash console and unsnap trim bezel.
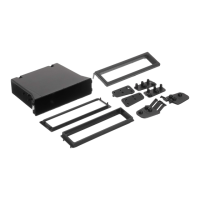
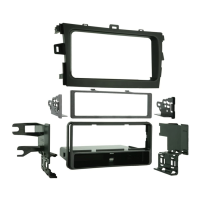
Remove factory mounting brackets. Align holes in brackets with Pocket holes. Mount brackets to Pocket with screws.
Disconnect negative battery terminal. Remove driver's side speaker panel, (1) screw, unsnap ignition cover, remove glove compartment assembly and radio trim bezel.
Remove factory mounting brackets. Align holes in brackets with Pocket holes. Mount brackets to Pocket with screws.
Disconnect battery terminal. Open armrest. Unsnap parking brake trim, gear shifter trim. Remove climate control knobs, trim plate, screws, radio trim bezel, factory head unit and wiring.
Remove factory mounting brackets. Align holes in brackets with Pocket holes. Mount brackets to Pocket with screws.
Disconnect battery terminal. Remove (2) screws from lower steering column panel, (2) screws from radio trim bezel, (1) screw and (1) bolt from glove box, (2) screws from ashtray cavity and bracket.
Remove factory mounting brackets. Align holes in brackets with Pocket holes. Mount brackets to Pocket with screws.
Disconnect battery terminal. Remove (2) screws above climate controls, unsnap dash trim bezel. Remove (4) screws securing factory head unit and disconnect wiring.
Remove factory mounting brackets. Align holes in brackets with Pocket holes. Mount brackets to Pocket with screws.
Disconnect battery terminal. Pry up gear shifter trim panel. Remove (2) screws from bottom edge of radio trim panel. Unsnap panel, disconnect ashtray and cigarette lighter wiring.
Remove factory mounting brackets. Align holes in brackets with Pocket holes. Mount brackets to Pocket with screws.
Disconnect battery terminal. Remove (2) Phillips screws from each side of console trim bezel. Remove (4) screws securing factory head unit and disconnect wiring.
Remove factory mounting brackets. Align holes in brackets with Pocket holes. Mount brackets to Pocket with screws.
Disconnect battery terminal. Remove (4) screws from top edge of instrument trim bezel, (2) screws below radio opening, (1) screw from lower-left tab of bezel.
Remove factory mounting brackets. Align holes in brackets with Pocket holes. Mount brackets to Pocket with screws.
Disconnect battery terminal. Remove (1) screw right of ignition switch, (1) screw above driver's side speaker. Carefully unsnap dash trim bezel.
Remove factory mounting brackets. Align holes in brackets with Pocket holes. Mount brackets to Pocket with screws.
Disconnect battery terminal. Remove climate control knobs, unsnap upper trim bezel, disconnect hazard/clock leads. Remove (2) screws from lower trim bezel.
Remove factory mounting brackets. Align holes in brackets with Pocket holes. Mount brackets to Pocket with screws.
Disconnect battery terminal. Remove climate control knobs, unsnap dash trim bezel. Disconnect clock and hazard leads.
Remove factory mounting brackets. Align holes in brackets with Pocket holes. Mount brackets to Pocket with screws.
Disconnect negative battery terminal. Remove ashtray and (3) screws from ashtray bracket. Remove (1) screw from each side of dash console and unsnap trim bezel.
Remove factory mounting brackets. Align holes in brackets with Pocket holes. Mount brackets to Pocket with screws.
Disconnect battery terminal. Remove ashtray and (2) screws from ashtray cavity. Unsnap and remove shifter console bezel. Remove (1) screw below ignition switch and remove dash trim bezel.
Remove factory mounting brackets. Align holes in brackets with Pocket holes. Mount brackets to Pocket with screws.
Disconnect negative battery terminal. Remove driver's side speaker panel, (1) screw, unsnap ignition cover. Remove glove compartment assembly and radio trim bezel.
Remove factory mounting brackets. Align holes in brackets with Pocket holes. Mount brackets to Pocket with screws.
| Brand | Metra Electronics |
|---|---|
| Model | 88-00-8000 |
| Category | Automobile Accessories |
| Language | English |