EasyManua.ls Logo

Metra Electronics 99-5825S User Manual

Metra Electronics 99-5825S
8 pages
To Next Page IconTo Next Page
Page #1 background imageLoading...
Page #1 background image
METRA. THE WORLD’S BEST KITS.™
© COPYRIGHT 2004-2011 METRA ELECTRONICS CORPORATION
APPLICATIONS
1-800-221-0932
metraonline.com
INSTALLATION INSTRUCTIONS FOR PART 99-5825
Ford Fiesta 2011-up
•ISODINHeadunitprovision
•Driverinformationcircuitsandbuttons
•PaintedSilverorMatteBlacktomatchfactoryfinish
WIRING & ANTENNA CONNECTIONS(SoldSeparately)
Wireharness:
•XSVI-5524-NAVFordinterface2011-up
Antennaadapter:
•40-EU10multi-appadapter
PanelRemovalTool•PhillipsScrewdriver•SocketWrench•CuttingTool
C
A
B
•A)RadioHousing•B)RadioISOBrackets
•C)(6)#8x3/8”Phillipstrussheadscrews
TOOLS REQUIRED
KIT FEATURES
KIT COMPONENTS
99-5825S
99-5825B
Question and Answer IconNeed help?

Do you have a question about the Metra Electronics 99-5825S and is the answer not in the manual?

Metra Electronics 99-5825S Specifications

General IconGeneral
BrandMetra Electronics
Model99-5825S
CategoryAutomobile Electronics
LanguageEnglish

Summary

Ford Fiesta 2011-up Applications

Kit Features

Details the main capabilities and advantages provided by the installation kit.

Kit Components

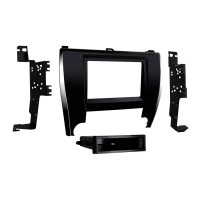
Lists all the physical parts and hardware included within the installation kit.

Wiring and Antenna Connections

Specifies the necessary wiring harnesses and antenna adapters required for system integration.

Tools Required for Installation

Lists the essential tools needed to properly perform the installation process.

Dash Disassembly Procedures

Remove Top Dash Panel

Instruction to unsnap and remove the panel located at the top of the vehicle's dashboard.

Remove Radio Panel Screws

Instruction to remove two 7 mm hex screws securing the top radio panel.

Remove Radio Trim Panel

Instruction to unclip and remove the radio trim panel, including the air vents.

Remove Radio Chassis Screws

Instruction to remove two 7 mm hex screws holding the radio and chassis together.

Remove Vents and Airbag Light

Instruction to remove T-20 Torx screws from vents and airbag light for removal.

Sub Dash Clearance Modification

Note on requiring a small cut in the sub dash to ensure adequate clearance.

Kit Assembly and Programming

Install Factory Vents

Instruction to snap the factory vents into the designated radio panel.

Mount ISO Brackets to Head Unit

Instruction to mount the ISO brackets to the aftermarket head unit using supplied screws.

Mount Radio Bracket Assembly

Instruction to mount the radio bracket assembly to the radio panel with screws.

Mount Factory Airbag Indicator

Instruction to mount the factory airbag indicator to the radio panel using supplied screws.

Connect Wiring and Adapters

Guidance on locating and connecting factory wiring harnesses and using appropriate adapters.

Programming for Vehicles Without SYNC

Steps to program the kit for vehicles not equipped with the SYNC system.

Related product manuals