GB
- 15 -
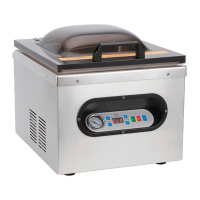
Button/indicator Function
SEAL TIME
Sealing time adjustment
buttons (10)
Increase sealing time by pressing
“+”, decrease sealing time by
pressing “-“.
VAC TIME
Vacuum time adjustment
buttons (11)
Increase vacuum time by
pressing “+”, decrease sealing
time by pressing “-“.
LED display (12)
Shows the vacuum/sealing time
and the status of the appliance.
0
-5
-10
-15
Bar
˝Hg
-20
-25
-30
1
.9
.8
.7
.6
.5
.4
.3
.2
.1
Vacuum gauge (13)
Shows the vacuum level inside
the vacuum chamber (2).
VACUUM SEALING USING A POUCH
1. Select a proper size vacuum pouch. Allow at
least 3-5cm of extra space at the top of the pouch
to ensure an air-tight seal. Place the food inside
the bag.
Note: Eliminate any liquids or food residues from the
area inside the bag that will be sealed. Otherwise,
the sealing might not be successful.
2. Open the vacuum lid (1), place the seal bar (3) in
the correct position in the vacuum chamber (2).
3. Install the connector of the power cord into the
socket on the back of the appliance. Then plug
the power plug (5) into a grounded electrical
outlet. The LED display (12) will show “OFF”.
4. Press the ON/OFF button (7). When the vacuum
lid (1) is closed, the LED display (12) will show
“CLO”. Open the vacuum lid (1); the LED display
(12) will show “ON” now.
Note: When LED display (12) shows “CLO”, the
appliance is in protection mode. In this mode, no
matter which button you are pressing, the appliance
will not react. Open the vacuum lid (1) to make the
appliance return to normal operation.
5. Set the timing controls to the desired time:
• Vacuum Time: Set the vacuum time with the
vacuum time adjustment buttons (11). As an
initial test, set the vacuum time to 30 seconds. If
necessary, further adjust the vacuum time later.
Depending on the pouch size and the volume of
the product in it, the vacuum time can be chosen
between 5 and 60 seconds.
• Sealing Time: Set the sealing time with the
sealing time adjustment buttons (10). As an
initial test, set the sealing time to 5. If necessary,
further adjust the sealing time later. The sealing
time can be chosen between 3 and 9.
Note: All time adjustments must be made with the
LED display (12) showing “ON”.
6. Lay the vacuum pouch with food flat into the
vacuum chamber (2) with the opening of the
pouch across the seal bar (3). Then, open the
pouch clamp (4) in front of the seal bar (3), clamp
the underside of the vacuum pouch mouth, and
then lock the pouch clamp (4).
Notes:
- Keep pouches that contain liquids or wet product
below the height of the seal bar (3).
- The entire pouch, including the opening, must be
inside the vacuum chamber (2).
7. Close the vacuum lid (1). The appliance will now
automatically enter the vacuum process. The
number on the LED display (12) will count down
from the preset vacuum time to 0.
8. When the vacuum process is finished, the
appliance will automatically start the sealing
process. The number on the LED display (12) will
count down from the preset sealing time to 0.
9. Air is let back into vacuum chamber (2) and the
vacuum pouch will tighten around the product.
When the appliance beeps, the process is
complete. The LED display (12) will show “CLO”.
You can now open the vacuum lid (1).
10. Inspect the vacuum pouch:
• Vacuum: Check the tightness of the pouch
around the product. If you notice air pockets,
increase the vacuum time by 5 seconds and test
again.
• Seal: Check the seal; a positive seal will look
clear. If the seal is spotty or incomplete, increase
the sealing time by 1 unit. If the seal is white or
milky, decrease the sealing time by 1 unit.
11. If the LED display (12) shows “ON” after use, first
press the ON/OFF button (7) before unplugging.
The LED display (12) will show “OFF”. Unplug the
appliance and let it cool down before cleaning it.
MAKING A POUCH FROM A ROLL
Note: When using a roll pouch, you first need to
seal one of the open ends of the cut off part before
you can use it for vacuum sealing. Afterwards, the
process is the same as when using a regular vacuum
pouch.
1. Cut the required length of pouch off the roll.
2. Lay one of the open ends of the pouch across the
seal bar (3). Clamp the underside of the vacuum
pouch mouth with the pouch clamp (4) in front of
the seal bar (3).
3. Set the lowest vacuum time (5 seconds) and an
appropriate sealing time. Close the vacuum lid (1)
to start the “vacuum” and sealing process.
 Loading...