SCREEN
1
3
2
DMX 512
3 PIN
SIGNAL
SIGNAL
6
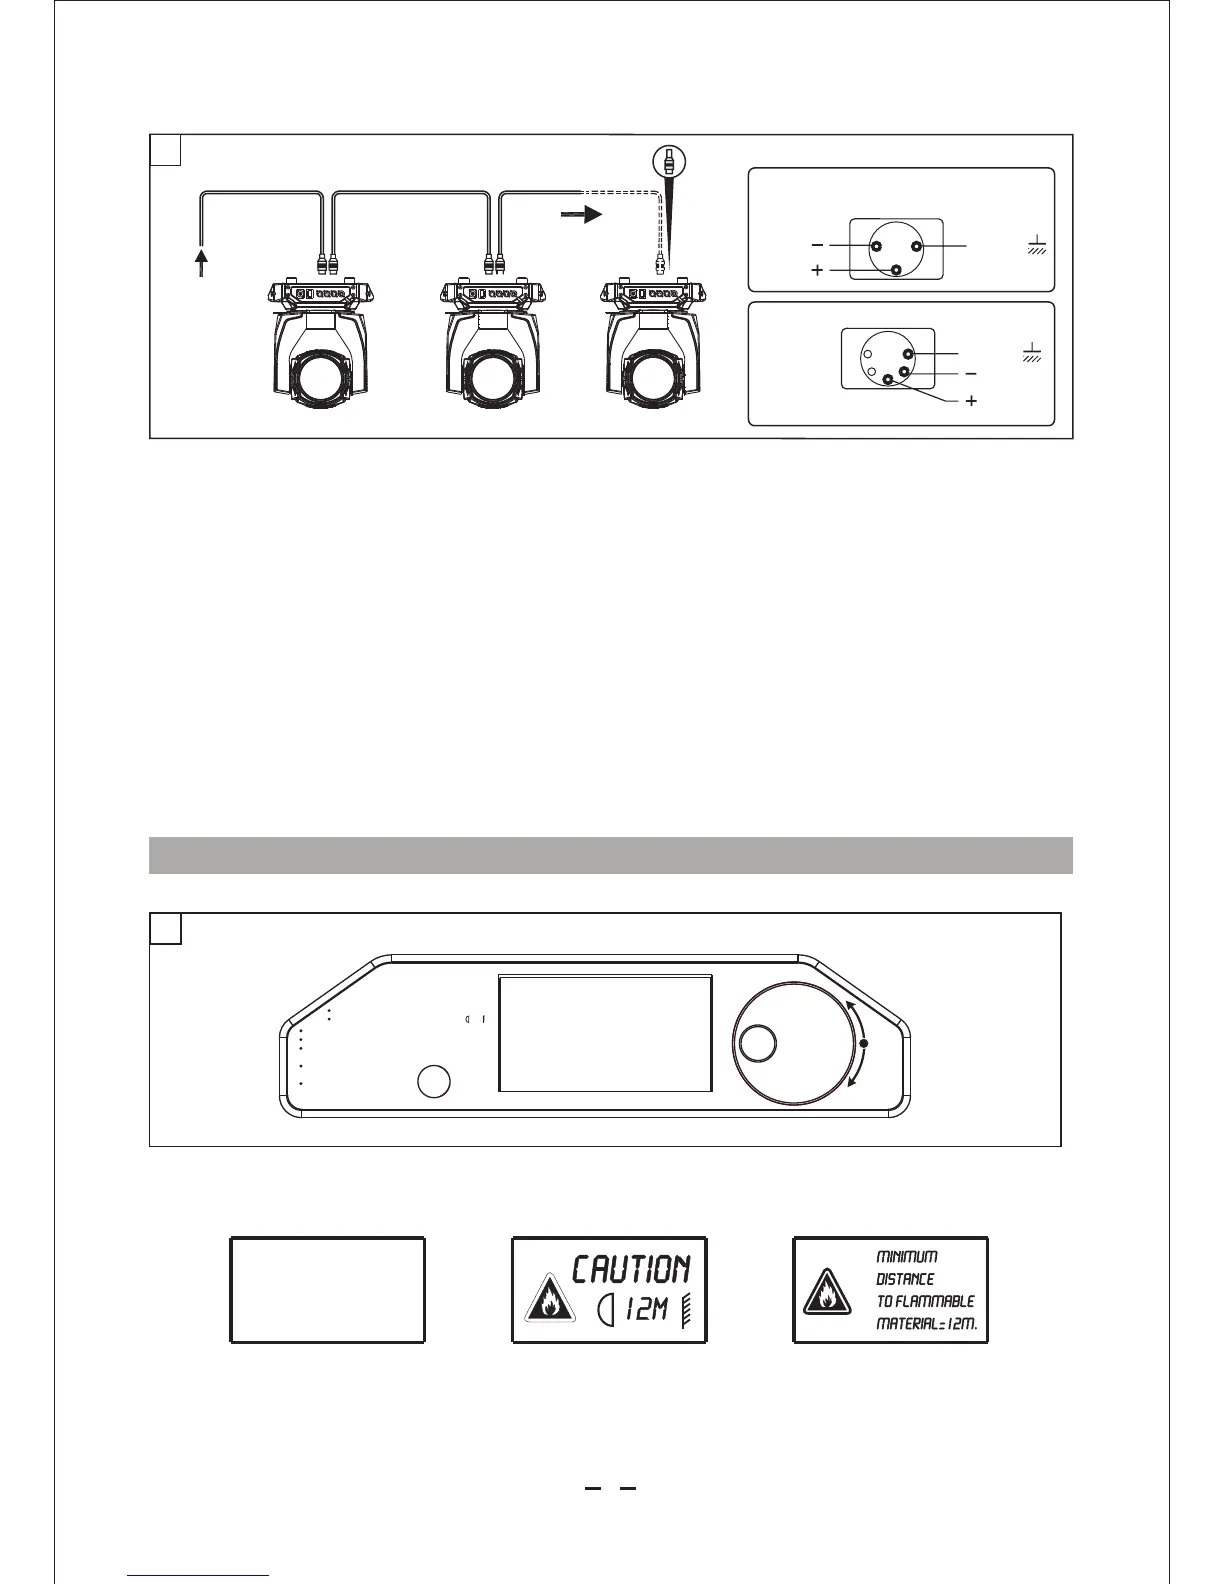
Connecting to the control signal line (DMX) - Fig. 5
◎ Please use the round 3 or 5-pin XLR plugs &sockets offered by menu facture to connect the first
projector's output to the second projector' input and connect the second projector's output to the
third projector's input. And in the same way for the rest,eventually connect the last projector's
output,all the projectors are together.
◎The projectors's control signal output or input by using the 3 or 5-pin XLR pug and socket.If need to
lengthen the communication cable,please make sure the both side of 3 or 5-pin plug is one to one .
(one to one,two to two,three to three).Otherwise,the communication cable will be interrupted.The
communicate cable is 2-cord screened cable 75Ω resistance with each core is at least a 0.5mm
diameter.(Caution:All the inside leading wire of 3 or 5-pin XLR plug couldn't touch each other or
plinth).
◎Recommend to use the DMX signal terminator for the installation to avoid the electronic noise dama
-ge the digital control signal.Simply speaking,DMX terminator is an XLR connector with a 120Ω 1/2W
resistor connected across pin 2 and 3.Which is then plugged into the output socket on the last projec
-tor in the chain.Refer to the connection.
CONTROL PANEL
SIGNAL
SCREEN
DMX
512
5 PIN
1
2
3
4
5
SIGNAL
UP ARROWHEAD:Page up or increase;
DOWN ARROWHEAD:Page down or reduce;
ENTER:OK Function
RETURE:Exit (In the choice screen)
Press the switch. The projector starts resetting the effects. At the same time, the following
information scrolls on the display:
DMX 512
5
EN TER
Mini mu m di stance to flammable m at erial=12m.
Mini mu m di stance to illumin at ed s urface=
12m
WARNING:HOT!
Maximu m am bient temperature t =38℃.
a
Alwa ys d is connect from mains be fo re replacing the lamp .
Cautio n: Hot lamp. Allow to cool fo r 30 m inutes
befo re o pe ning.
Exteri or s urface temperatur e un der
steady s ta te condition =100 .
Prol on ge d exposure to
unsh ie ld ed lamp can
cause ey e an d skin burns.
℃
7
(please refer to the
actual material)