5
For installation on galvanised, copper or plastic pipe. Style of ttings may vary from
those shown, depending on type and size of pipe.
• Use only plumber tape for tting housing connections.
• Install lter cartridge in lter housing according to the lter cartridge replacement
instructions (below) before proceeding with installation.
• Install lter after water meter or pressure tank.
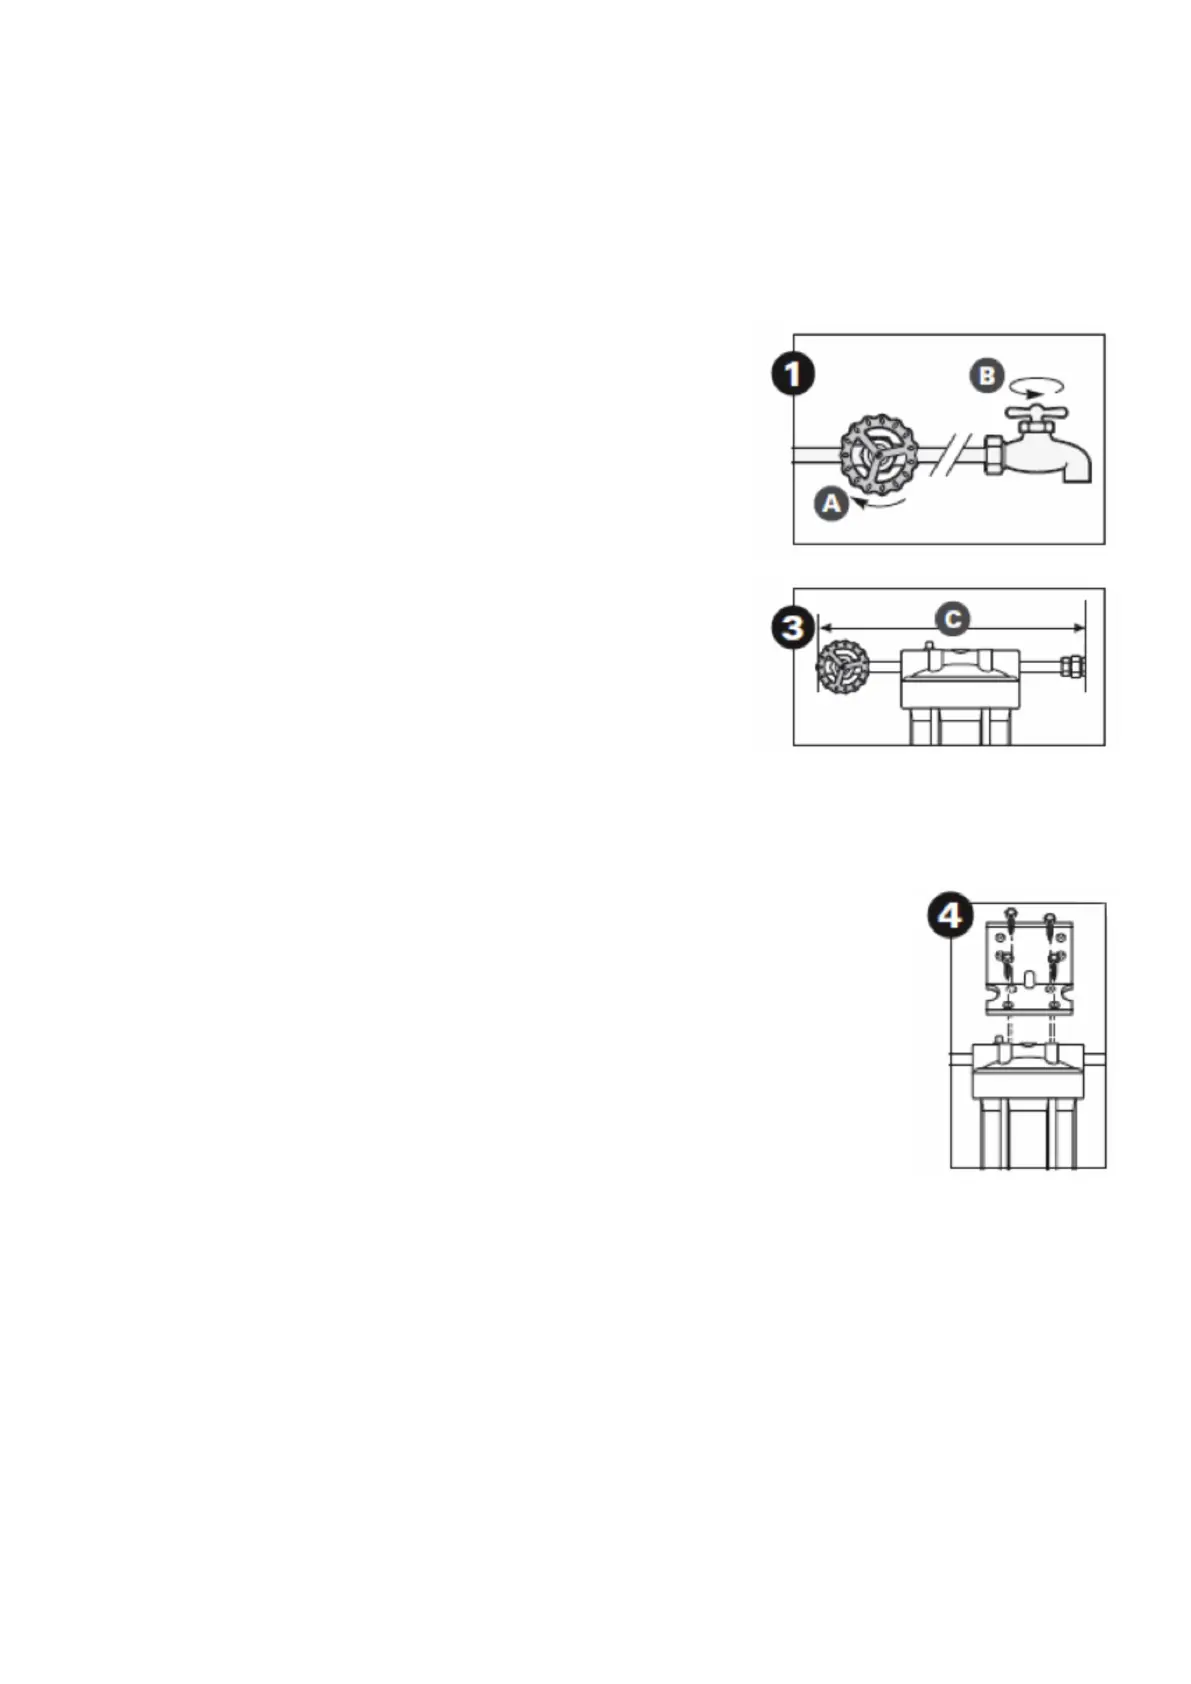
• Numbered diagrams correspond with numbered steps.
1. Turn off cold water supply (A) and open nearest tap (B)
to release pressure in pipes before starting installation.
2. Assemble all ttings. Start adapters into cap by hand.
Use a wrench to tighten rmly. Do not over-tighten.
3. Measure length (C) across assembled ttings and
subtract 1-inch if you are installing on 3/4-inch pipe,
or 11⁄2-inch if you are installing on 1-inch pipe. Mark
section of main line pipe to be removed.
Using a pipe cutter or hacksaw, cut pipe and remove
marked section (C) and thread ends of the remaining pipe.
Wrap threads with plumber tape.
Align lter assembly with ends of pipe, making certain
cap opening marked “IN” is facing your incoming water supply. It will be necessary to
spread ends of pipe apart to install lter assembly. Using two adjustable wrenches,
hold inlet adapter securely with one wrench and tighten with second wrench. Repeat
process for outlet adapter.
4. Attach bracket to cap with screws.
Attach bracket with cap to wall.
 Loading...