Filter Cartridge Replacement
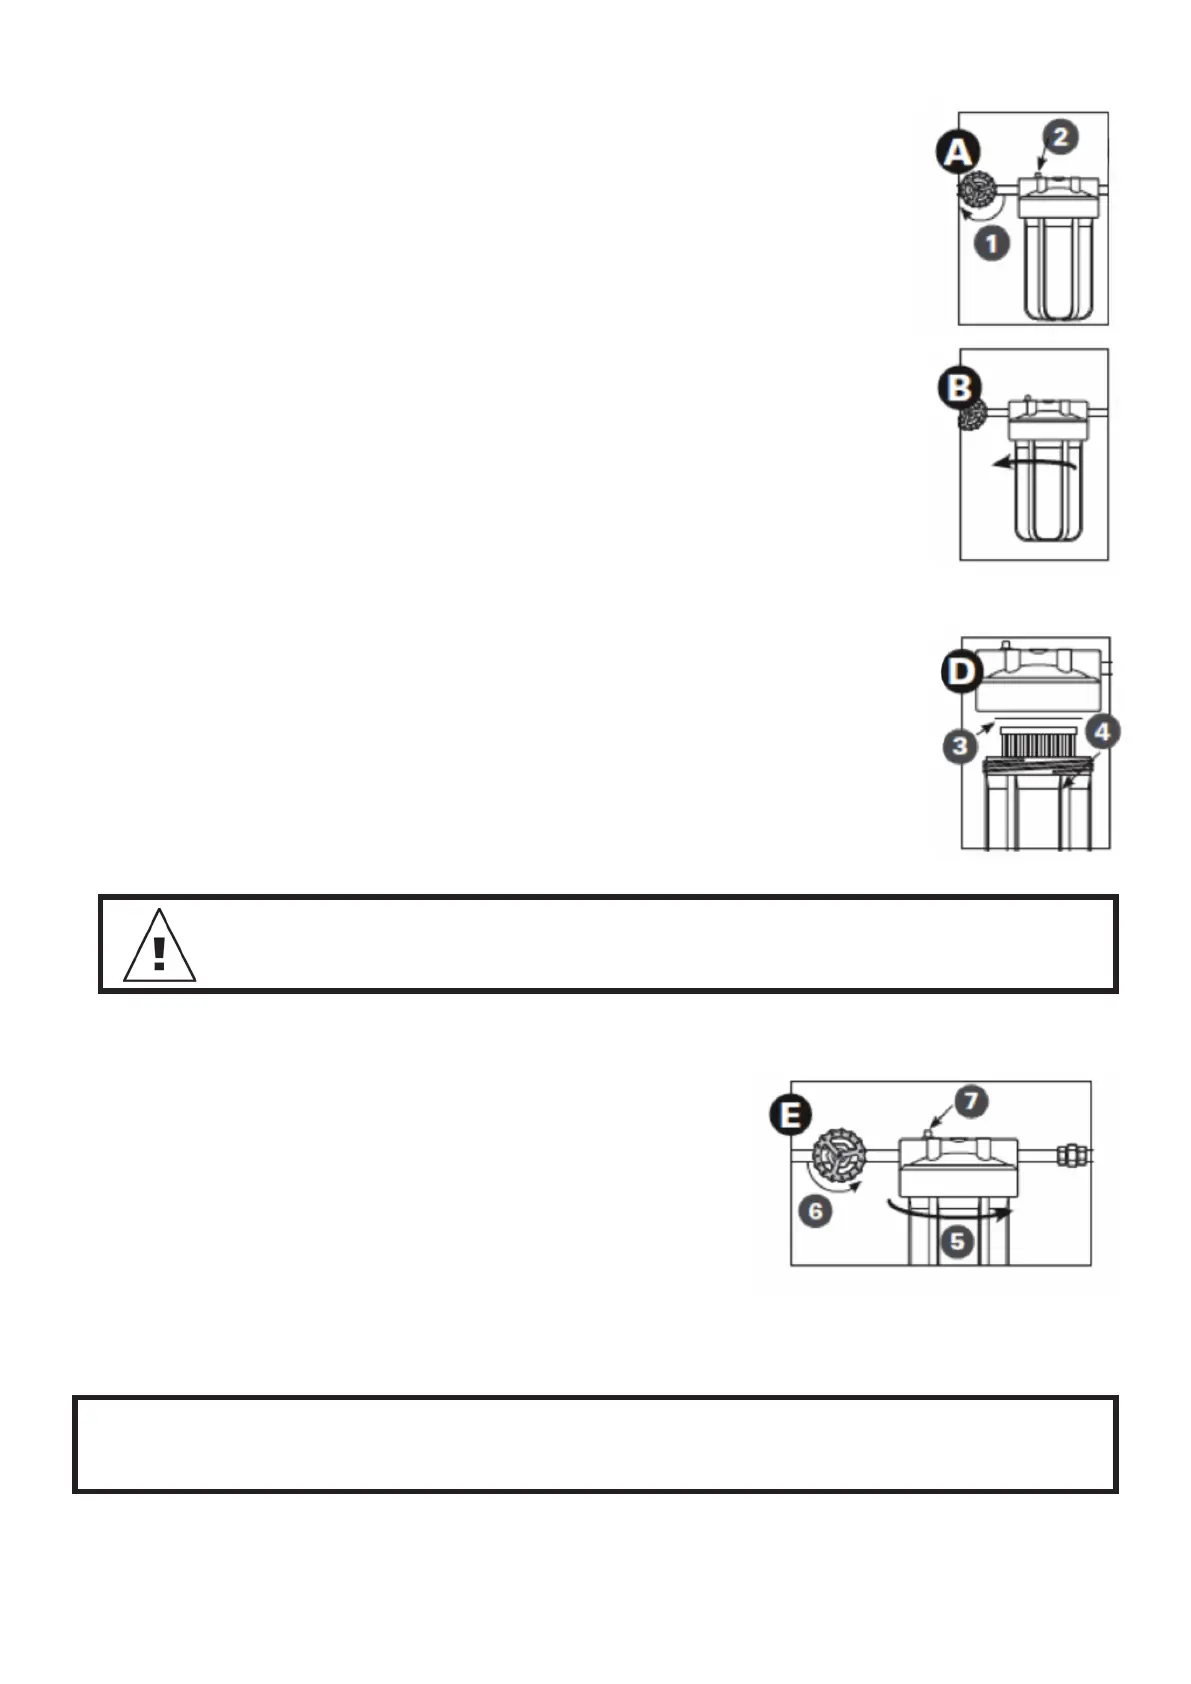
A. (1) Turn off water supply to lter. (2) Depress blue pressure-relief
button to release trapped air.
NOTE: If turning off water supply to the lter, this will also turn off water to
the rest of the home, be sure to ll a bucket of water rst to allow
you to clean housing after it has been removed.
B. Remove bottom of housing by turning clockwise.
C. Empty out the water.
D. Locate and remove large o-ring (3), wipe clean of lubricant
and set aside.
Discard used cartridge (4). Rinse out bottom of housing and ll 1/3 full
with water. Add 2 tablespoons of bleach and scrub cap and bottom of
housing with non-abrasive sponge or cloth. Rinse thoroughly.
Lubricate o-ring (3) with clean silicone grease. Insert o-ring back into
groove and smooth into place with nger.
NOTE: This step is important to ensure proper housing seal. Make sure o-ring is
seated level in the groove.
Insert new cartridge (4) over standpipe in bottom of
housing.
E. (5) Screw bottom of housing onto the cap and hand-
tighten. Do not over-tighten. Make certain cap standpipe
slips into cartridge. Close ball valve.
(6) Turn on water supply slowly to allow lter to ll with
water. (7) Depress blue pressure-relief button to release
trapped air. Flush cartridge for 5 minutes before use. Flush again for 10 minutes
before using water. Check for leaks before leaving installation.
Do not use petroleum jelly or automotive grease as this will damage the
housing. Such damage is not covered by warranty.
To maintain performance, Australian Standards and warranty, cartridges and replacement
cartridges must be WaterMark certied. Contact Microlene for further advice.
6
 Loading...