ScanMaker 9800XL Installing and Getting Started 11
Using the USB cable
Before connecting the scanner, check to see if your computer system has a built-in
USB port. The latest Macintosh computers (i.e., G3, G4, etc.) are equipped with a
built-in USB port, and usually labeled with the USB “ ” logo.
Follow the steps below to make the USB connection.
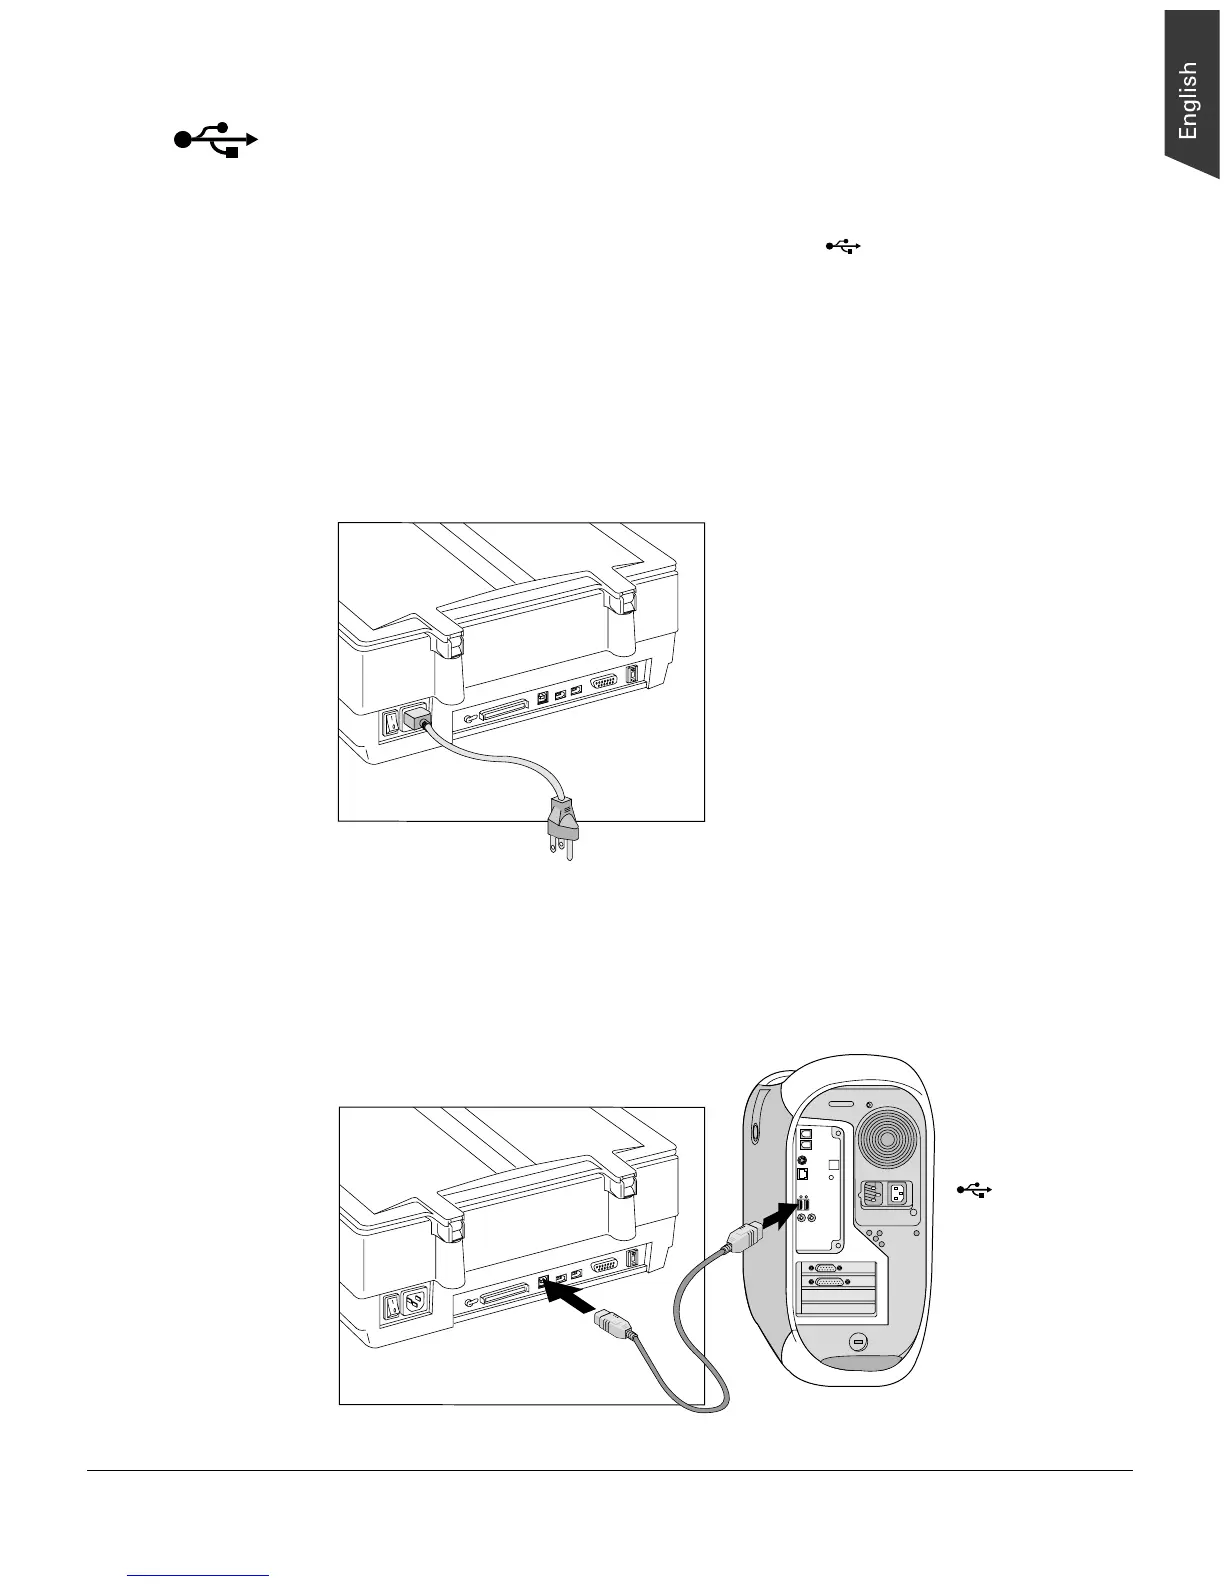
1. Connect the power cord to your scanner.
Plug the power cord into the back of the scanner, and plug the other end into a
power source (power surge protector highly recommended). Make sure no other
cable is connected to the scanner except the power cord at this point.
2. Connect the scanner to your computer, using the provided USB cable.
Connect one end of the USB cable to your computer’s USB port, and connect the
other end of the cable to the scanner’s USB port.
USB port usually
labeled with the
“ ” logo.
For Macintosh users