8 ScanMaker 9800XL Installing and Getting Started
Using the SCSI cable
Before connecting the scanner, check to see if your computer system has a built-in
SCSI interface or an installed SCSI card. If you need help on installing the SCSI
card, please refer to the “SCSI Installation Guide” on a separate documentation
included with your scanner package, or refer to the documentation that came with the
SCSI card.
Follow the steps below to make a SCSI connection.
1. Shut down your computer.
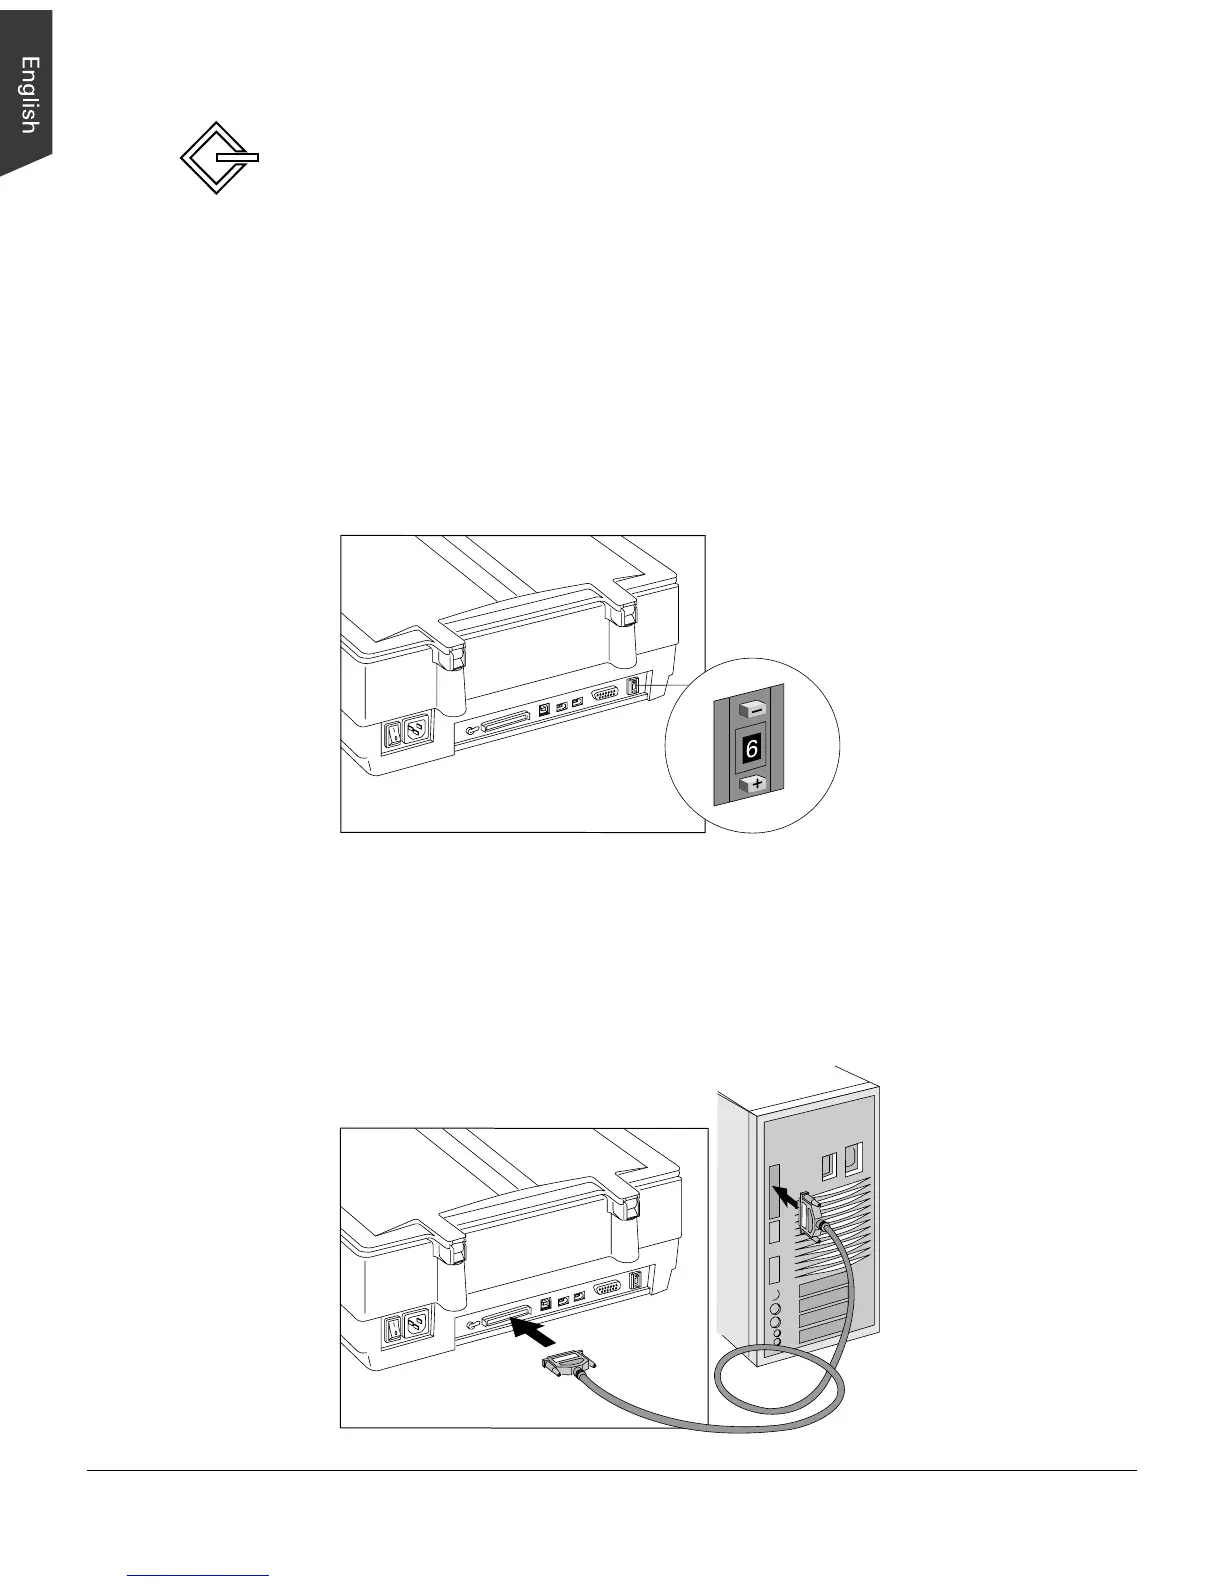
2. Set the SCSI ID number to 6. If the SCSI ID number 6 is used by another SCSI
device, check which SCSI ID is free, and set the number to a free SCSI ID.
Push the minus button (-)
above the SCSI ID number
to decrease the number;
push the plus button (+) to
increase the number.
3. Connect the scanner to your computer, using the SCSI cable.
Connect one end of the SCSI cable to your computer’s SCSI port, and connect the
other end of the cable to the scanner’s SCSI port.
For Macintosh users