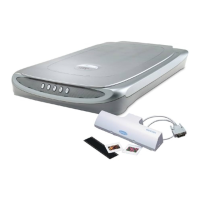
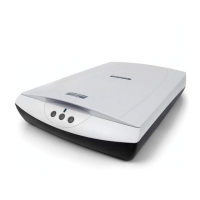
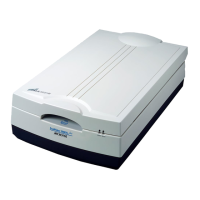
The lights on the button panel indicate the status of the scanner.
1. No light comes on when the scanner is turned on.
Make sure your scanner is connected to your computer and plugged into a
power source.
2. The “Add/Remove Hardware Wizard” appears on your screen.
Click the “Cancel” button and close the Control Panel. Disconnect the USB
or FireWire cable from the back of your computer, and refer to the installation
instructions in this guide or the ScanMaker i700 Supplement.
First, make sure that you have followed
installation steps 1 through 4. If your problem
is listed here, try the suggested solution.
On
Ready to scan.
Flashing
Warming up or scanning.
Off
Scanner is off.
Manuals
If you have additional questions and need further instruction or information,
we provide PDF manuals for:
1. Using the ScanWizard 5 scanning software
2. Using the bundled third-party software
To access the PDF manuals: Insert the Microtek CD-ROM into your
computer’s CD-ROM drive. Next, locate and click the “View Manuals”
option when the software installer window appears on your screen. Finally,
select and click the title of the manual you wish to view.
Missing Items
If your package is missing items, please call the number below.
Customer Service Department 310-687-5940
Hours (PST): Mon, Tues, Web, Fri 7am-5pm; Thur s 7am-3pm
24-hour Online Technical Assistance
For free 24-hour technical assistance, Microtek offers automated
technical support via the Internet and Email.
• World Wide Web
www.support.microtek.com
• Personal Email Support
www.support.microtek.com/emailsupport/
• Automated Email Responder
helpdesk@support.microtek.com
Personal Technical Assistance
Microtek basic installation telephone support is available free of charge for
90 days from your purchase. Toll or long-distance charges may apply.
Technical Support 310-687-5930 (PC & Mac)
Hours (PST): Mon, Tues, Thurs, Fri 7am-5pm; Wed 7am-3pm
Before you call, please install your scanner and software by following the
included instructions, and have the information below ready:
1) Date of purchase
2) Product serial number (on the back or bottom)
3) Model name & number (ScanMaker i700)
4) Version of operating system software installed on your computer
(i.e. Windows 98SE, Me, 2000, XP, Mac OS 9.x, OS X, etc.)
5) Type of hardware: • Brand of computer • CPU type
(Pentium II, III, 4, iMac, Power Mac, G4, G5, etc.)
6) Exact wording of any error message that may have appeared on the screen
7) What happened and what you were doing when the problem occurred
Note: Advanced troubleshooting is available for a consulting fee.
For a detailed listing of your Technical Support options, go to:
www.support.microtek.com/gold/
Third-Party Software Assistance
For technical support or any questions you have on these software titles
which may be included with your package, please use the contact
information listed below.
Phone Website
ABBYY
®
FineReader
®
Sprint 510-226-6719 www.abbyyusa.com
Adobe
®
Photoshop
®
Elements
Adobe
®
Photoshop
®
Album SE
Adobe
®
Acrobat
®
Reader 800-87-ADOBE www.adobe.com
Ulead
®
Photo Explorer
™
310-896-6391 www.ulead.com
Using DIGITAL ICE and ColoRescue
B. Reconstructing damaged film:
1. Raise the scanner lid, and remove the Black Mat.
2. Place the film holder with the loaded film on the scan bed. See the
previous section (“Using the Film Holders”) for more details. Close
the scanner lid.
3. Launch ScanWizard 5. When the Standard Control Panel appears, click
the Switch icon on the upper right corner to switch to the Advanced
Control Panel.
5. In the ScanWizard Settings window, verify the DIGITAL ICE strength
setting. “Normal” is sufficient in most cases.
6. Click the “Scan to” button in the Preview window. DIGITAL ICE will
automatically repair the damaged film.
Restoring Color in Photos
ColoRescue™ is an automatic color recovery system that restores faded
color in both photos and film to their original luster.
To use ColoRescue:
1. Start ScanWizard 5 and click the Switch icon on the upper right corner to
switch to the Advanced Control Panel.
2. In the ScanWizard Settings window, check the “Automatic Color
Restoration” check box. The next time you scan faded photos or film,
ColoRescue will restore the faded colors to their original brilliance.
Select Automatic
Color Restoration
3. When trying to scan, an error message appears on your screen
that reads, “Can’t Find Scanners”.
Make sure your scanner is unlocked (see Step 3).
Make sure your scanner is connected to your computer and plugged in to a
power source (see Step 4).
Uninstall and reinstall the ScanWizard 5 software.
4. After clicking “Scan,” a blank screen appears.
Make sure your scanner is unlocked (see Step 3).
Uninstall and reinstall the ScanWizard 5 software.
5. Having trouble scanning negatives or slides?
Make sure the scanner lid is properly installed, with its connector securely
connected to the scanner’s 15-pin accessory port.
Make sure you place the EZ-Lock Film Holder properly on the scan bed. Do
not block the calibration area (as indicated in the “Using the Film Holders”
section).
From the ScanWizard 5 Standard Control Panel, go to the Original
button category, then proceed to the Film subcategory and make sure you
select either the Positive or Negative option.
Reconstructing Damaged Photos and Film
The DIGITAL ICE feature repairs cracks, tears, and rips in your damaged
photos and film.
Problems?
Energy Star Notice
As an ENERGY STAR Partner, Microtek International,
Inc. has determined that this scanner meets the
ENERGY STAR guidelines for energy efficiency.
Use only power supplies (AC/DC adapters) listed below:
Voltage Manufacturer Model No.
100V to 240V FAIRWAY VE50-150A
Copyright © 2004 Microtek Lab, Inc. The following are trademarks or
registered trademarks of their respective companies: Microtek, ScanMaker,
ScanWizard of Microtek Lab, Inc.; DIGITAL ICE of Kodak. All other
trademarks or registered trademarks are the property of their respective
holders. Specifications, software and hardware bundles are subject to
change without notice. Not responsible for typographical errors. 091504
www.microtekusa.com
4. Click the Scan Material button in the ScanWizard Preview window.
Choose “Negative” or “Negative Film” to scan negative film, or choose
“Positive” or “Positive Film” to scan transparencies and slides.
DIGITAL ICE
button
A. Reconstructing damaged photos:
1. Raise the scanner lid, and place the
photo on the scan bed.
Make sure the Black Mat is attached
to the scanner lid, so that uneven
photos lay as flat as possible.
2. Press the DIGITAL ICE button on the
front panel of the scanner. DIGITAL
ICE will automatically repair the
damaged photo, and the
reconstructed file is saved in the
default image folder.
Black Mat
NOTE: You can also use DIGITAL ICE to repair photos
through ScanWizard 5. For more details, refer to the
ScanMaker i700 Supplement.
A. To load film:
1. Load the film inside the holder, with the film’s shiny base facing down.
2. Raise the scanner lid, and place the film holder with the loaded film
on the scan bed. The holder should be flush against the top ruler of
the scan bed.
Do not block
calibration window
Using the Film Holders
EZ-Lock 35mm
Filmstrip Holder
EZ-Lock 35mm
Slide Holder
EZ-Lock 4" x 5" / 6 x 9 cm (120)
Film Holder
EZ-Lock 6 x 17 cm (120) Panoramic
Film Holder
B. Remove the Black Mat:
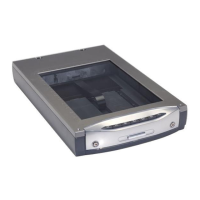
Raise the scanner lid, and push the Black Mat to the side to remove it
from the scanner lid.
Windows XPMac OS X
 Loading...


