Page 8
Installation
Instructions
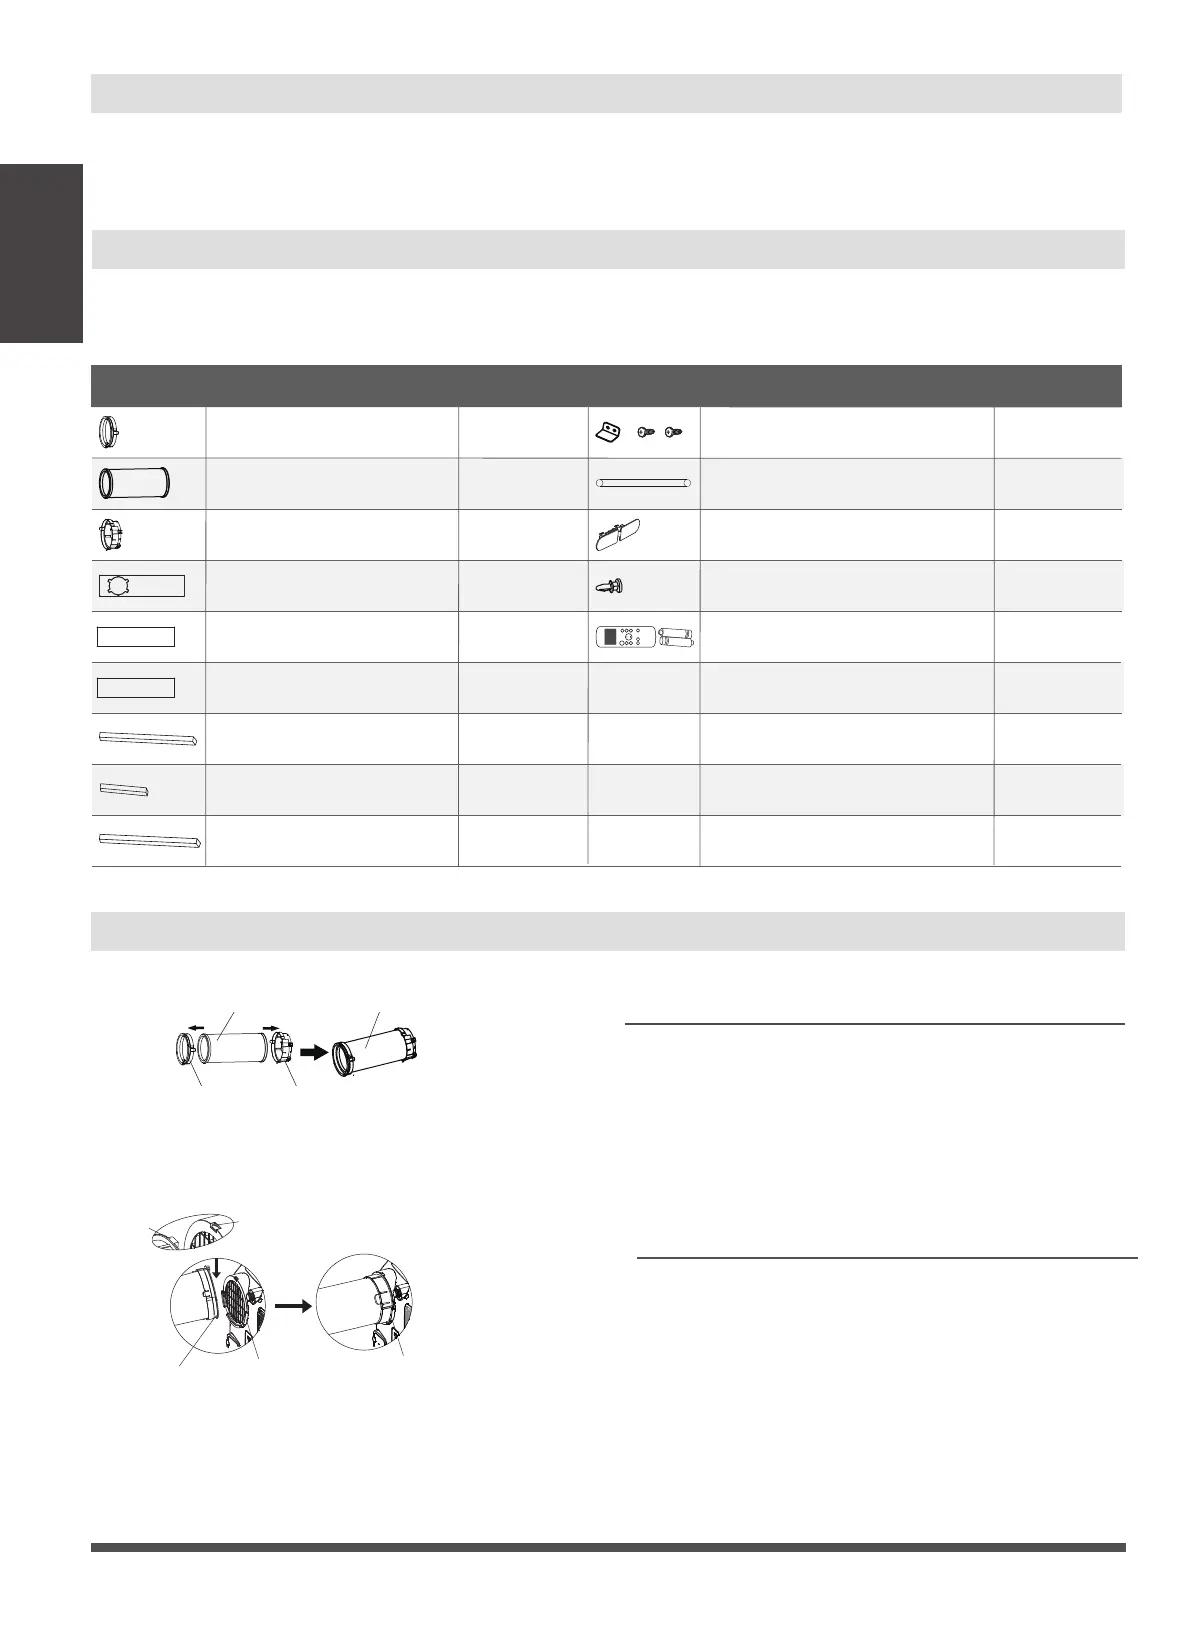
Accessories
Tools Needed
-Medium Philips screwdriver; -Tape measure or ruler; -Knife or scissors;
-Saw (On some models, to shorten window adaptor for narrow windows)
Name of Accessories
Qty.
Shape
Name of Accessories
Qty.
Shape
1 pcWindow Slider A Bolt
1 pc 1 setUnit Adaptor Security Bracket and 2 Screws
1 pc 1 pcExhaust Hose Drain Hose
1 pc 1 pcWindow Slider Adaptor Power Cord Buckle
ON /OFF
TEM P
SHO R T
CU T
TIME R
ON
TIME R
OFF
MO DE
FAN
SLE EP
SW ING
LED
1 set1 pcWindow Slider B
Remote Controller and Battery
1 pcWindow Slider C
4 pc
2 pc
Foam Seal A (Adhesive)
2 pc Foam Seal B (Adhesive)
2 pc
Foam Seal C (Non-adhesive)
NOTE: Slight variations in design may occur.
Window Installation Kit
Unit adaptor Window slider
adaptor
Exhaust hose
Exhaust hose
assembly
Hook
Hole Seat
Lower groove
adaptor
Make sure the adaptor
is inserted into the lower
groove of the air outlet.
Step Two: Install the Exhaust hose assembly to
the unit
Insert unit adaptor of the Exhaust hose assembly
into the lower groove of the air outlet of the unit
while the hook of the adaptor is aligned with the
hole seat of the air outlet and slide down the
Exhaust hose assembly along the arrow direction
for installation.
Type window installation
Press the exhaust hose
into the window slider adaptor
and unit adaptor, clamp automatically by
elastic buckles of the adaptors.
Step One: Preparing the Exhaust Hose assembly