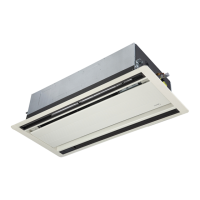
In North America
24
GG
Wire Cover
Over
1-9/16"
(40mm)
Terminal block
Conduit panel
Connecting cable
Power supply cord
Please select the appropriate through-hole according
to the diameter of the wire.
Remove the wire cover from the unit by
loosening the 3 screws.
Dismount caps on the conduit panel.
Temperarily mount the conduit tubes(not
included) on the conduit panel.
Properly connect both the power supply and
low voltage lines to the corresponding
terminals on the terminal block.
Ground the unit in accordance with local codes.
Be sure to size each wire allowing several inches
longer than the required length for wiring.
Use lock nuts to secure the conduit tubes.
The outside unit’s terminal block is protected by
an electrical wiring cover on the side of the unit.
A comprehensive wiring diagram is sticked on
the inside of the wiring cover.
Step 2:Step 1:
How to properly connect the wire lines.
Loop
Insulation
Strip 25mm(15/16")
Solid wire
Round
terminal
Strip 10mm(3/8")
Strand wire
Screw with
special
washer
Round terminal
Terminal plate
Wire
Screw with
special
washer
Wire
Round
terminal
The treatment about the end of the wire. connecting the line to the corresponding terminals
on the terminal block.
●
●
●
●
●
●
●
NOTE: Please choose the right cable size
according to the Minimum Circuit Ampacity
indicated on the nameplate of the unit.
Indoor unit
Outdoor unit
Wall receptacle or
Air break switch(North America)
(purchased seperately)
Wall receptacle or
Air break switch
(North America)
(purchased seperately)
(purchased seperately)
Outdoor unit power wires
Indoor & Outdoor
connective wires
(A)
Indoor unit
Outdoor unit
(purchased seperately)
Indoor unit power wires
Indoor & Outdoor
connective wires
(B)
 Loading...
