3. INSTALLATION METHOD
5
Fig 3-4
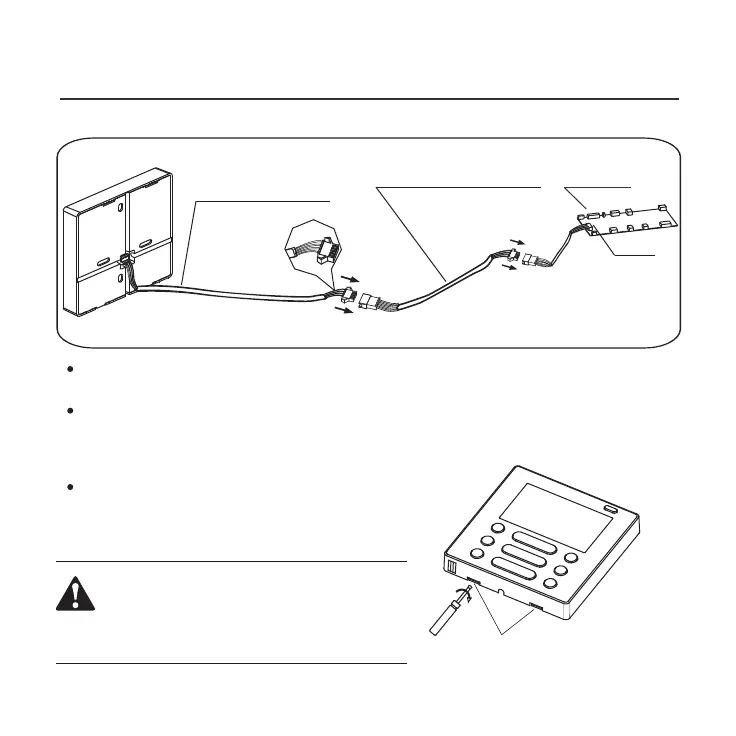
Connect the female joint of wires group from the mainboard with the male joint of
connective wires group. (See Fig.3-3)
Please connect the other side of connective wires group with the male joint of
wires group leads from wire controller. (See Fig.3-3)
Fig 3-3
Mainboard
4-core shielding wire
3.Wiring figure
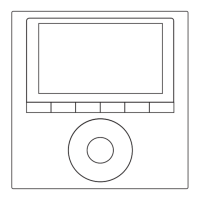
4.Remove the upper part of wire controller
The connective wires group
CN40
Insert a slot screwdriver into the slots in the lower
part of the wire controller (2 places), and remove
the upper part of the wire controller. (Fig.3-4)
Slots
NOTICE
The PCB is mounted in the upper part of the wire
controller. Be careful not to damage the board
with the slot screwdriver.