Press the "◄" and "►" buttons to select the
start time T.ON, end time T.OFF, mode and
temperature to be set, and then press the "▲"
and "▼" buttons to set the time, mode, and
temperature value.
When the cursor stays at “SILENT
MODE”,press "◄" and "►" to select silent
mode including “STANDARD”, “SILENT”,
“SUPER SILENT”.
After setting, press "OK" to confirm saving, or
press "BACK" to cancel setting and return to
the previous interface.
If Time1 T.ON is set the same as Time1 T.OFF,
then the setting is invalid, the ACT option for
the timer of this segment jumps to "OFF", the
setting of Timer2 is the same as that of
Timer1, and the timing interval of Time2 can
cross with that of Time1.
For example, if Timer1 T.ON is set to 12:00
and Timer1 T.OFF is set to 15:00, then the
values of Timer2 T.ON and Time2 T.OFF can
be set in the range of 12:00-15:00. If the time
interval crosses, the machine will be powered
on at the time T.ON which is set in Timer1 or
Timer2,and will be powered off at the time
T.OFF which is set in Timer1 or Timer2.
After the daily timer function setting is
enabled, the icon " TIMER ON" will be
displayed on the home page interface.
Press the "▼" and "▲" buttons to select the
desired option, and press the "OK" button to
access the interface.Press the "BACK" button
to cancel the setting and return to the previous
interface.
◆
Select the quering address
Select "SELECT THE QUERING ADDRESS",
and press the "OK" button to enter the
interface. The interface display is as follows:
SELECT THE QUERING ADDRESS
00
QUERY
OK
Press the "▼" and "▲" buttons to select the
address of module to view (the offline address
is skipped automatically). Press the "OK"
button to access the lower-layer submenu, or
press "BACK" to go back to the previous
interface. During operation on the menu
page, press "BACK" to go back to the
previous interface. if there is no operation in
60 seconds, the wired remote controller will
return to the home page.
If there is no error,press the "OK" button will
enter the interface as follows:
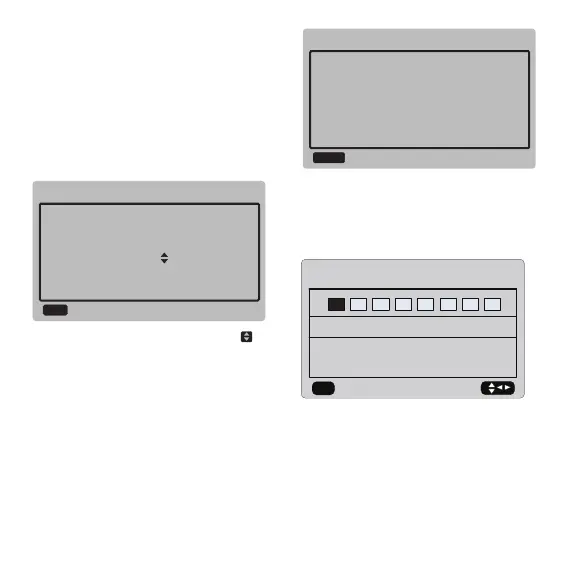
HISTORY ERRORS QUERY
CLEAR CURRENT ADDRESS ERRORS
1 2 3 4 5 6 7 8
ok
E2:COMMUNICATION ERROR
Press the "◄" and "►" buttons to view
records of error history,press "OK" button
back to "HISTORY ERROR QUERY"
interface .Press "▼" and "▲" buttons to select
"CLEAR CURRENT ADDRESS ERRORS"
and press "OK" button to clear current
address error,and enter the interface,the
interface is as follows:
The wired controler can display 8 errors at
most.Take the mainboard (00#) as an example
to make further explanation of the submenu.
After the mainboard is selected, the running
state of mainboard is as shown below:
NO ERROR
HISTORY ERRORS QUERY
BACK
17
9
 Loading...