Refrigerant pipe installation
222 Installation
5. Refrigerant pipe installation
5.1 Maximum pipe length and height drop
Considering the allowable pipe length and height drop to decide the installation position. Make sure the
distance and height drop between indoor and outdoor unit not exceeded the date in the following table.
Capacity Max. Length Max. Elevation
12,000Btu/h 15m 8m
18,000Btu/h~24,000Btu/h 25m 15m
30,000Btu/h~36,000Btu/h 30m 20m
42,000Btu/h~60,000Btu/h 50m 30m
5.2 The procedure of connecting pipes
5.2.1 Choose the pipe size according to the specification table.
5.2.2 Confirm the cross way of the pipes.
5.2.3 Measure the necessary pipe length.
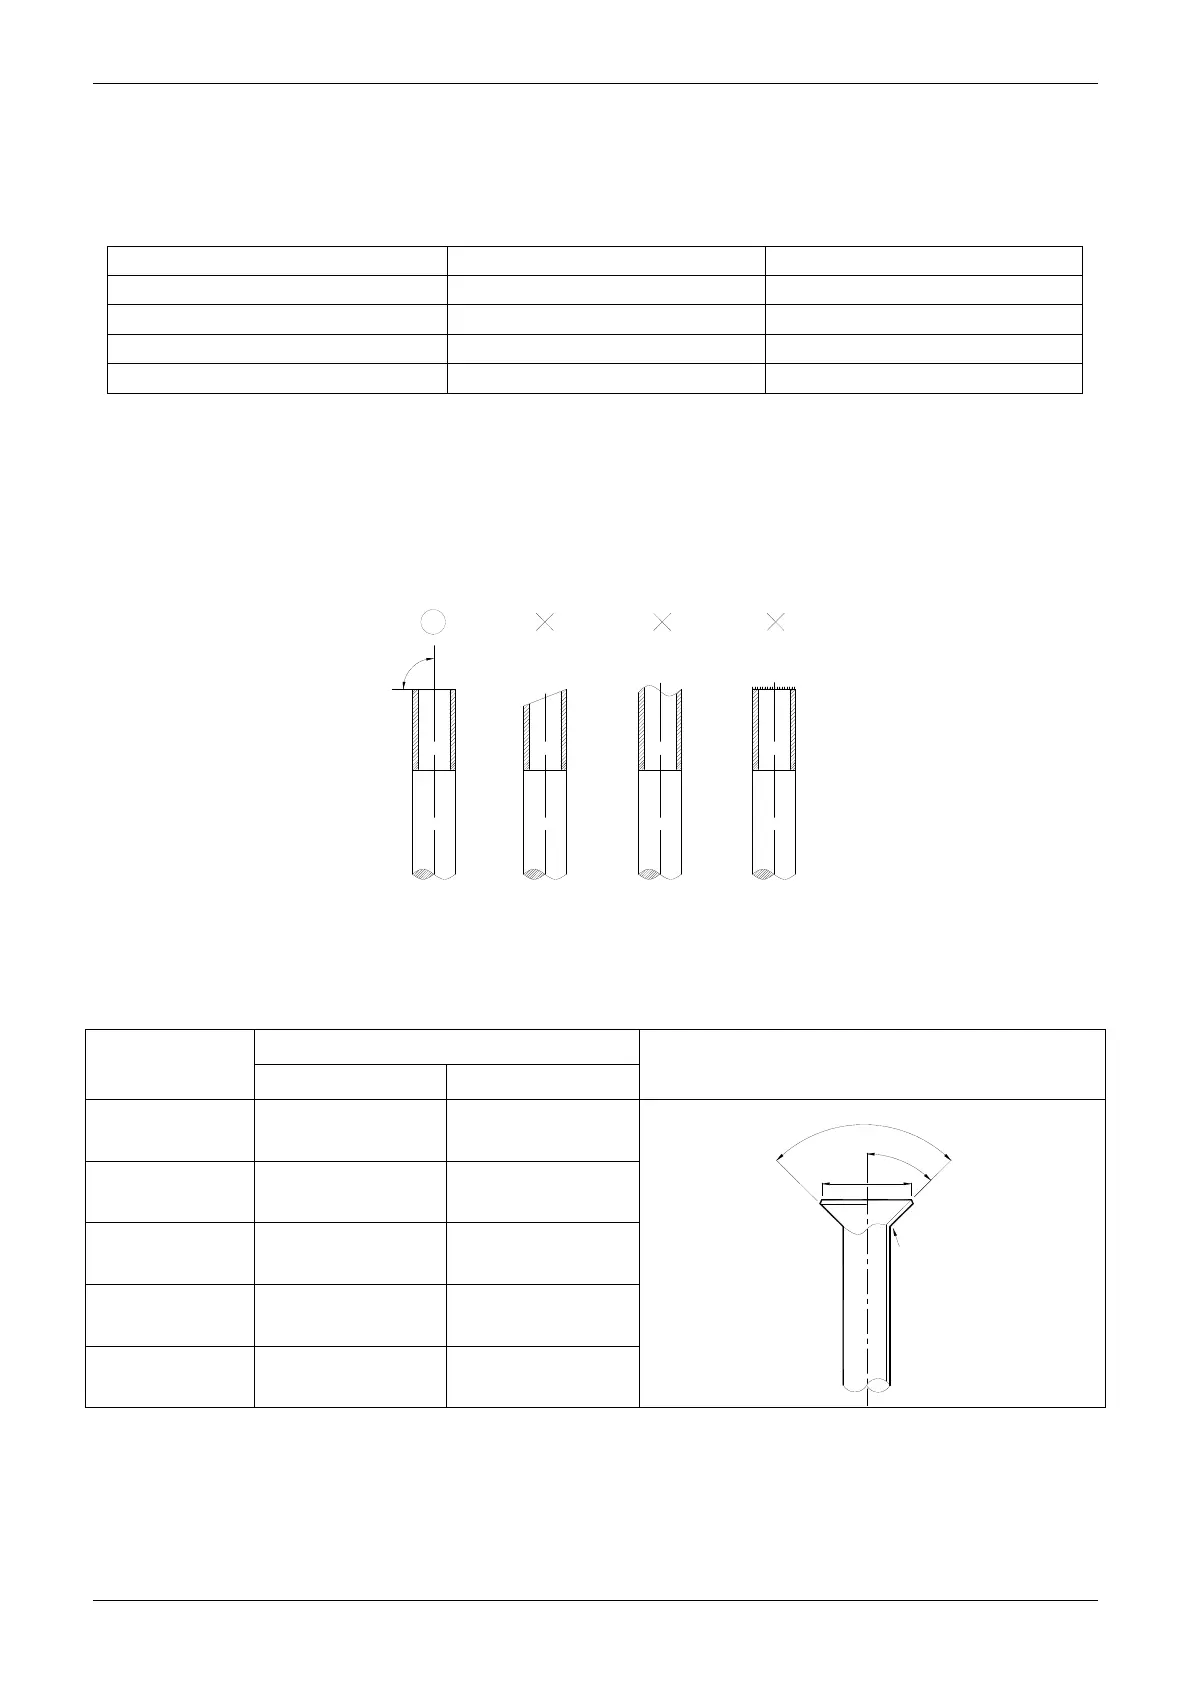
5.2.4 Cut the selected pipe with pipe cutter
Make the section flat and smooth.
90
Lean
Crude
Burr
o
5.2.5 Insulate the copper pipe
Before test operation, the joint parts should not be heat insulated.
5.2.6 Flare the pipe
Insert a flare nut into the pipe before flaring the pipe
According to the following table to flare the pipe
Pipe diameter
Flare dimension A (mm)
Flare shape
Min Max
1/4" (6.35) 8.3 8.7
R0.4~0.8
A
4
5
°
90
°
4
-
+
3/8" (9.52) 12.0 12.4
1/2" (12.7) 15.4 15.8
5/8" (15.9) 18.6 19.1
3/4" (19) 22.9 23.3
After flared the pipe, the opening part must be seal by end cover or adhesive tape to avoid duct or
exogenous impurity come into the pipe.
5.2.7 Drill holes if the pipes need to pass the wall.
5.2.8 According to the field condition to bend the pipes so that it can pass the wall smoothly.
5.2.9 Bind and wrap the wire together with the insulated pipe if necessary.
5.2.10 Set the wall conduit
 Loading...