Installation of the Connecting Pipe MCAC-UTSM-2009-03
46 Installation
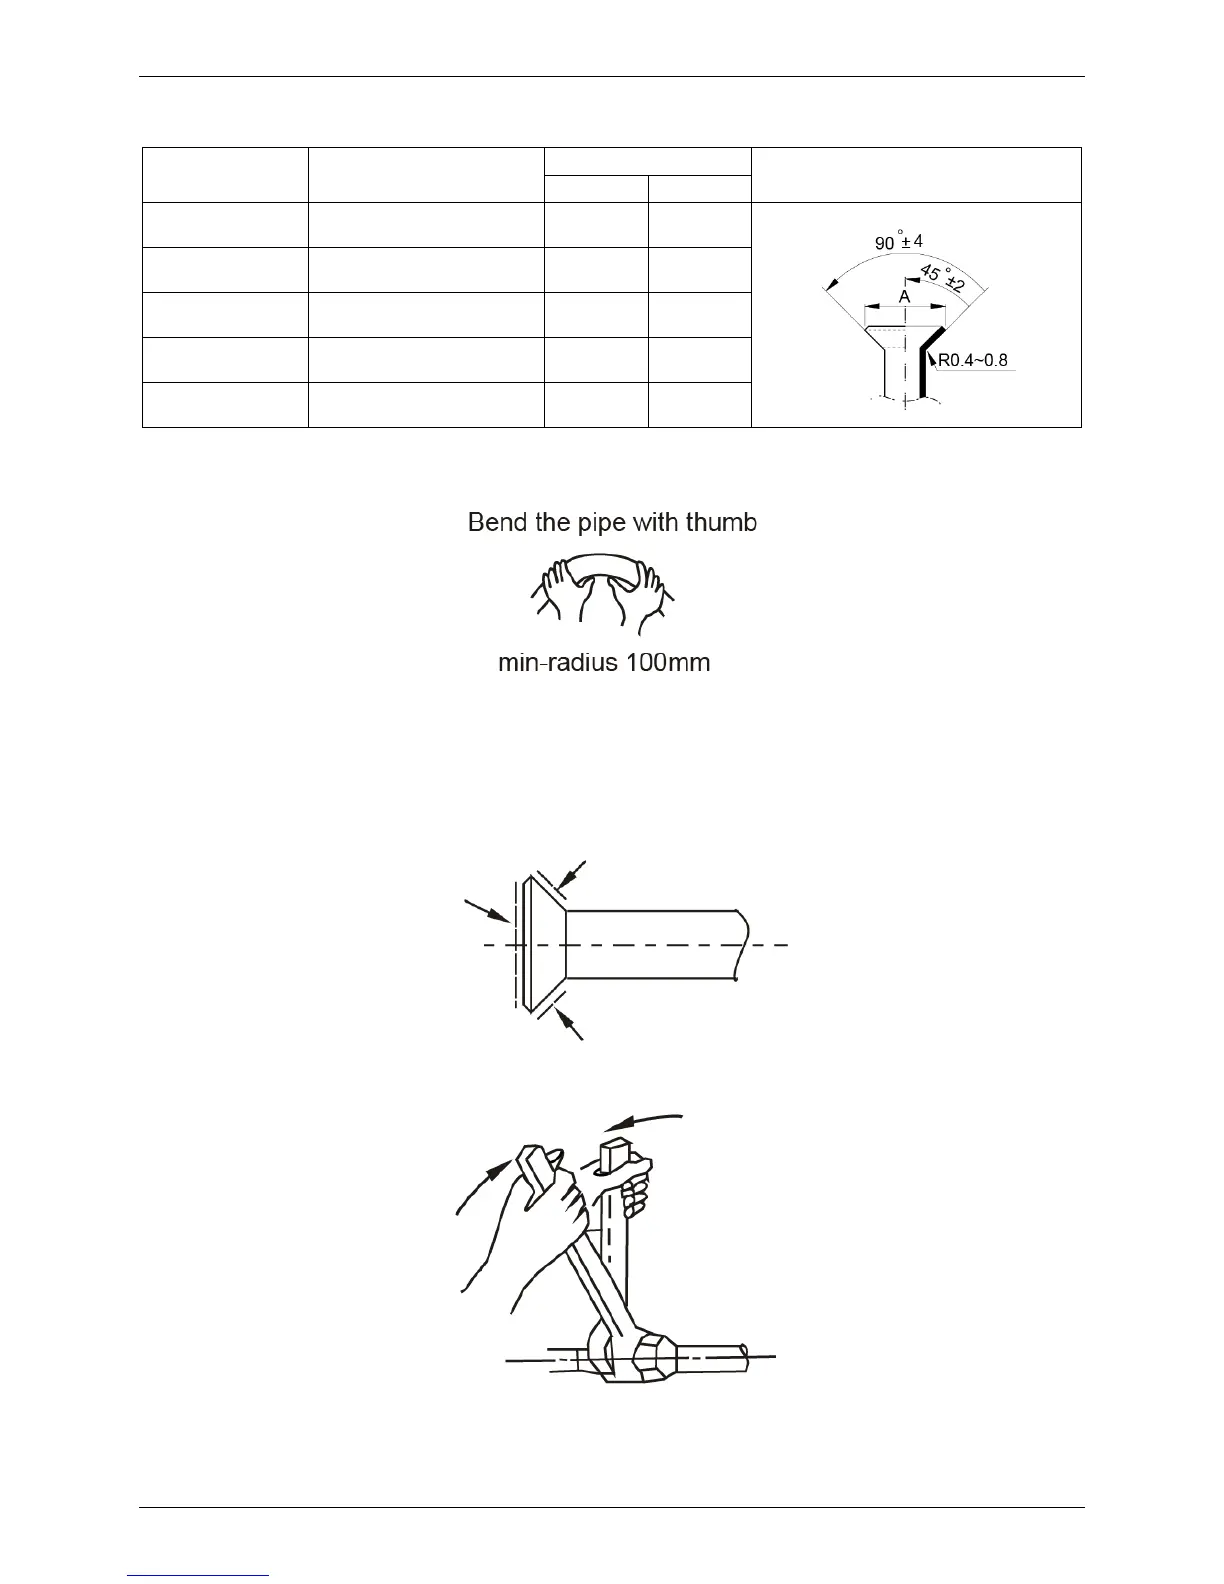
Insert a flare nut into a pipe and flare the pipe.
Refer to the following table for the dimension of flare nut spaces.
Pipe gauge Tightening torque
Flare dimension (A)
Flare shape
Min Max
Φ6.4
15
~16N.m
(153
~163kgf.cm)
8.3 8.7
Φ9.5
25
~26N.m
(255
~265 kgf.cm)
12.0 12.4
Φ12.7
35
~36 N.m
(357
~367 kgf.cm)
15.4 15.8
Φ15.9
45
~47 N.m
(459
~480 kgf.cm)
18.6 19.0
Φ19.1
65
~67 N.m
(663
~684 kgf.cm)
22.9 23.3
2. Connect the indoor unit at first, then the outdoor unit.
z Bend the tubing in proper way. Do not harm to them.
z The bending angle should not exceed 90°.
z Bending position is preferably in the middle of the bendable pipe. The larger the bending radius the
better it is.
z Do not bend the pipe more than three times.
z When connecting the flare nut, coat the flare both inside and outside with either oil or ester oil and
initially tighten by hand 3 or 4 turns before tighting firmly.
z Be sure to use both spanner and torque wrench together when connecting or disconnecting pipes to the unit.
Caution:
z Too large torque will harm the bell mouthing and too small will cause leakage.
z After the connecting work is finished, be sure to check that there is no gas leak.