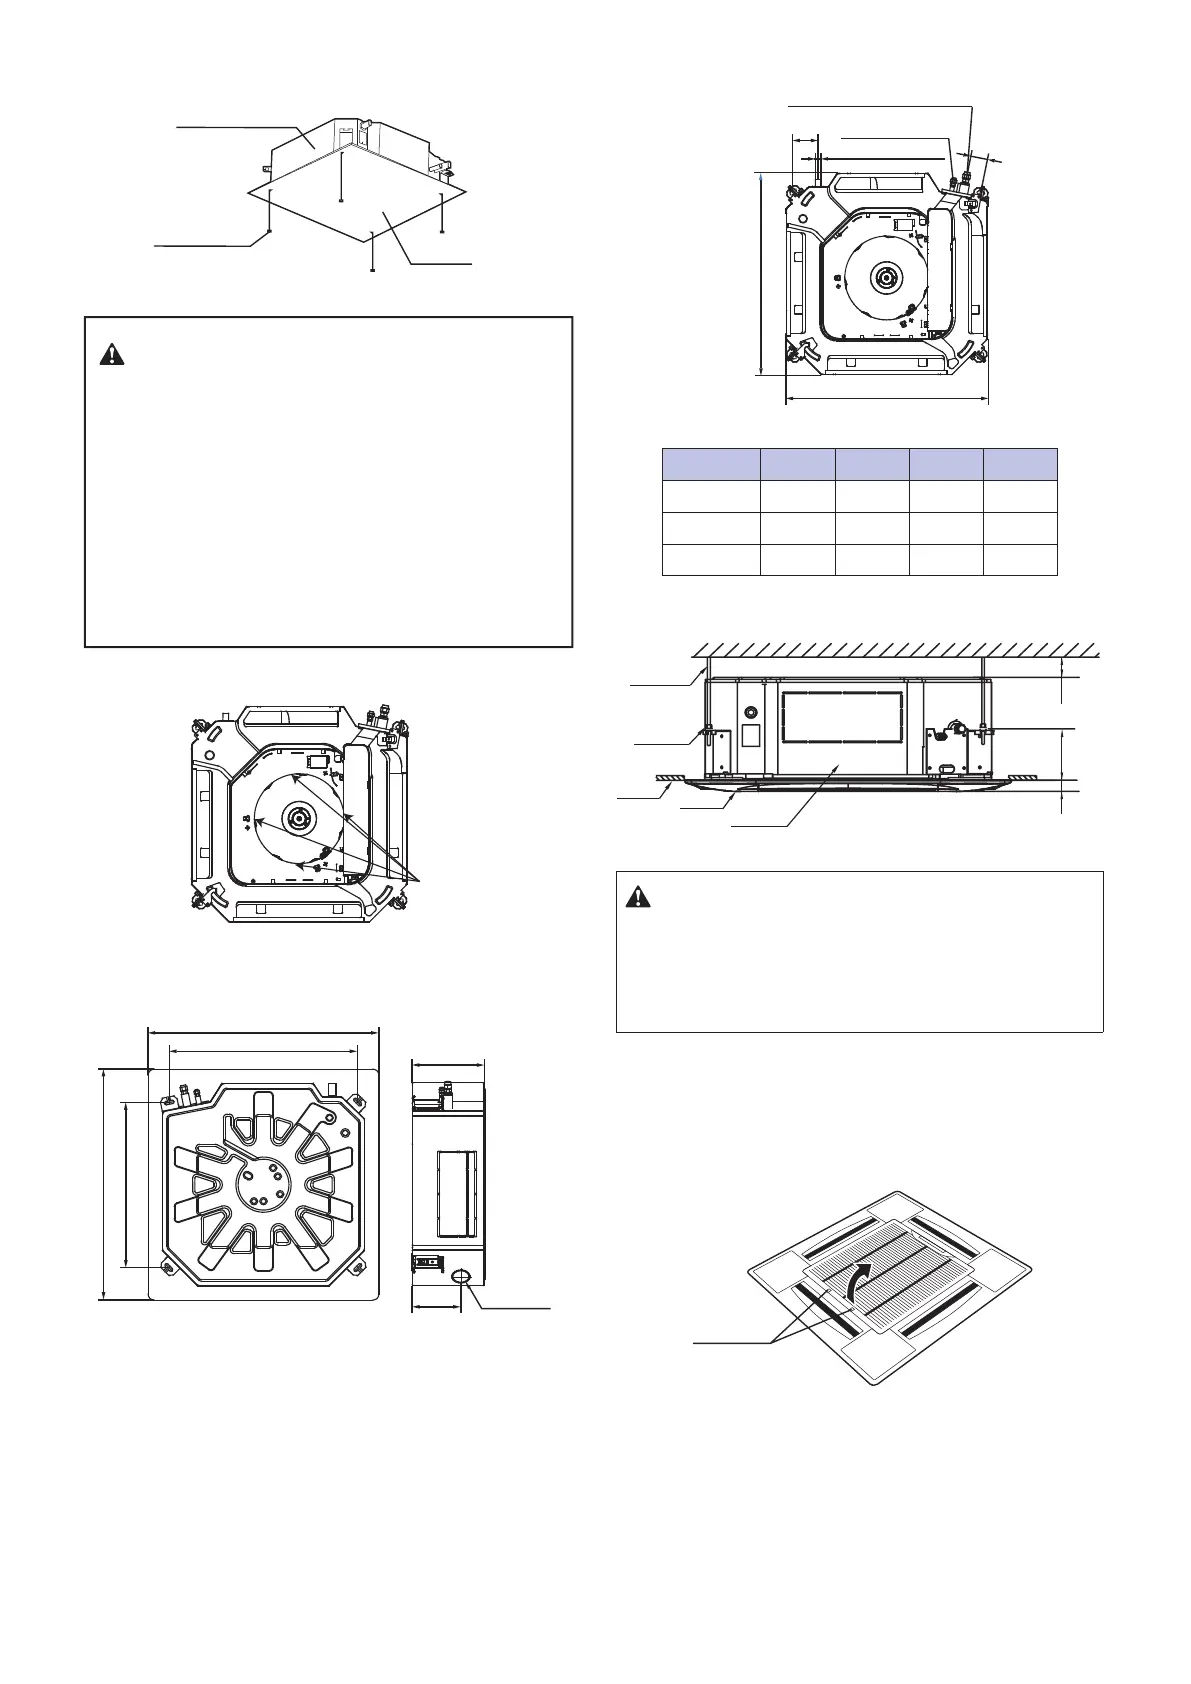
Air conditioner body
Screw M6x12
(accessory)
Installation
board
Figure 3.8
Figure 3.9
Figure 3.12
• Before you install the indoor unit, make sure that you remove
the buffers used for transportation between the fan and the
pipe socket (see Figure 3.9). If you run the unit without
removing the buffers, you may damage the fan motor.
• Make sure that the unit body is level; otherwise, it may cause
water to leak. Calibrate the levelness of the unit using a spirit
level or polyethylene tube filled with water.
• The unit is equipped with a built-in water discharge pump and
float switch. Do not tilt the unit in the direction of the drain pan;
otherwise, the float switch may malfunction and cause water
leakages.
Buffers
Dimensions of unit
ϕ75 (fresh
air vent)
Refrigerant piping
vent (liquid side C)
Refrigerant piping vent (gas side D)
ϕ32 (outer diameter of
water discharge pipe)
Figure 3.10
Figure 3.11
Mounting
hooks
Master air
conditioner
Ceiling
Panel
Hex nut (to
adjust level)
• All the figures in this manual are for illustration purposes only.
The actual air conditioner you purchased may not have the
same appearance and functions as those listed in these
figures. Please refer to the actual product model.
3.3 Panel Installation
3.3.1 Remove the air inlet grille
(1) Press the two grille locks at the same time to lift it up.
Grille locks
(2) Raise the air inlet grille to about 45°, and remove the grille.
A
B
Side view
950
680
950
780
Back view
≥3046 146
Caution
Top view
A (mm) B (mm) C (mm) D (mm)
230 126
230 126
300 197
Model
2.8-4.5kW
5.6-8.0kW
9.0-14.0kW
Φ6.35
Φ9.53
Φ9.53
Φ12.7
Φ15.9
Φ15.9
Caution
840
840
105
70
6
 Loading...