Page 11
Indoor Unit
Installation
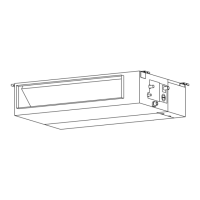
Fig. 4.10
Step 3: Duct and accessories installation
NOTE: 1. Do not place the connecting duct
weight on the indoor unit.
2.When connecting the duct, use an
nonammable canvas tie-in to prevent vibrating.
3.Insulation foam must be wrapped outside the
duct to avoid condensate. An internal duct
underlayer can be added to reduce noise,
if the end-user requires.
1. Install the lter (optional) according to the size
of the air inlet.
5. Refer to the following static pressure guidelines
when installing the indoor unit.
Change the fan motor static pressure
according to external duct static pressure.
2. Install the canvas tie-in between the body and
duct.
3. The air inlet and air outlet duct should be far
enough apart enough to a avoid air passage
short-circuit.
4. Connect the duct according to the following
diagram:
Canvas tie-in Canvas tie-in
Air outlet
Isolation booth
Isolation booth
checking orice
Air inlet
Air dust lter
Table.4-2
MODEL
(Btu/h)
Static Pressure
(Pa)
0~100
18K
0~160
24K
0~160
30K~36K
0~160
42K~60K
 Loading...