MCAC-VTSM-2015-10 R410A All DC Inverter V5 X Series 50Hz
Installation 101
copper shavings from entering the pipe.
2) After the chamfering is completed, use veiling to remove the copper chip out of the pipe.
3) Ensure piping is not scarred, so as to avoid any breaches during flaring.
4) If the pipe end is deformed, cut the end off and then cut the pipe again.
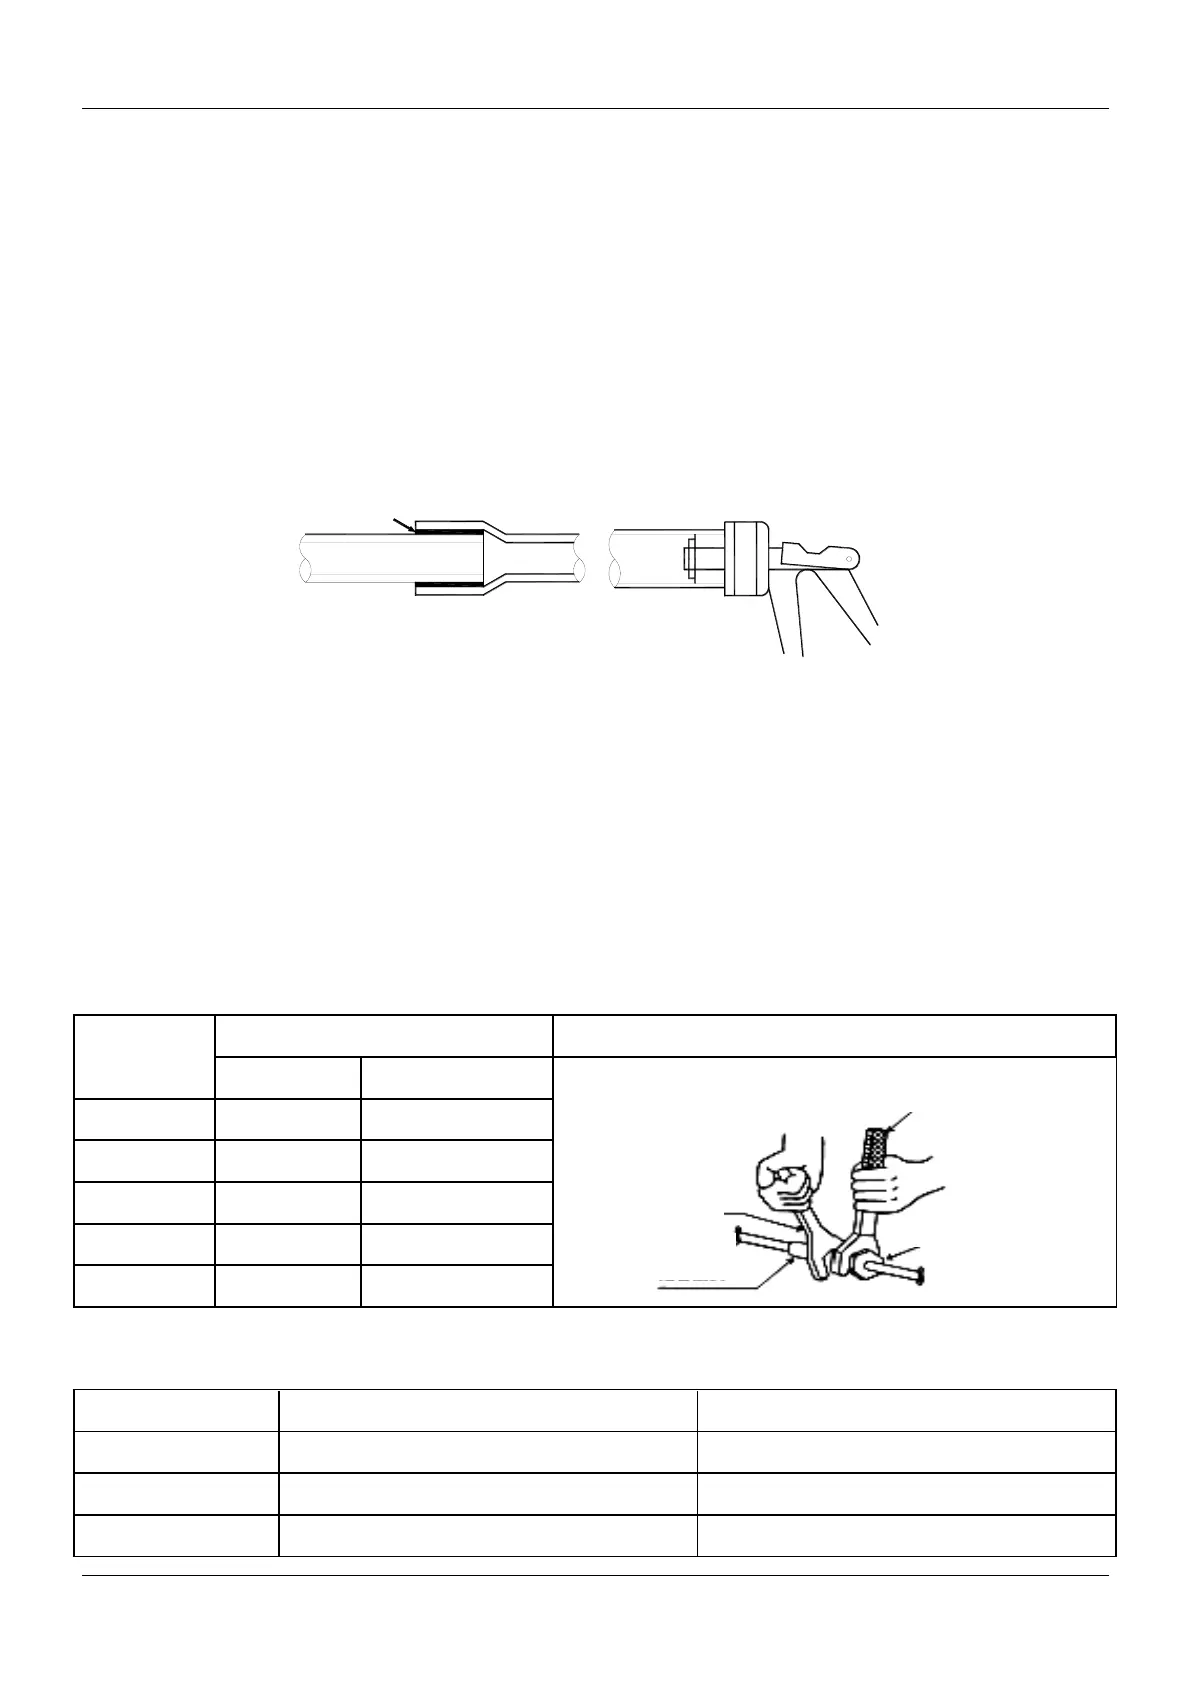
4.3.3 Pipe expansion
1. Purpose: Expand the opening of the pipe so that another copper pipe can be inserted, serves as an
alternative to direct connections and reduces welding spots.
2. Attention: Ensure that the connection part is smooth and even; after cutting the pipe off, remove the inner
spurs.
3. Operation method: Insert the expanding head of the pipe expander into the pipe. After completing pipe
expansion, rotate the copper pipe a few degrees to rectify the straight line mark embedded by the expanding
head.
4.3.4 Bell-mouthed opening
1. Purpose: Flaring bell-mouthed opening is used for screw thread connection.
2. Attention::
1) Before performing the bell-mouthed opening operation, perform fire annealing for the hard pipe.
2) Use a pipe cutter to cut pipe ensuring even cross sections and avoid refrigerant leakage; do not use a steel
saw or metal cutting device to cut pipe, in order to avoid deformation and prevent shavings from entering the
pipe.
3) Remove burrs carefully to avoid scars on the bell-mouthed opening, which may lead to refrigerant leakage.
4) When connecting pipes, use two spanners (one torque wrench and one non-adjustable spanner).
5) Before conducting opening bell-mouthed, install pipe onto the flaring nut.
6) Use proper torque to tighten the flaring nut..
Caution: When you are tightening the flaring nut with a spanner, the tightening torque will be suddenly increased at a
certain point. From this point, further tighten the flaring nut to the angles shown below.
Angle of further tightening
Recommended length of tool lever
(mm)
 Loading...