2019/10/22 16:44 3/76 MIDIbox SEQ V4 Beginner's Guide
MIDIbox - http://wiki.midibox.org/
Various options on the screen will be written between apostrophes. For example, if reference is made
to the save function on the main menu, the option is written as 'Save'; if you are advised to press a
button to initialise the active track, you are told to select the 'INIT' option, etc. Also, 'on' and 'off' will
be written between apostrophes to indicate that they denote a binary state instead of grammatical
pre- or postpositions.
Many buttons have indicator LEDs associated with them. These LEDs will tell you whether something
(out of many possible options) is selected, or whether some mode or function is toggled 'on' or 'off'.
The 16 LEDs directly below the knobs are step indicator LEDs which will tell you something of the
state of the step. In addition, when the sequencer is running you will see a red cursor LED indicating
which step is being played and how fast the progression from one step to another will be. Above the
datawheel, there is a tempo LED, blinking quarter notes.
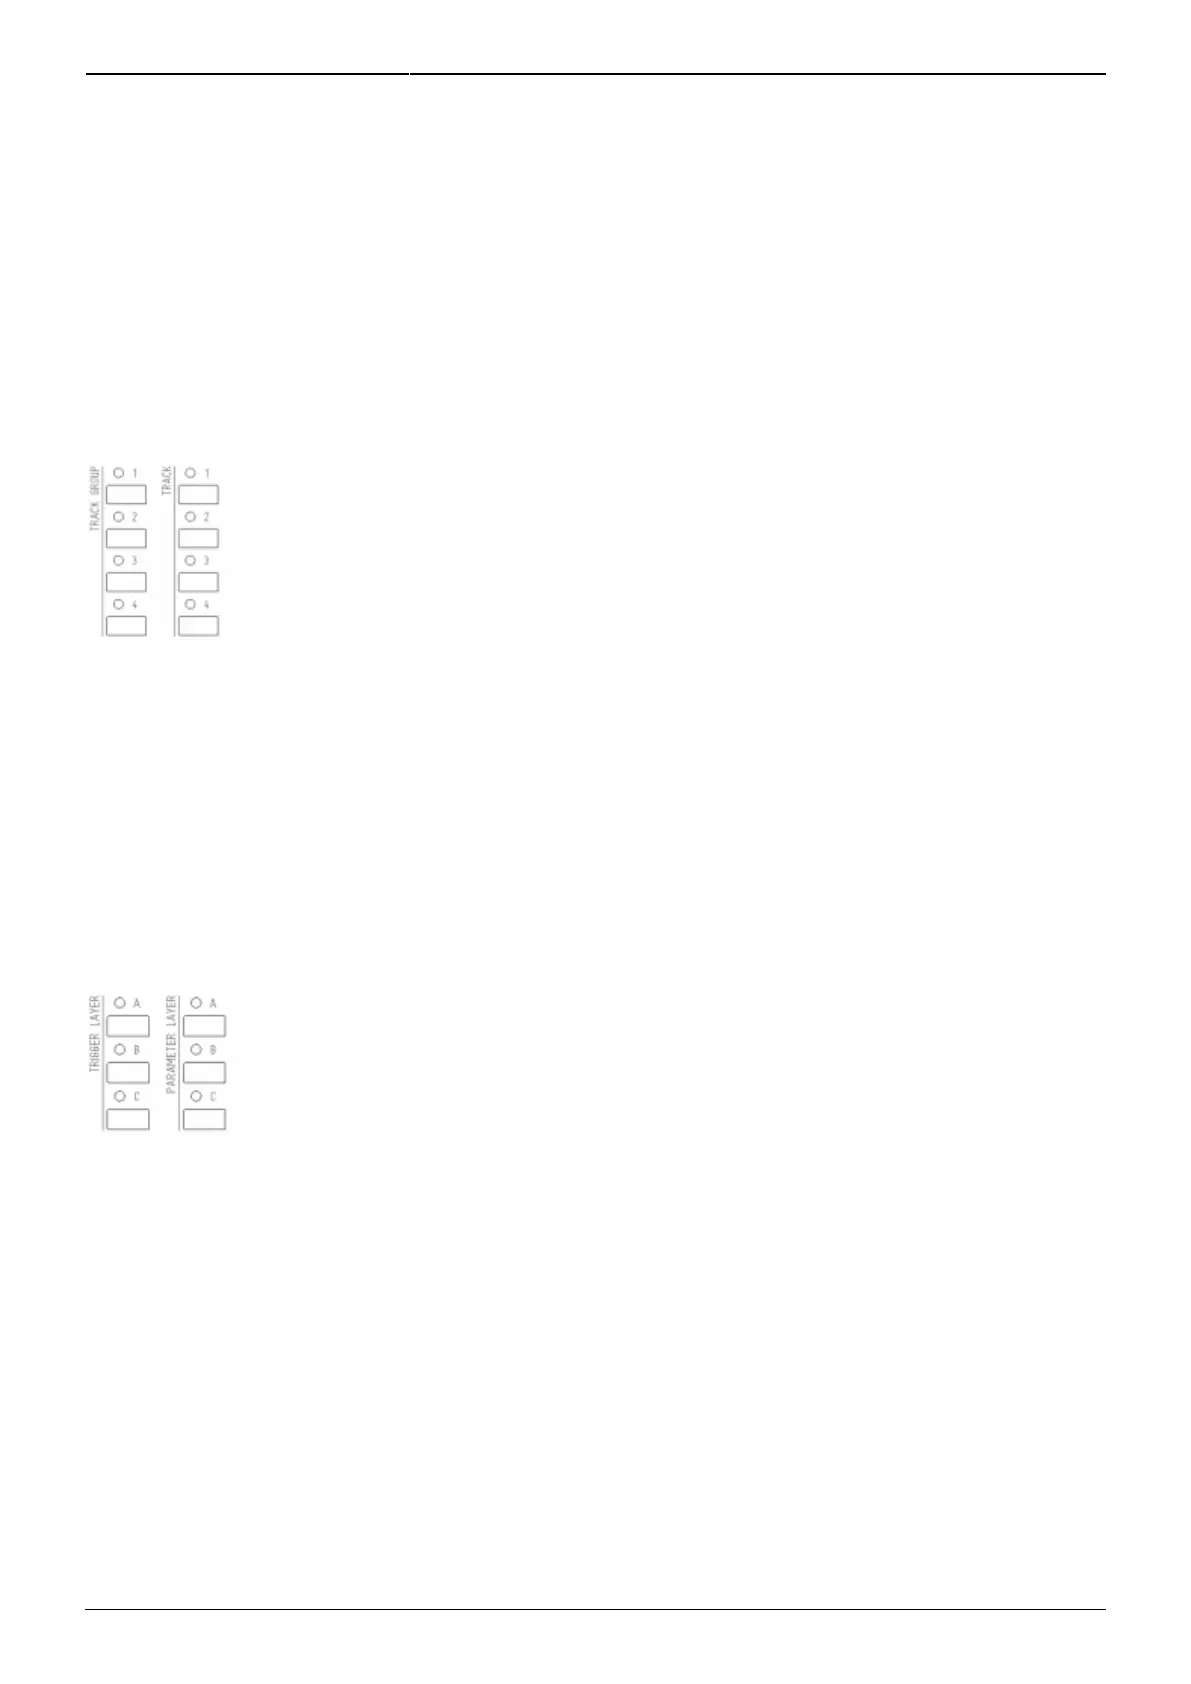
On the left side of the frontpanel there's two groups of buttons which deserve special mention. The
eight buttons on the top left are the group and track selection buttons. The left column selects a
group (1–4), the right column selects a track within the selected group. (More on groups and tracks in
section 1.2.) The LEDs indicate which group and track is currently selected, though the information is
often available on the LCDs as well (most often on the left edge of the left LCD).
You can select multiple tracks at once within a group by pressing & holding one track selection button
and then pressing the others one by one; press another time to deselect. (Any combination of tracks
can be selected on the Track Selection page, which is available only as a F1–F4 button or as a saved
bookmark; for customising F1–F4 buttons, see Appendix 1, and for bookmarks, see Appendix 2.)
Below the group and track buttons there are six more buttons for layer selection. The left column is
used to select trigger layers of the selected (active) track, and the right column is used to select
parameter layers of the selected track. (More on layers in section 3.)
In a new session, trigger layer button A selects the gate trigger layer, button B selects the accent
trigger layer and button C brings up a menu of all the trigger layers, allowing you to choose the one
you need with the GP buttons. You can have a maximum of 8 trigger layers, except on drum tracks,
where the maximum is two.
In a new session, parameter layer button A selects the note parameter layer, button B selects the
velocity parameter layer, and button C alternates between length and roll parameter layers. Each of
the default session's tracks has four parameter layers, but if your track has more than four parameter
layers, button C brings up a menu, allowing you to choose the layer you need with the GP buttons.
You can have up to 16 parameter layers, except for drum tracks where the maximum is two.