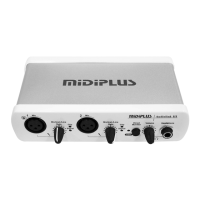
A “virtual control surface” application called Console is installed with the
driver.The console allows you to control the audio I/O and clocking functions
of your Midiplus product, and it brings these controls to a single easy-to-use
location. From the console you can control the output levels, select
synchronization clocks and digital mode, and adjust input monitoring. The
examples in this section will be for AudioLinkPlus4x4 are similar.
Running the Console
Once you have run the installer, you willfind
the console under your “Start” menu.To run the
AudioFire Console application go to the
“AudioLinkPlus4x4” folder in the “Midiplus
Digital Audio” group and click “AudioLinkPlus
4x4 Console.”
In the Console, you can select the Samplerate
for all the Input and Output, you can also select
the input and output channels(1+2, 3+4, 5+6).
Contacting Midiplus Customer Service
If you experience any trouble with your Midiplus hardware please go to
the supportarea of our website at www.midiplus.com.tw & www.midiplus.cn
and check out the “QuickTips” & FAQ’s we have there. If you can’t find a
solution to your problem there, please contact technical support via email.
There is an exampleform that can be copied and sent to our technical
support staffand they will respond to you quickly.
Please fill in all the details completely. The best way to get the help
you need isby giving us plenty of detailed information about your computer
system, your audio software and hardware, and the problem you are having.
We do ask you to please read through this manual and the support area of
our website before contacting us.
Thank you for buying Midiplus product!
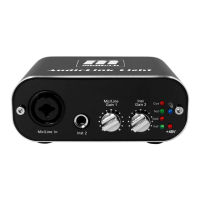
AudioLinkPlus4x4’s rear panel has:
1. Power Supply Jack: DC 6-9V input. If Power Supply
on USB is not enough, please use the
External Power Adapter for power
supply. Especially when you open
the phantom power(+48V).
2. USB Jack, Plesae connect it to
the USB 2.0 port On PC with
the USB 2.0 USB cable.
3. A phantom(+48V) power switch and an amber power indicator light.
To enable phantom power, press the button labeled +48V (the +48V
LED will light up) and phantom power will be provided to all microphone
inputs.
Note: Phantom power will not be applied to any line level equipment or
guitars plugged in using cables with ¼” connectors.
4. S/PDIF In & Out Interface:
These S/PDIF connectors are used to transmit digital audio data between
digital audio devices via an electrical signal. When connecting devices to
the S/PDIF jacks, the use of standard analog RCA audio cables is not
recommended. For reliable S/PDIF operation, 75-ohm coaxial
(RG59)video cables are recommended.
5. MIDI In & Out Interface:
The MIDI ports can be used for receiving MIDI time code (MTC), or
sending and receiving MIDI signals between your digital audio/MIDI
sequencing software and external sound modules, keyboards, MIDI
controllers, etc. And the MIDI cable is standardized and widely available.
6. Two analog line inputs (3-4) and four analog line outputs(1-4).
These analog inputs (3 – 4) operate with an input impedance of 10Kohms.
The input and output connections can be used with balanced or
unbalanced cables via the ¼” connectors. By default, the inputs and
outputs are set to receive or send a +4dBu signal.
 Loading...