15
Chapter 1: Introduction & OverviewGR8
Preparing to Charge
Inspecting the Battery
Before starting the test, visually inspect the battery for:
• Cracked, buckled, or leaking case. If you see any of these
defects, replace the battery.
• Corroded, loose, or damaged cables and connections. Re-
pair or replace as needed.
• Corrosion on the battery terminals, dirt, or acid on the
case top. Clean the case and terminals using a wire brush
and a mixture of water and baking soda.
• Low electrolyte level. If the electrolyte level is too low, add
distilled water to the level indicated by the battery manu-
facturer, and fully charge the battery. Do not overll.
• Corroded or loose battery terminals, tray and hold-down
xture. Tighten or replace as needed.
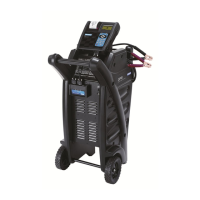
Connecting the Clamps
Connect the charging clamps to the battery in accordance
with all precautions and safety instructions. Do not connect
either clamp to the vehicle’s chassis.
Connecting to AC Power
Plug the charger into a dedicated, grounded nominal 15-amp
or higher AC outlet. Press the power switch to the ON position.
If the clamps are not making good contact with the battery
posts, the charger displays CHECK CLAMP CONNECTIONS.
Make sure that both jaws of each charging clamp come in
good contact with the battery posts.
If you accidentally reverse the clamp connections, the charger
will sound an alarm and display “Charger Clamps Reversed.”
Setting User Preferences
Before starting your test you may want to customize the use
of your charger by setting preferences in the Setup Menu and
creating a User ID. The menu has settings for the date and time,
the contrast and backlight time, a utility to customize printouts
for the optional IR printer, among others. See Chapter 6: Setup
for more information.
Help Menu and Soft Keys
In addition to the HELP soft keys, the charger contains a Help
Menu with a glossary of test-related denitions that you may
want to review prior to testing. The menu also provides trou-
bleshooting information and phone numbers for Midtronics
Customer Service, in case you encounter a problem and/or
need technical assistance.