9
Chapter 1: Introduction & OverviewGR8
Conventions In This Manual
To help you learn how to use your charger the manual uses
these symbols and typographical conventions:
Convention Description
!
The safety symbol indicates instructions for
avoiding hazardous conditions and personal
injury.
The safety symbol with the words CAUTION,
WARNING, or DANGER indicates instructions
for avoiding hazardous conditions and
personal injury.
CAUTION The word CAUTION indicates instructions for
avoiding equipment damage.
The wrench symbol indicates procedural notes
and helpful information.
UP ARROW The text for keypad buttons are in Bold capital
letters.
CAPITAL
LETTERS
The text for screen options are in regular
capital letters.
BACK
ARROW
The text for soft keys are in Bold capital
letters.
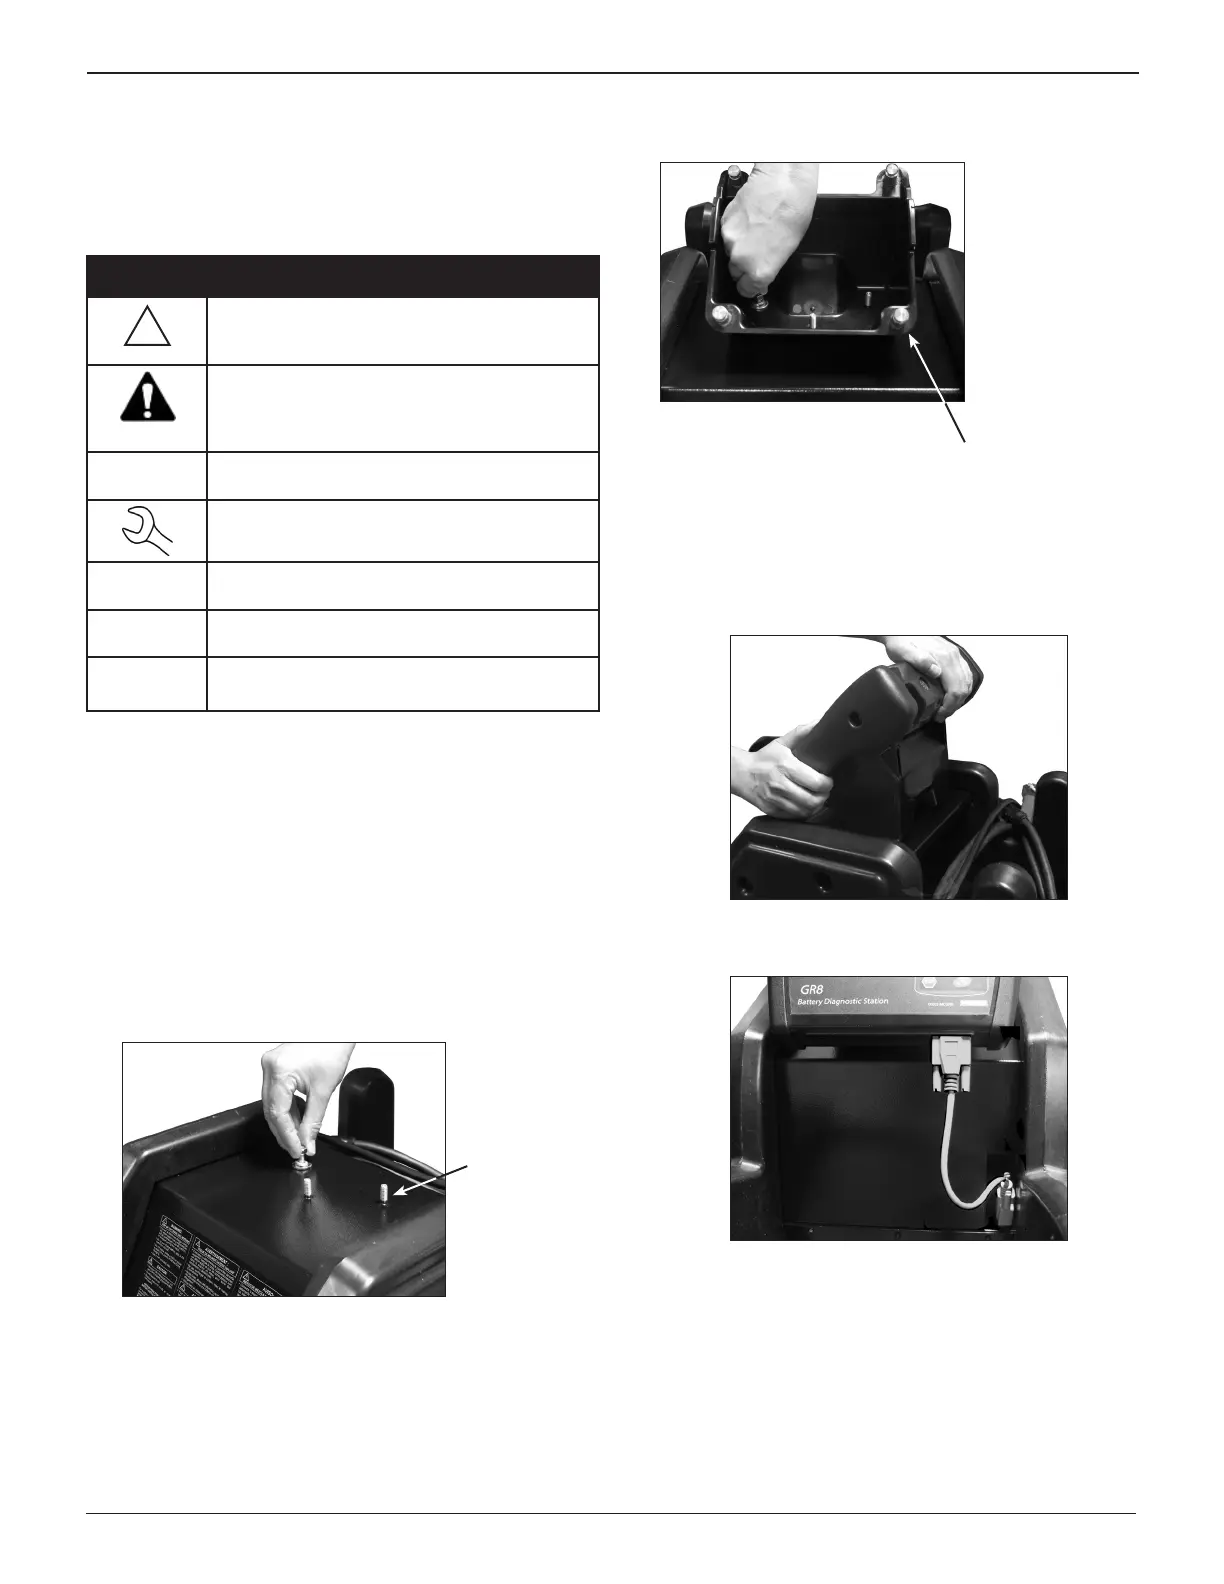
Assembling The GR8
The GR8 is shipped with the control module and mounting
bracket
packed separately. For easy assembly, follow these
steps:
Control Module
1. The hardware to attach the control module’s mounting
bracket to the charger is installed on the top of the char-
ger. There are three bolts with one at washer, one lock
washer, and one hex nut per bolt. Remove the washers
and hex nuts, and set them aside.
One of three
pre-installed
bolts for the
control module
mounting
bracket.
2. Center the three holes in mounting bracket over the bolts,
and lower the bracket onto the charger. Reinstall the hard-
ware in this order: the at washer rst, the lock washer
next, and the hex nut last. Tighten the nuts securely.
Pre-installed bolts on Control
Module mounting bracket.
3. Center the holes on the bottom of the control module
with the bolts, and lower the module onto the top of the
bracket. Firmly pull the module down at an angle until the
bolts are inserted securely into the slots extending from
the module’s holes.
4. Connect the serial cable between the charger and tighten
the screws on each connector.
Chapter 1: Introduction & Overview