5:/057
0LWL,06WWL,
LWL
VVHPEOlWKHDWWHUlDRVWlF6WDWlR
To assemble the cart refer to “Instruction Sheet: Midtronics
Battery Testing Cart” and “Midtronics Battery Testing Cart
Assembly Instructions: Change to Accommodate New GR
Charge Engine” included with your shipment. The Battery
Diagnostic Station is shipped with the control module,
mounting bracket and hardware with the cables packed
separately. For easy assembly, follow these steps:
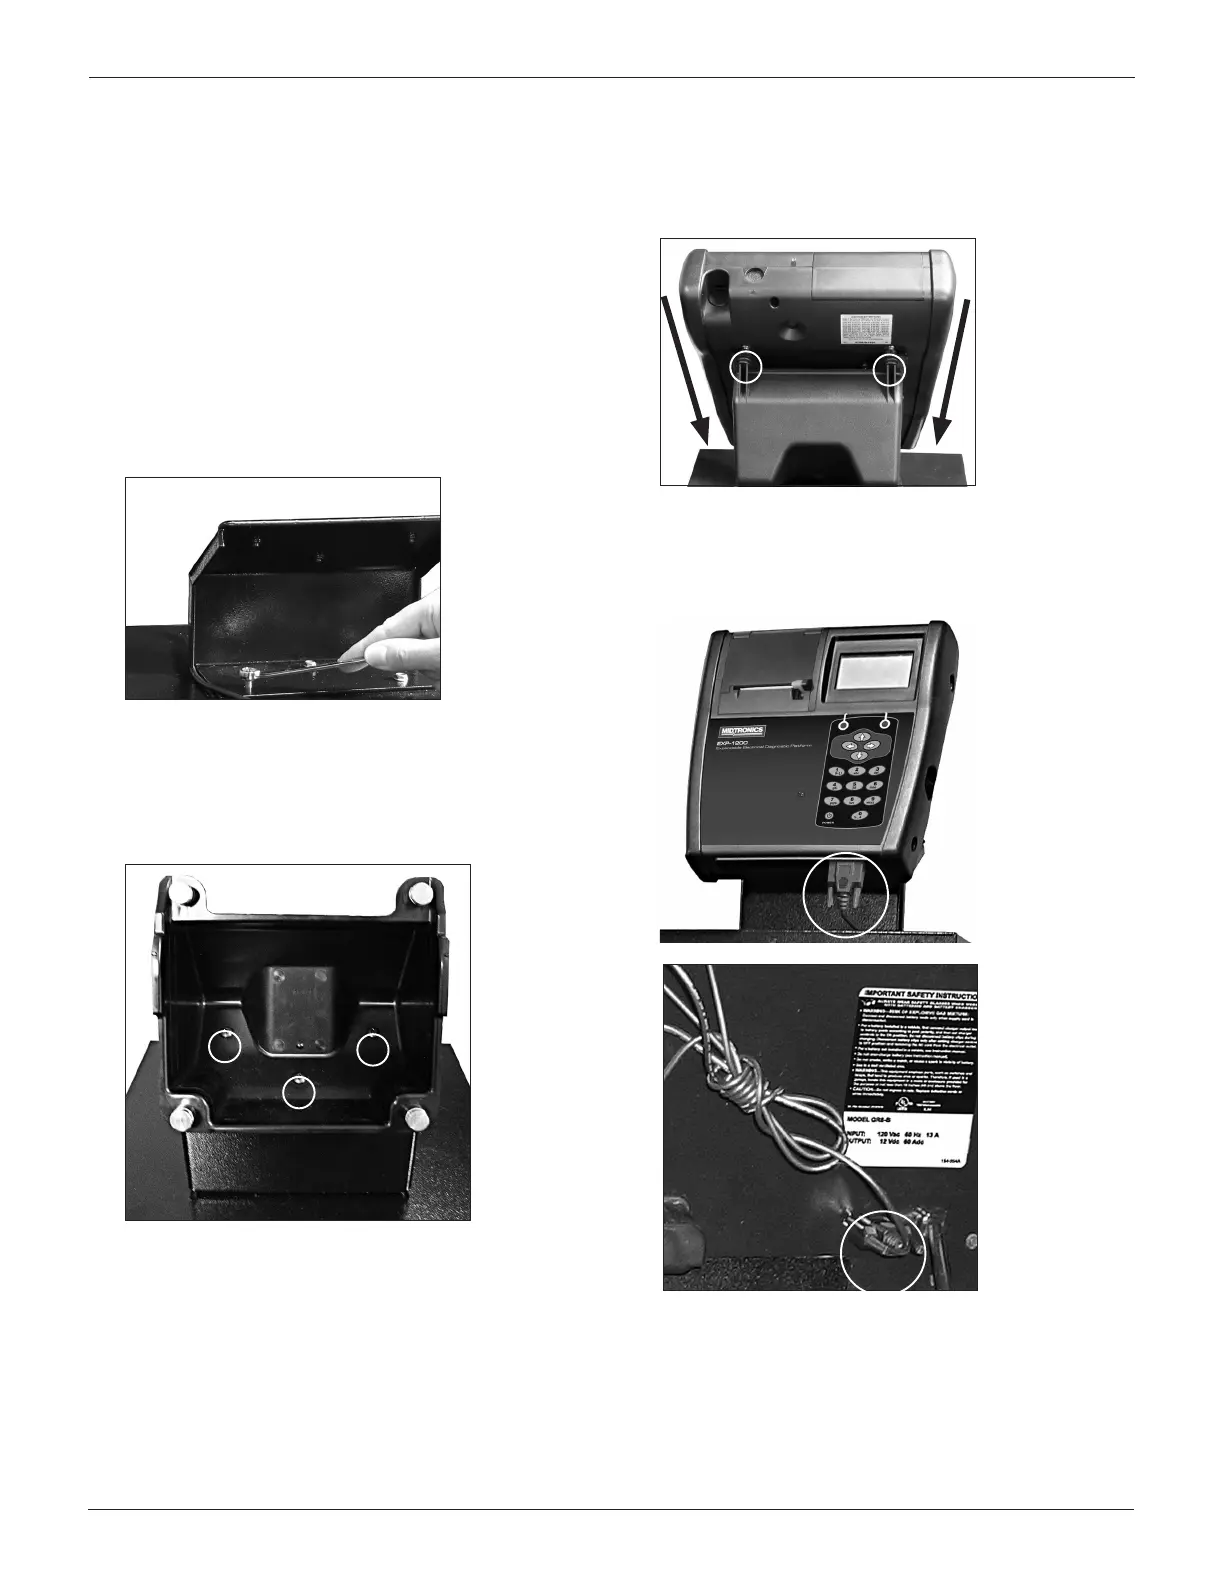
$WWDFKLWKHRWURO0RGXOH
1. Center the three holes in bottom mounting bracket over
the holes on the top of the cart. Insert the three 5/16-inch
hex-head bolts into the holes and tighten the bolts se-
curely.
2. Attach the upper mounting bracket to the bottom bracket
with the three Phillips screws as shown the illustration be-
low.
3. The upper part of the bracket has four pre-installed bolts
at each corner for mounting the control module.
4. Center the holes on the bottom of the control module with
the bolts (circled), and lower the module onto the top of
the bracket. Firmly pull the module down at an angle (ar-
rows) until the bolts are inserted securely into the slots
extending from the module’s holes.
5. Place the Charge Engine with the attached Control Mod-
ule on the cart. Connect the serial cable between the Con-
trol Module and Charge Engine (circles) and tighten the
screws on each connector.
KDSWHU%HIRUHRX%HL