EasyManua.ls Logo

MikroTik RB4011 Series User Manual

MikroTik RB4011 Series
5 pages
To Next Page IconTo Next Page
Page #1 background imageLoading...
Page #1 background image
RB4011 series
The device is already configured with basic settings, you can simply plug in your ISP cable and start using the
Internet. We recommend you to set up a password to secure your device.
Powering
The power consumption under maximum load can reach 55 W. The device accepts powering from the power jack
or from the first Ethernet port:
Direct-input power jack (5.5 mm outside and 2 mm inside, female, pin positive plug) accepts 12-57 V DC.
First Ethernet port accepts Power over Ethernet 18-57 V DC.
Setup
1. Connect your Internet cable to the first port, and if you have wired devices, connect them to the other ports.
2. Set your computer IP configuration to automatic (DHCP).
3. From your PC or smartphone, connect to the wireless network name which starts with “MikroTik”.
4. Once connected to the wireless network, open http://192.168.88.1 in your web browser to start
configuration, since there is no password by default, you will be logged in automatically. Set up your
password in the screen that loads. Please also specify your country, to make sure local wireless
regulations are observed.
Configuration
Once logged in, we recommend clicking the “Check for updates” button in the QuickSet menu, as updating your
RouterOS software to the latest version ensures the best performance and stability. For wireless models, please
make sure you have selected the country where the device will be used, to conform with local regulations.
RouterOS includes many configuration options in addition to what is described in this document. We suggest to
start here to get yourself accustomed to the possibilities: http://mt.lv/help. In case IP connection is not available, the
Winbox tool (http://mt.lv/winbox) can be used to connect to the MAC address of the device from the LAN side (all
access is blocked from the Internet port by default).
For recovery purposes, it is possible boot the device from network, see section Buttons and jumpers.
Extension slots and ports
The Ethernet ports are connected in two groups of five, each group is connected through a switch chip.
The ports can be configured individually and support automatic cross/straight cable correction (Auto
MDI/X), so you can use either straight or cross-over cables for connecting to other network devices.
SFP+ port accepts SFP and SFP+ modules. Note: The RB4011 does not support passive DAC modules,
1GB copper SFP modules and SFP GPON modules.
Integrated wireless module which supports AP/CPE/P2P/repeater modes (select models).
RJ45 console port for serial console access, set by default to 115200 bit/s, 8 data bits, 1 stop bit, no parity.
See mikrotik.com for more information. Document #44748, modified on 01/07/19
Question and Answer IconNeed help?

Do you have a question about the MikroTik RB4011 Series and is the answer not in the manual?

MikroTik RB4011 Series Specifications

General IconGeneral
RAM1 GB
Storage512 MB NAND
Dimensions228 x 120 x 30 mm
Operating SystemRouterOS
RouterOS licenseLevel 5
Max Power Consumption33W
PoE in802.3af/at
PoE outNo
Voltage Range12-57V
Power Input2 (DC jack, PoE-IN)
Ethernet Ports10 x 10/100/1000 Ethernet ports
SFP+ Ports1 x 10G SFP+
Operating Temperature-40°C to 60°C

Summary

Powering the RB4011 Series

Powering Options

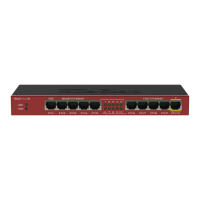
Device accepts powering from DC jack (12-57V) or first Ethernet port (PoE 18-57V).

Initial Setup and Configuration

Initial Setup Steps

Connect internet/devices, set IP to DHCP, connect to "MikroTik" Wi-Fi, open 192.168.88.1.

RouterOS Configuration

Check for updates, select country for wireless, use http://mt.lv/help or Winbox for advanced settings.

Hardware Features

Ethernet Ports

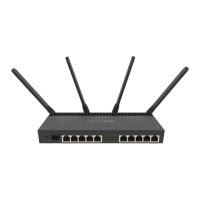
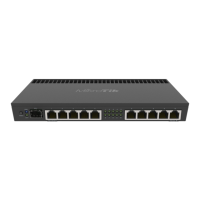
Two groups of five ports, Auto MDI/X support for straight/cross-over cables.

SFP+ and Wireless Ports

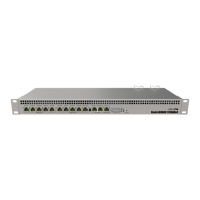
SFP+ port supports SFP/SFP+ modules (no passive DAC/1GB copper/GPON). Integrated wireless module.

Console Port

RJ45 console port for serial access, default 115200 baud, 8 data bits, 1 stop bit, no parity.

Device Operation and Mounting

Reset Button Functions

Functions include RouterOS reset (5s), CAP mode (10s), and Netinstall mode (15s).

Supported OS

Supports RouterOS software. Other OS not tested.

Mounting Options

Flat surface or wall mount using screws. Rackmount model includes ears. Grounding screw provided.

Regulatory Compliance

FCC Compliance

Complies with FCC Part 15 Class B. Details on interference correction and caution.

RF Exposure and Antenna Installation

13cm minimum distance for RF exposure. Use only certified antennas.

Industry Canada Compliance

Complies with Industry Canada licence-exempt RSS standards. Subject to two conditions.

EU Declarations and Usage

CE Compliance Statement

Declares compliance with EU Directive 2014/53/EU for radio equipment.

RF Exposure Limits (EU)

Complies with EU radiation exposure limits for uncontrolled environments. Minimum 20cm distance.

Frequency Band Usage

Details frequency ranges, channels, power, and restrictions (indoor use).

Related product manuals