RB2011iLS-IN
First use
1. Choose your powering solution, please see Powering section for possibilities.
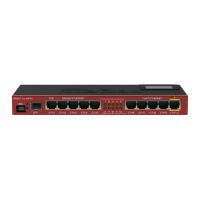
2. Connect your Internet cable to port 1 (labeled “Internet”), and local network computers to other ports.
3. Connect your direct input power jack if not using POE, to start up the device.
4. If using POE please see section POE Adapter on how to connect.
5. The device will boot up and after short beep, the network will be available for connecting.
6. Set your computer IP configuration to automatic (DHCP).
7. Once connected to the network, open http://192.168.88.1 in your web browser to start configuration, since
there is no password by default, you will be logged in automatically.
8. We recommend clicking the “Check for updates” button and updating your RouterOS software to the latest
version to ensure the best performance and stability.
9. Set up your password in the screen that loads.
Powering
The device accepts powering from either the power jack, or from the LAN1 Ethernet port:
• Direct-input power jack (5.5 mm outside and 2 mm inside diameter, female, pin positive plug) accepts
8-30 V DC (overvoltage protection starts at 30 V).
• Eth1 port accepts 8-30 V DC input (at the board; higher voltage needed to compensate for power loss on
long cables) from non-standard (passive) Power over Ethernet injectors. The board does not work with
IEEE802.3af compliant 48 V power injectors.
Maximumm power consumption 6 W, with attachments 18 W.
Connecting to a POE Adapter:
1. Connect the Ethernet cable from the device to the POE port of the POE adapter.
2. Connect an Ethernet cable from your LAN to the LAN port of the POE adapter, please mind arrows for data
and power flow.
3. Connect the power cord to the adapter, and then plug the power cord into a power outlet.
Power output
The PoE on Ether10 outputs approximately 2 V below input voltage, and supports up to 0.58 A (So provided 24 V
PSU will provide 22 V at 0.58 A output to the Ether5 PoE port).
Configuration
Once logged in, we recommend clicking the “Check for updates” button in the QuickSet menu, as updating your
RouterOS software to the latest version ensures the best performance and stability. For wireless models, please
make sure you have selected the country where the device will be used, to conform with local regulations.
RouterOS includes many configuration options in addition to what is described in this document. We suggest
starting here to get yourself accustomed to the possibilities: http://mt.lv/help. In case IP connection is not available,
the Winbox tool (http://mt.lv/winbox) can be used to connect to the MAC address of the device from the LAN side
(all access is blocked from the Internet port by default).
For recovery purposes, it is possible to boot the device for reinstallation, see section Buttons and Jumpers.
See mikrotik.com/products for the latest version of this document. Page 1, Document #52418 Modified on: 01.OKT.2019