STEP 1A
WARNING
Make sure to disconnect battery first!
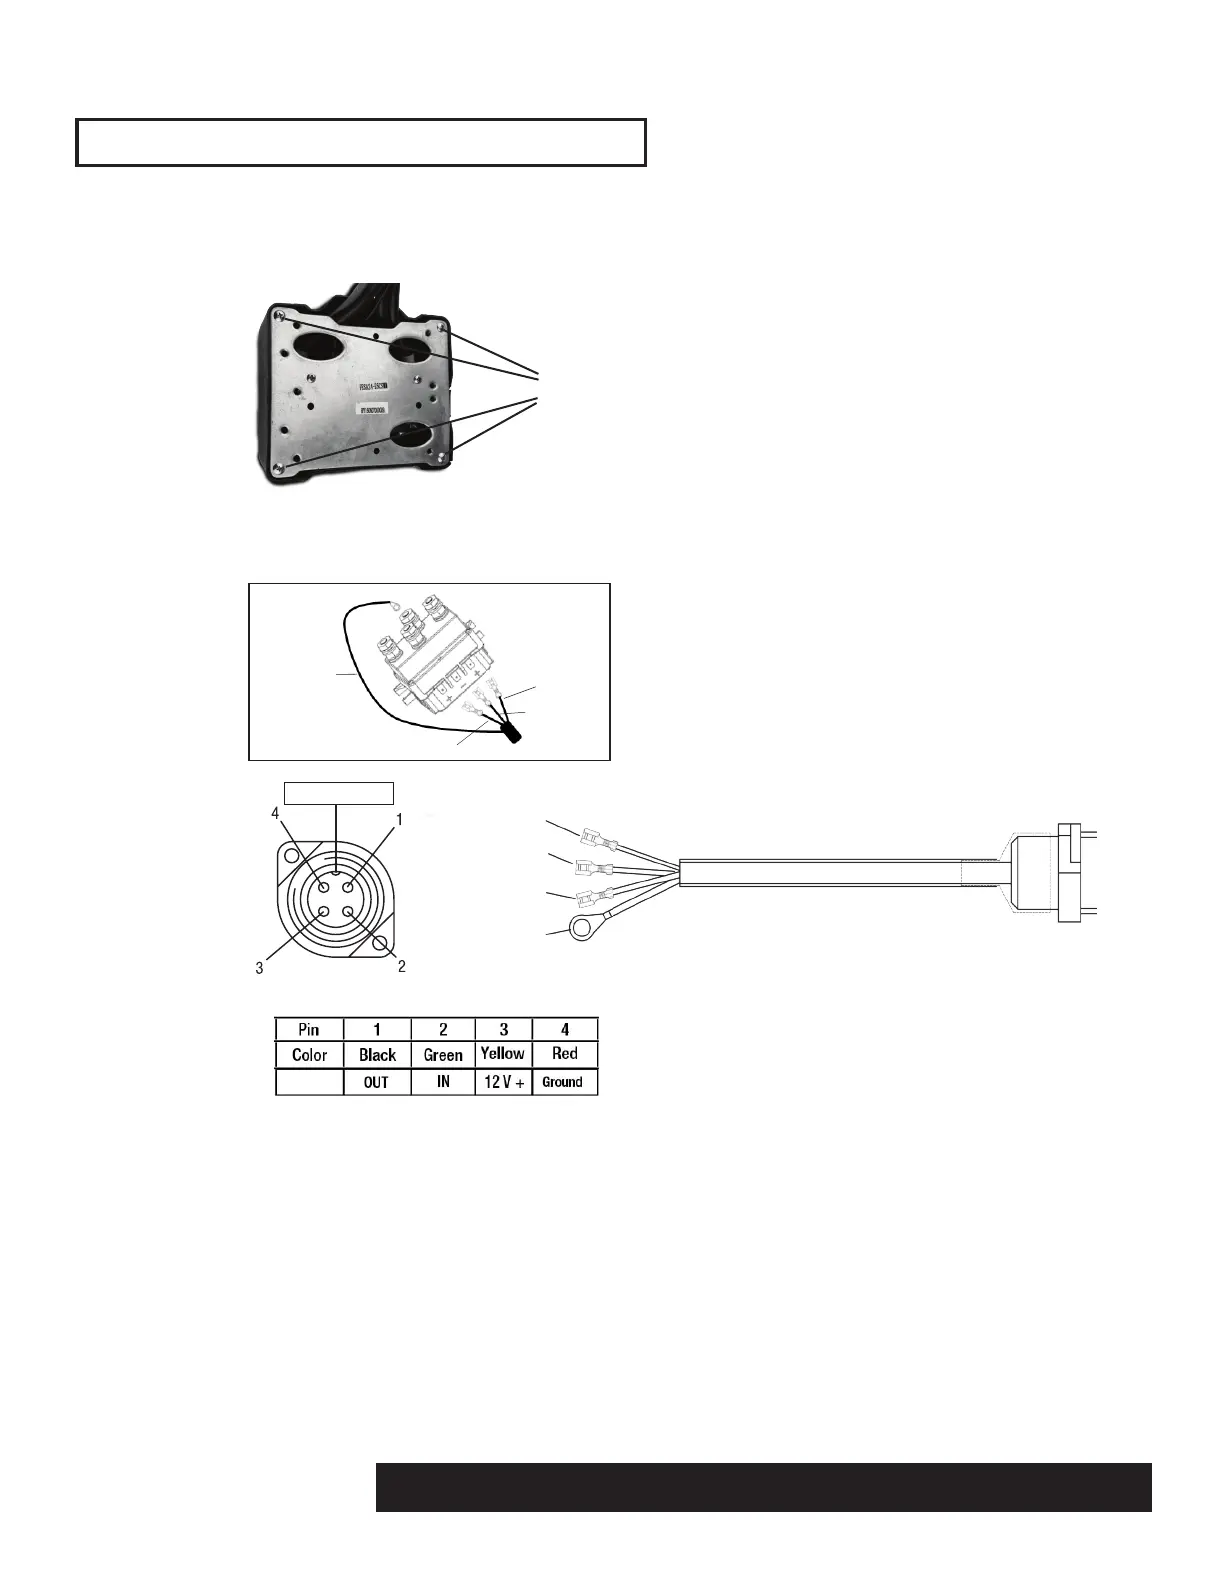
The solenoid box has 4 screws on the bottom as shown in the
image below. Remove these screws and lift box cover up.
sol 1
WEIGHT:
A1
SHEET 1 OF 1
SCALE:2:1
DWG NO.
TITLE:
REVISION
DO NOT SCALE DRAWING
MATERIAL:
DATE
SIGNATURE
NAME
DEBUR AND
BREAK SHARP
EDGES
FINISH:
UNLESS OTHERWISE SPECIFIED:
DIMENSIONS ARE IN MILLIMETERS
SURFACE FINISH:
TOLERANCES:
LINEAR:
ANGULAR:
Q.A
MFG
APPV'D
CHK'D
DRAWN
Green IN
Black OUT
Red GROUND
Yellow 12 V
+
STEP 2A
Wire the pig tail (plug) according to the diagram
below.
Black OUT
Red GROUND
Green IN
Yellow 12V +
Alignment Pin
PIGTAIL PLACEMENT OPTIONS
There are many options for the placement of your new plug. Here are a few options we suggest:
1. Slide plug under the solenoid box and attach accordingly on the outside of the solenoid.
2. Drill the top side of the box cover (on the right side of the Mile Marker logo), then slide in the
head of the pig tail (plug).
3. Drill the right side of the box cover toward the top and then slide in the head of the pig tail
(plug).
screws
2121 Blount Road Pompano Beach, FL 33069 MileMarker.com 1.800.886.8647PAGE 3
INSTALLATION: USING PIGTAIL
 Loading...