5.5.2 Recording loops
5.5.2.1 Record display structure
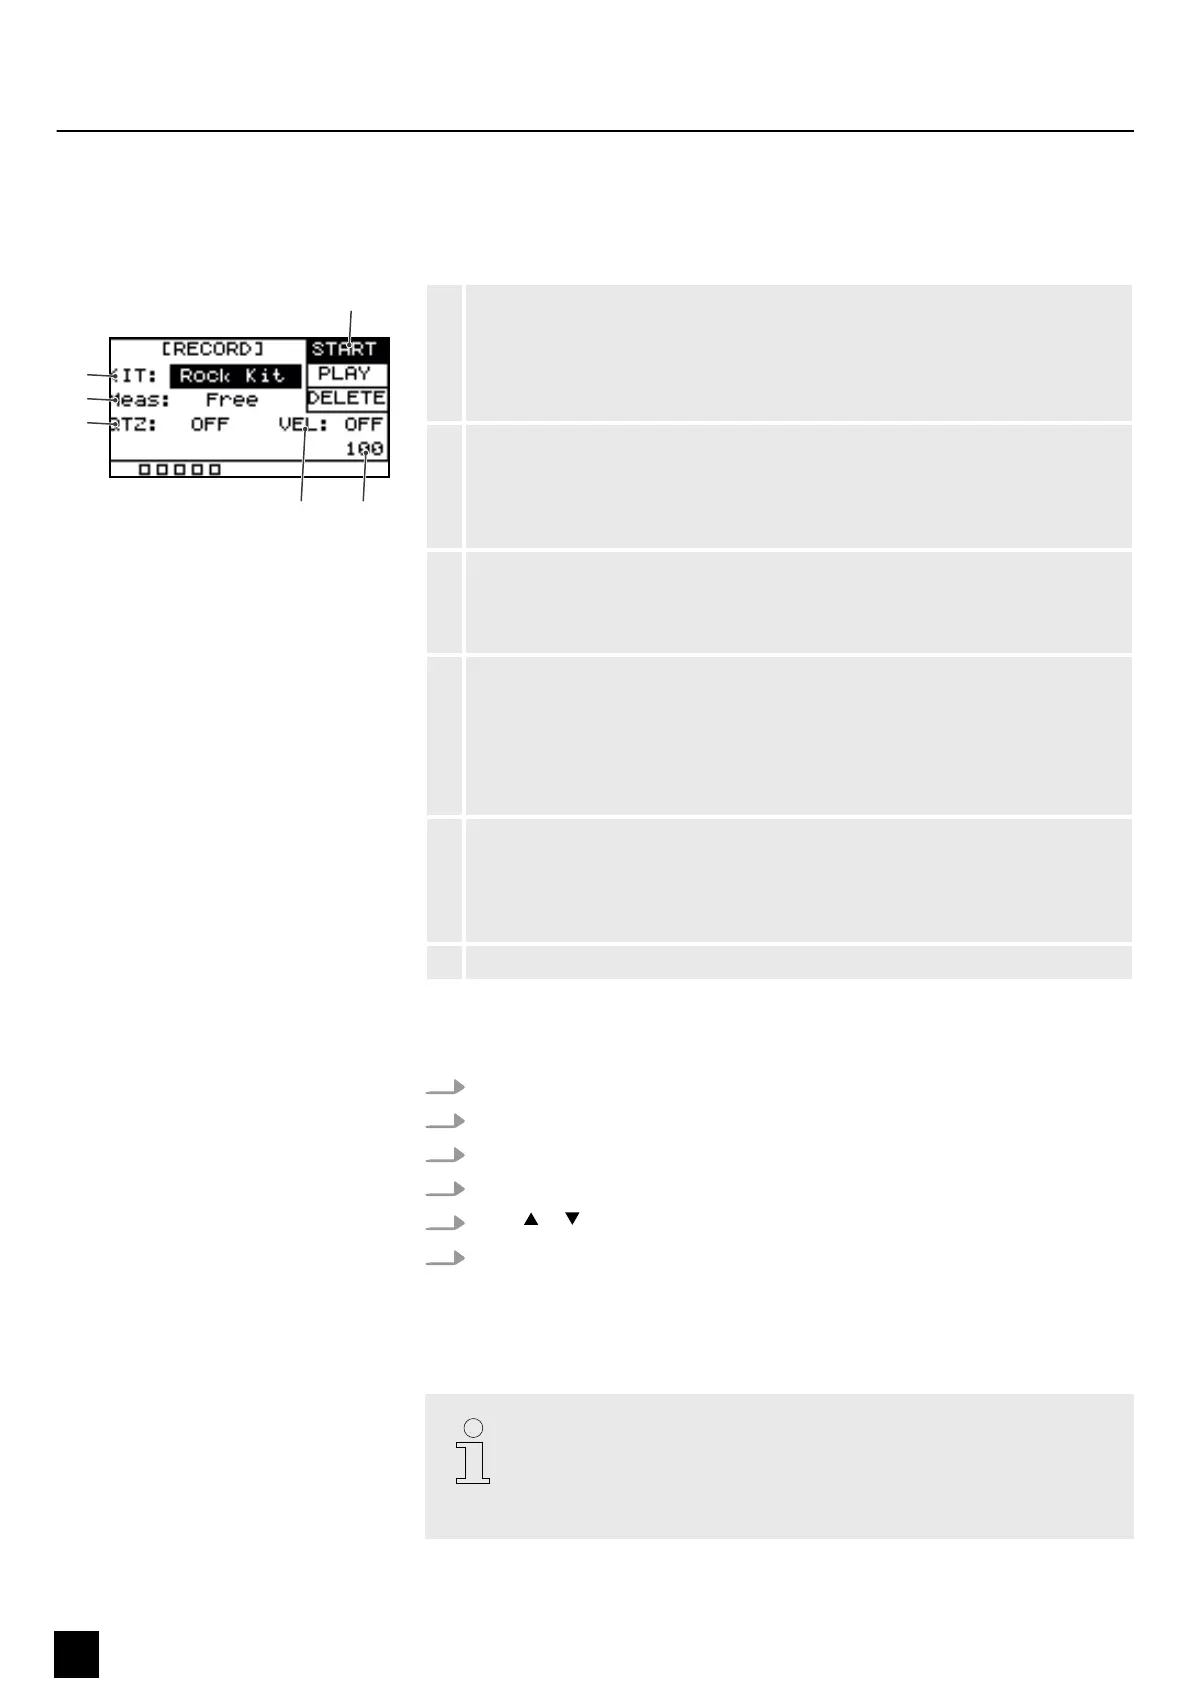
1 Shows the current recording status.
‘START’ : The device is record-enabled.
‘STOP’ : The recording has ended.
Conrm the selection with [OK].
2 Shows the name of the currently selected drum kit to which the currently
edited pad is linked.
Use the rotary control or press [–/+] to change the drum kit.
Conrm the selection with [OK].
3 Shows the selected time signature ( ‘Free’ , ‘*1’ , ‘*2’ , ‘*4’ , ‘*8’ , ‘*16’ )
Use the rotary control or press [–/+] to change the time signature.
Conrm the selection with [OK].
4 Shows the quantizing setting.
Automatically corrects the timing of the strikes ( ‘OFF’ , ‘1/4’ , ‘1/8’ , ‘3/8’ , ‘1/16’ ,
‘3/16’ , ‘1/32’ , ‘1/64’ )
Use the rotary control or press [–/+] to change the quantizing setting.
Conrm the selection with [OK].
5 Shows the correction of the touch velocity.
Use the rotary control or press [–/+] to change the correction of the touch
velocity.
Conrm the selection with [OK].
6 Shows the metronome tempo.
5.5.2.2 Start recording
1. Hit the desired pad for which you want to record a loop.
2. Press [REC] to open the record menu.
3. Press [SELECT] repeatedly to switch between submenus.
4. Use the rotary control or press [–/+] to change the respectively displayed value.
5.
Press or to select ‘START’ .
6. Press [REC] to start recording.
ð
‘RECORD’ is ashing in the display. The metronome is automatically turned
on. To set the metronome according to your requirements, proceed as
described under
Ä
Chapter 5.9 ‘Metronome’ on page 21.
A maximum of 5000 beats can be recorded per recording. When the max‐
imum is reached, the recording is automatically ended. If you start a new
recording without saving the previous one, the previous recording will be
overwritten. If you switch to another function while recording, the recording
will be discarded.
Operating
16
NonaPad
Sampling Percussion Pad