OM-1593 Page 10
out bottom of cut.
801 400-A
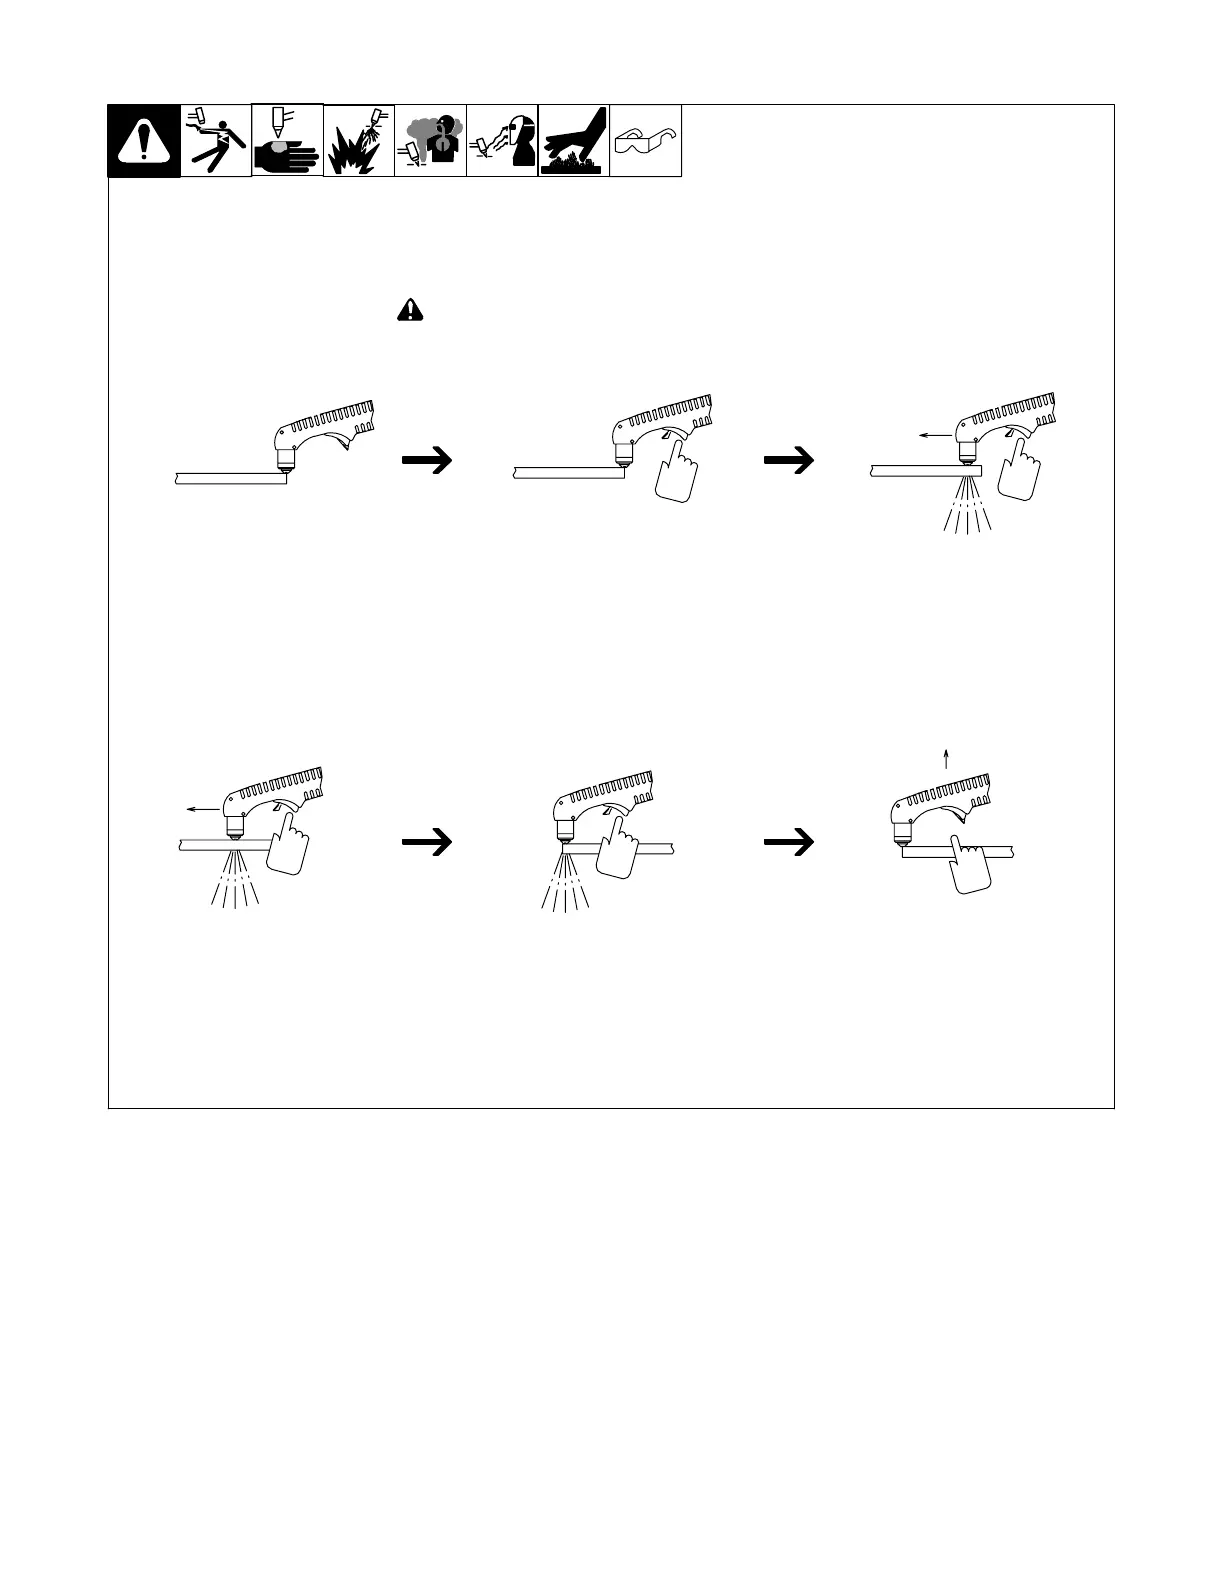
11. Sequence Of Operation For 12 Ampere Torch
After cutting arc starts, slowly
start moving torch across metal.
Adjust torch speed so
sparks go thru metal and
Pause briefly at end of
cut before releasing trigger.
EXAMPLE Of Cutting Operation
Raise trigger lock and press
trigger. Pilot arc starts.
Postflow continues for approx. 12 seconds
after releasing trigger; cutting arc can be in-
stantly restarted during postflow by raising
trigger lock and pressing trigger.
! The pilot arc starts immediately when trigger is pressed.
For shielded cutting, place drag shield on edge
of metal. For non-shielded cutting (non-CE
only), use 1/8 in (3.2 mm) standoff distance
(dragging tip will reduce tip life).
. Moisture from the compressor will form in the air line and at
the torch. It will be normal to sometimes see moisture come
out the end of the torch.
 Loading...