PR036484w REV 07/20 4 of 7
Replacing the O-ring
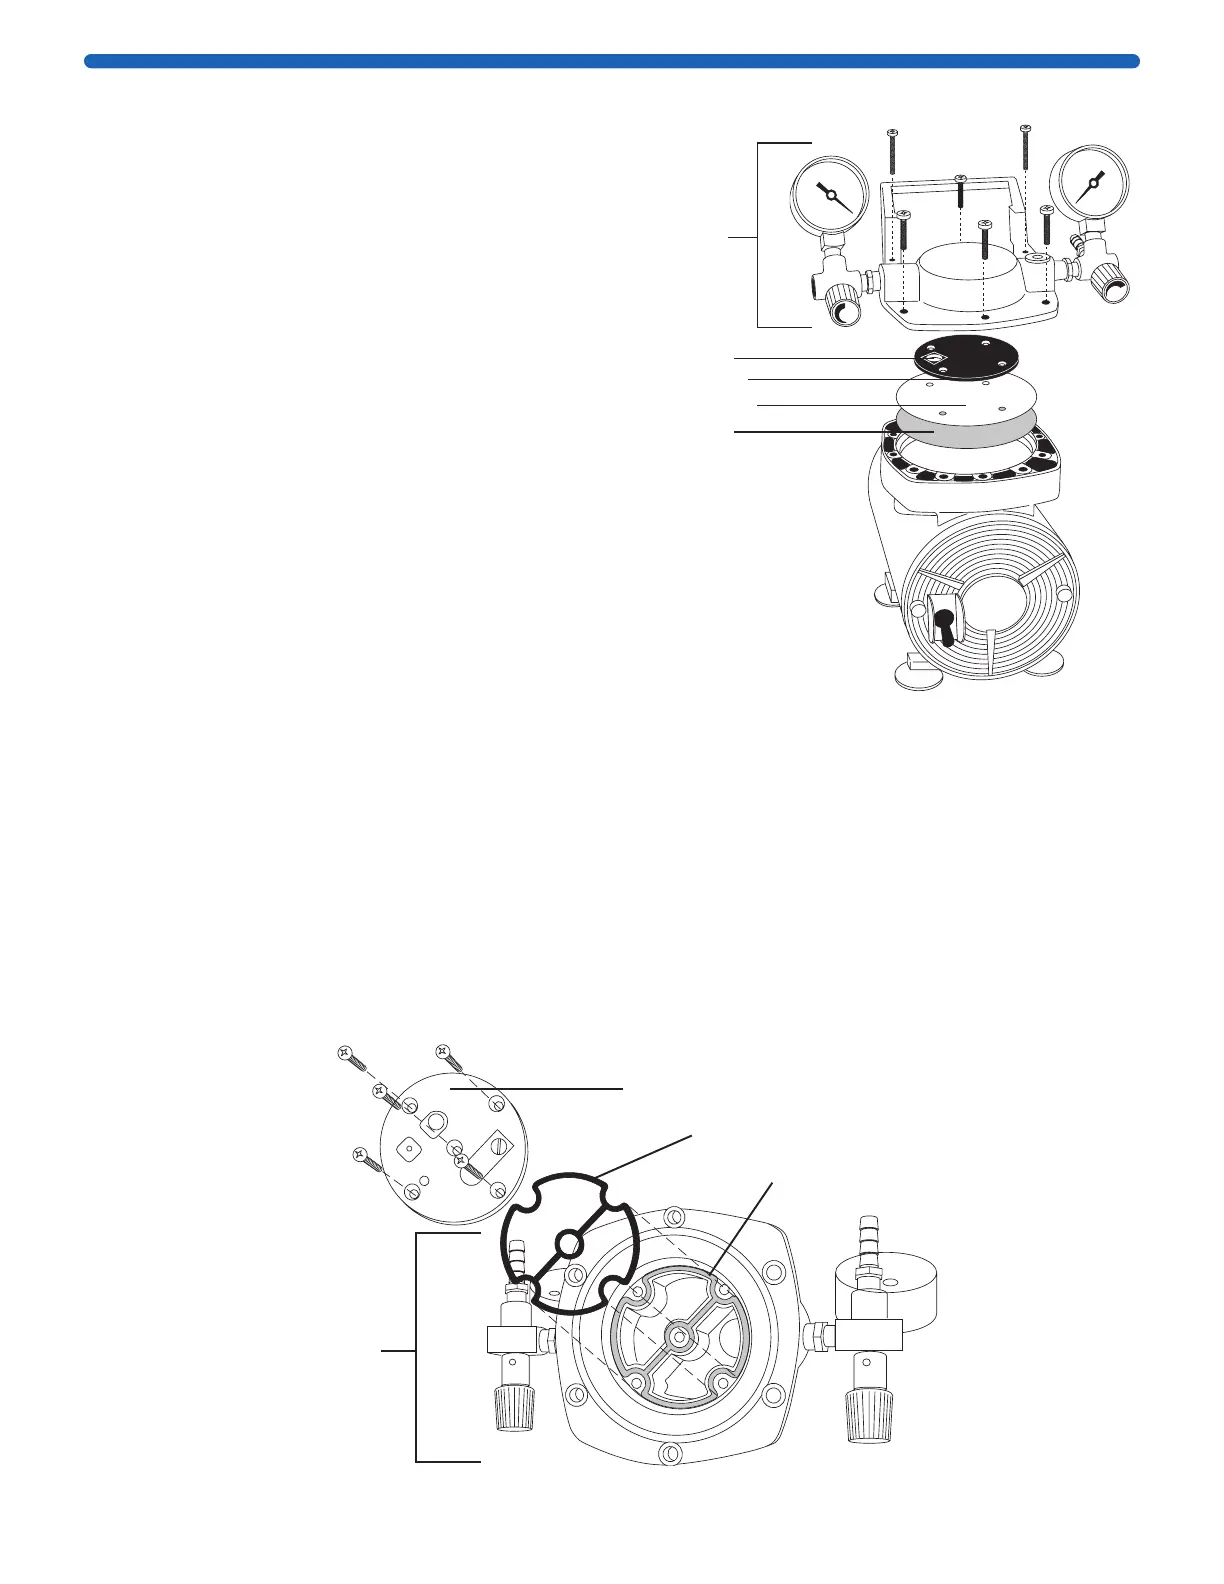
1. Unscrew the four socket-cap screws from the pump head and unscrew the two
screws from the pump handle. Remove the pump head assembly from the top of
the pump.
2. Remove the five Phillips-head screws that hold the valve plate assembly to the
underside of the pump head assembly.
3. Remove the O-ring and replace it by pressing the new O-ring into the groove.
4. Replace the valve plate assembly with the recessed screw holes facing out and
tighten the five Phillips-head screws.
5. Replace the pump head assembly and tighten the socket head screws.
Underside
of pump
head
assembly
Valve plate
O-ring
Groove
Diaphragm liner
Diaphragm
Retainer plate
Large hole
Pump
head
assembly
Replacing the Diaphragm
1. Unscrew the four socket-cap screws from the pump
head and unscrew the two screws from the pump
handle. Remove the pump head assembly from the
top of the pump.
2. Unscrew the four Phillips-head screws, then
remove the retainer plate, the diaphragm liner, and
the diaphragm.
3. Replace the diaphragm (the number printed
on it should be facing up), aligning the holes
in the diaphragm with the screw holes in the top
of the pump.
4. Replace the diaphragm liner, lining up holes in the
liner with the screw holes in the top of the pump.
5. Replace the retainer plate, aligning the four small
holes with the screw holes and orienting the large
hole to the left as shown. Replace and tighten the
Phillips-head screws.
CAUTION: Take care not to nick the heads of the
screws; burrs can damage the inlet valve.
6. Replace the pump head assembly and tighten the
six screws to hold it in place.