5
ASSEMBLY
Recharge only with the charger
specied for the battery. For spe-
cic charging instructions, read the operator’s
manual supplied with your charger and battery.
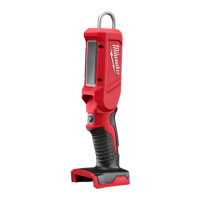
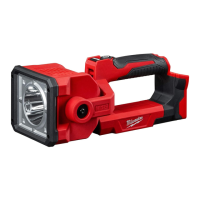
Removing/Inserting the Battery
To remove the battery, push the battery latch lock
to the side and squeeze the battery latch lever. Pull
the battery pack away from the light.
Always remove battery pack before
changing or removing accessories.
To insert the battery, slide the pack into the body of
the light. Make sure it latches securely into place.
Only use accessories specically
recommended for this light. Others
may be hazardous.
Transportation
Use two people whenever it
is necessary to lift or carry
the light. Light is heavy. Lift with legs, not
back.
Always unarm the light before transporting.
Disconnect extension cords before transporting.
Always clear the area of obstructions before
transporting.
To move light from place to place, grasp the transport
handle and tilt the light back onto the wheels. Push,
don't pull, the light.
Always use a two person lift when necessary. To
lift, grasp the handle and tilt the light back onto the
wheels. Have a second person grasp the lower hand
pockets. Always maintain a rm footing.
Use the transport handles as anchor points when
hoisting the light. Ensure the hoisting straps are rated
for the weight of the light, and the straps will not slip
or contact other parts during transport.
NOTE: Do not store the light in a hoisted position.
Inserting/Removing Extension Cords to
operate on AC Power
To operate the light on AC Power, open the door
and plug in a suitable extension cord into the light.
NOTE: When an extension cord is plugged into the
light, the light will automatically run on AC power.
Position cord in routing notch and close AC battery
door during use.
To disconnect the extension cord, press the Power
button to turn o the light, then remove the cord
from the outlet.
NOTE: When not using the AC option, make sure
the AC battery door is closed completely.
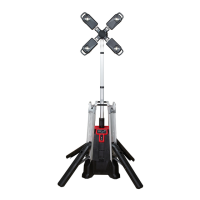
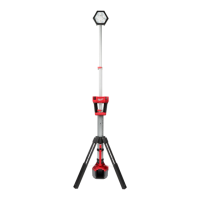
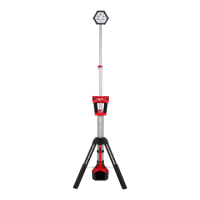
Deploying/Retracting the Legs
1
2
The four legs can be deployed individually. When
using the light on an uneven surface, ensure the light
is level and stable before use. Lower mast before
making adjustments to the legs or attempting to
transport the light.
1. Push the leg deploy latch to deploy a leg. Keep clear
of the legs as they deploy.
2. To retract a leg, lift the leg retract latch and secure
the leg back into place.
Raising/Lowering the Mast (Motor)
Press and hold the raise/lower mast button respec-
tively to set the light at the desired height.
NOTE: Before raising the mast; ensure
light is stable and be aware of any poten-
tial overhead obstacles.
NOTE: When lowering the mast back
into the unit, turn light o, lower mast to
shoulder level and return heads to their
outward-facing upright angle. Lowering
heads while fanned-out can cause dam-
age to unit. Lowering heads facing inward
can cause damage to unit by residual heat.
NOTE: Keep hands away from moving parts while
lowering mast.
1
2
1
Lowering the Mast (Power Loss)
To manually lower the mast after power loss, disen-
gage the mast motor disengage lever using the latch
found below the AC Outlet access door. Reset latch
once power is restored.
Adjusting LED Heads
1. Ensure light is in upright stable position
2. Press the Arm button.
3. Raise mast to shoulder level.
4. Rotate the heads to the desired angle. The four
heads can be adjusted individually.
5. If desired, loosen the positioning knob to tilt the
lights to the desired angle. Tighten knob.
6. Continue to raise the mast to the desired height.