GA10 Assembly
The GA 10 Guide Arm is an optional
attachment that helps to reduce fatigue
during long detecting sessions. The GA 10
attaches to the mid shaft and features a
Flex-link and strap for easy adjustment. A
C-clip is included with the GA 10 so that it
can be clipped to the detector when not in
use.
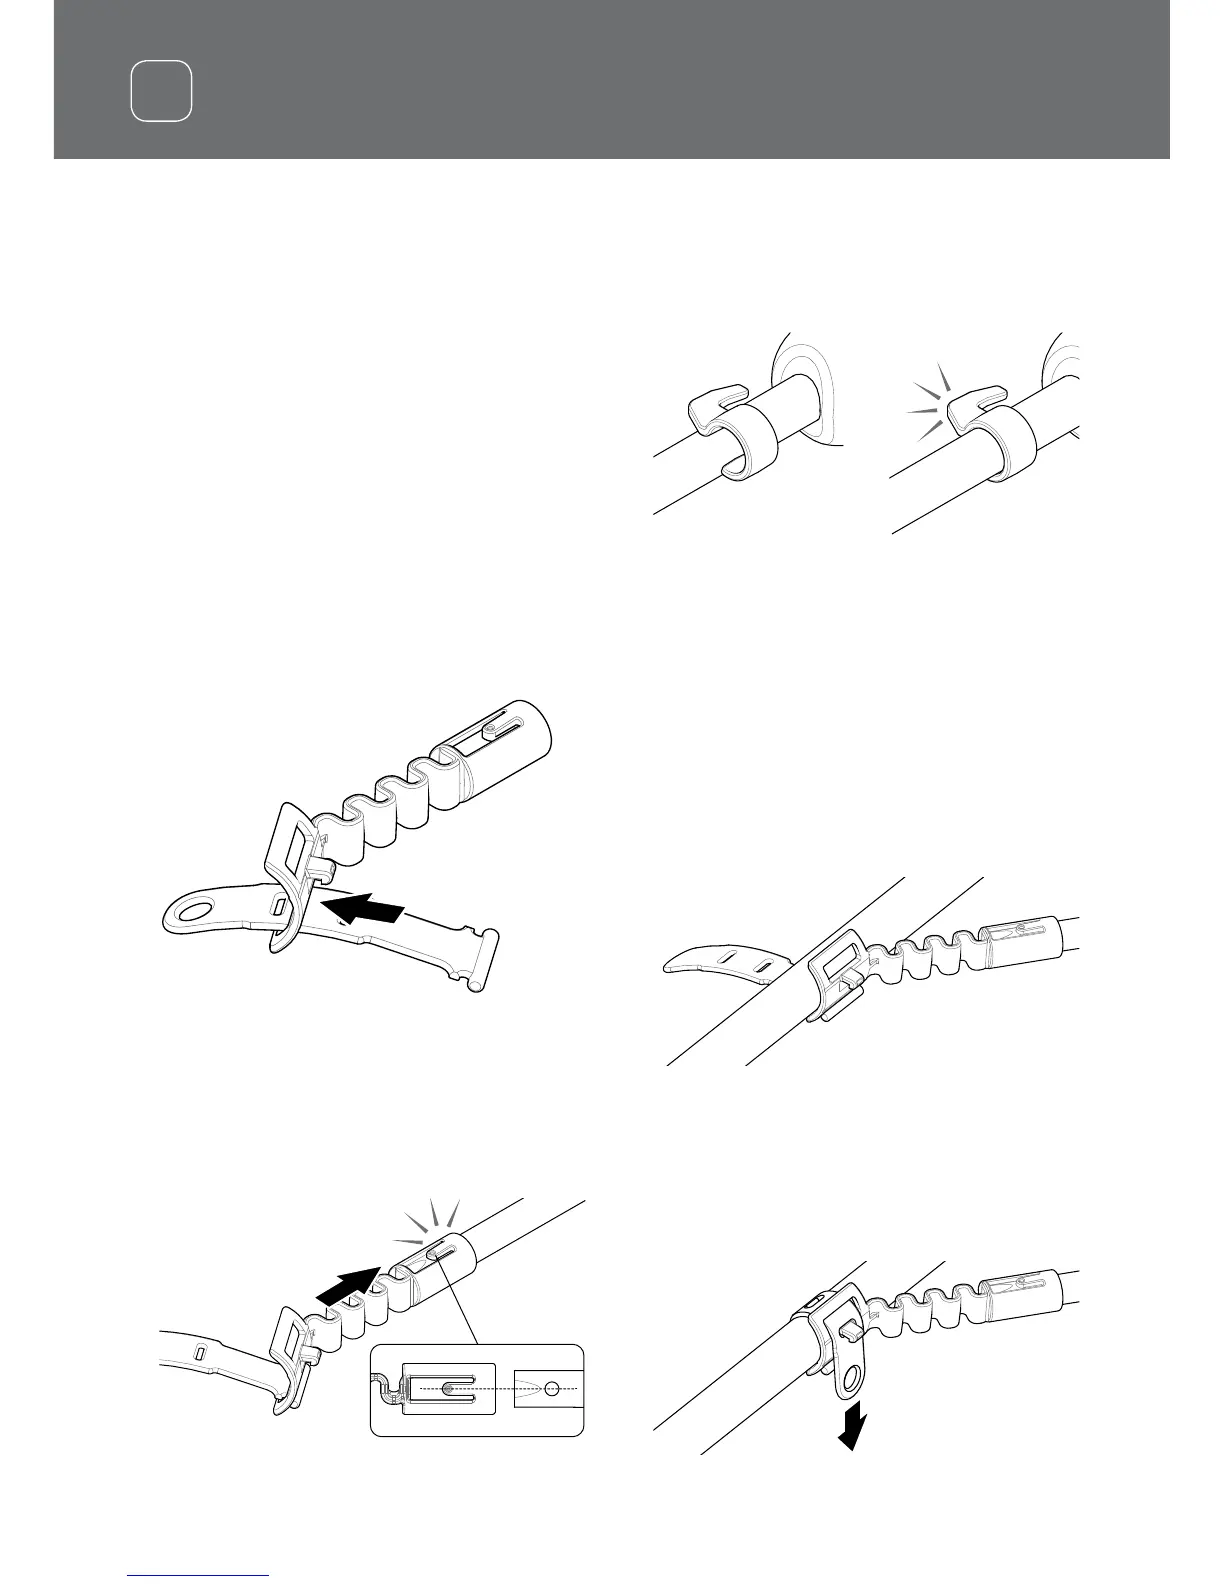
Assemble GA 10
1. Attach the shaft strap to the Flex-link by
looping the end of the strap through the
narrowest slot. Pull until the strap is
captured by the Flex-link.
2. Attach the Flex-link to the GA 10 shaft.
Align the holes in the shaft with the key
on the Flex-link. Push the Flex-link onto
the end of the shaft until it clicks into
place.
3. Attach the C-clip, with the hook pointing
towards the GA 10 handle. Apply firm
pressure to snap the clip onto the shaft.
Attach GA 10 to your detector
The GA 10 can be assembled to the detector
for left or right handed use. These steps
illustrate assembly for a right handed user.
For left handed use, perform the same
steps with the GA 10 on the left side of the
detector.
1. Place the Flex-link approximately half way
down the detector’s mid shaft.
2. Wrap the strap around the shaft and loop
the end of the strap through the slot on
the Flex-link. Pull the strap tight until the
Flex-link hook is through the first slot on
the strap.
6
 Loading...
