EasyManua.ls Logo

MINN KOTA 1810220 User Manual

MINN KOTA 1810220
12 pages
To Next Page IconTo Next Page
Page #1 background imageLoading...
Page #1 background image
1 | minnkotamotors.com
©2020 Johnson Outdoors Marine Electronics, Inc.
TALON SETBACK BRACKET - 6
1810220
TOOLS AND RESOURCES REQUIRED
Item /
Assembly
Part # Description Qty.
2 2378821 RISER BRACKET, 6",MACHINED 1
A
Items 4-10
2994918 BAG ASY,TALON 6" SETBACK BRKT 1
4 2373521 BOLT-5/16-18 X 1 1/2" HHCS SS 4
6 2371746 WASHER .750 X .3125 SS 8
8 2223100 NUT-5/16-18 NYLOCK S/S 4
10 2378608 ANTI SEIZE TUBE, 4CC, TALON 1
p
2374929 INSTRUCTION SHEET,SETBACK BRKT 1
22
AA
44
66
88
#3 Phillips Screw Driver
Drill
Scissors
17/64” Drill Bit
7/16” Box End Wrench
33/64 (.516”) Drill Bit
A second person to help with
the installation
p Not shown on Parts Diagram.
This part is included in an assembly and cannot be ordered individually.
The Talon Setback Bracket provides six inches of additional setback for direct-transom mount applications. This provides extra clearance for
accessories, such as trim tabs and ladders.
1010
MOUNTING CONSIDERATIONS
NOTICE: The Setback Bracket should only be used on
direct-mount applications. Using a setback bracket along
with any adapter bracket is not recommended and will void
your adapter bracket warranty.
NOTICE: To prevent seizing of the stainless steel hardware,
do not use high speed installation tools. Wetting the screws
or applying an anti-seize may help prevent seizing.
NOTICE: If directly mounting the Setback Bracket to the
Transom, please refer to the “Installation” section of the
Talon Owner’s Manual or Installation Instructions. They can
be found online at www.minnkotamotors.com.
Complete Typical Installation
Question and Answer IconNeed help?

Do you have a question about the MINN KOTA 1810220 and is the answer not in the manual?

MINN KOTA 1810220 Specifications

General IconGeneral
BrandMINN KOTA
Model1810220
CategoryTV Mount
LanguageEnglish

Summary

Talon Setback Bracket Overview

Tools and Resources Required

Lists essential tools and resources needed for installation, including screwdrivers and drill bits.

Mounting Considerations

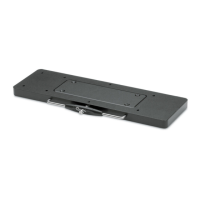
Provides important advice and notices regarding the mounting of the setback bracket.

Installation with Talon Already Installed

Remove Existing Talon and Mounting Bracket

Detailed steps for safely disconnecting the Talon and removing the original mounting bracket.

Align and Seal Setback Bracket

Instructions for positioning the setback bracket and applying sealant to the transom.

Attach the 6" Setback Bracket

Steps for securing the 6" setback bracket to the transom using provided hardware.

New Installation without Talon

Prepare for New Installation

Guidance on determining mounting location and marking holes for new installations.

Seal Transom for New Installation

Instructions for applying sealant around drilled holes and on the setback bracket face.

Attach Setback Bracket (New Installation)

Steps for securing the setback bracket to the transom using mounting hardware.

Completing the Installation

Attach Mounting Bracket to Setback Bracket

Steps for connecting the main mounting bracket to the 6" setback bracket using bolts and nuts.

Install Talon Assembly onto Mounting Bracket

Procedure for attaching the Talon unit to the assembled mounting bracket using tracks and stop bolts.

Adjust and Secure Talon Assembly

Final adjustments for Talon height, securing the vertical stop bolt, and tightening mounting hardware.

Installation Caution and Torque

Important caution regarding checking tension of vertical adjustment nuts and recommended torque.

Related product manuals