Do you have a question about the MINN KOTA PowerDrive i-Pilot and is the answer not in the manual?
Remove control box cover using a Phillips screwdriver.
Remove AutoPilot board and secure wires with heat shrink.
Remove the insert plug by pushing from the inside.
Remove sideplates and center cover, disconnect CoPilot if present.
Route i-Pilot Controller cable through the insert plug opening.
Feed i-Pilot Controller cable down the coil cord interior.
Install insert plug, guiding cables through it.
Position wires and route cables at the control box base.
Mount i-Pilot Controller to control box using screws.
Remove strain relief holding foot pedal and power cables.
Remove CoPilot Control Board screws if CoPilot is installed.
Route and secure cables in strain relief with screws.
Cut heat shrinks and connect steering housing wires.
Apply heat shrink to seal steering housing wire connections.
Reinstall covers and connect control board to i-Pilot controller.
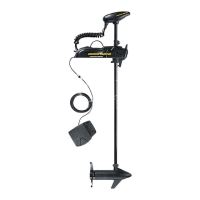
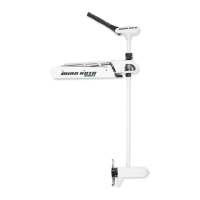
This document outlines the installation and maintenance procedures for a PowerDrive i-Pilot upgrade, designed to enhance the functionality of Minn Kota trolling motors. The i-Pilot system integrates advanced GPS technology to provide features such as Spot-Lock, recordable paths, cruise control, and advanced autopilot, significantly improving the user's fishing experience by automating boat positioning and navigation.
The i-Pilot system serves as a comprehensive control unit for Minn Kota trolling motors, replacing or augmenting existing control mechanisms. At its core, i-Pilot leverages GPS technology to offer precise boat positioning and navigation capabilities. The primary function is to provide hands-free control over the trolling motor, allowing anglers to focus on fishing rather than constantly adjusting boat position.
One of the most significant features is Spot-Lock, which acts like a digital anchor. When activated, Spot-Lock uses GPS coordinates to automatically hold the boat in a specific location, compensating for wind, current, and waves. This eliminates the need for a physical anchor, providing unparalleled precision and convenience, especially in challenging conditions or when fishing specific structures. The system continuously monitors the boat's position relative to the saved Spot-Lock point and makes micro-adjustments to the trolling motor's thrust and direction to maintain the desired position.
The i-Pilot also includes Record a Path, allowing users to record a fishing path up to two miles long. Once recorded, the system can automatically retrace this path, enabling anglers to repeatedly cover productive fishing grounds with precision. This feature is particularly useful for trolling or drifting along contours, weed lines, or other underwater features. The system stores multiple paths, which can be recalled and replayed at any time.
Cruise Control is another key function, maintaining a consistent boat speed regardless of external factors. This is crucial for precise bait presentation and trolling, ensuring that lures are presented at the optimal speed for target species. The user can set a desired speed, and the i-Pilot system will automatically adjust the motor's power output to maintain that speed, even against currents or wind.
The Advanced AutoPilot feature provides enhanced navigation capabilities. Unlike traditional autopilot systems that simply maintain a heading, the i-Pilot's Advanced AutoPilot uses GPS to keep the boat on a true course, correcting for external influences like wind and current. This means the boat will travel in a straight line over the water, rather than just maintaining a compass heading, which can be affected by drift. This is invaluable for covering long distances or navigating through open water while maintaining a precise direction.
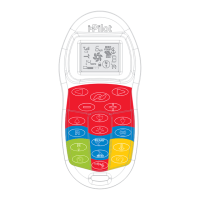
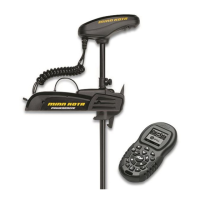
The system is controlled via a wireless remote, offering intuitive access to all functions. This remote allows users to activate Spot-Lock, record and recall paths, adjust speed, steer the motor, and engage Advanced AutoPilot from anywhere on the boat. The remote's display provides real-time information on motor status, GPS signal strength, and active features.
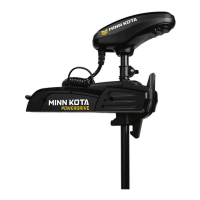
The i-Pilot upgrade is designed for ease of use and integration with existing Minn Kota PowerDrive trolling motors. The installation process involves replacing the existing control box cover with the i-Pilot controller, routing cables, and making electrical connections. The detailed instructions ensure that users can perform the upgrade with common tools, such as a Phillips screwdriver and a heat gun.
Once installed, the system's wireless remote is the primary interface. The remote is designed to be user-friendly, with dedicated buttons for key functions like Spot-Lock, speed control, and steering. The LCD screen on the remote provides clear feedback on the system's status, including GPS signal strength, battery life, and active navigation modes. This allows for quick adjustments and monitoring without needing to interact directly with the motor.
The ability to store multiple Spot-Lock locations and recorded paths enhances the system's utility. Anglers can save their favorite fishing spots and productive routes, making it easy to return to them on future trips. The system's memory allows for quick recall of these saved points and paths, streamlining the fishing process.
The i-Pilot system is also designed to be robust and reliable in marine environments. The components are built to withstand exposure to water, salt, and UV radiation, ensuring long-term performance. The use of heat shrinks during installation helps to create secure and waterproof electrical connections, protecting against corrosion and short circuits.
The system's integration with the trolling motor's existing power supply means no additional batteries are required for the i-Pilot controller itself, simplifying the power management. The wireless remote typically uses standard batteries, which are easily replaceable.
Maintenance for the i-Pilot system primarily revolves around proper installation and ensuring secure electrical connections. The instructions emphasize the importance of using heat shrinks to seal wire connections, which is a critical step in preventing corrosion and ensuring the longevity of the electrical system in a marine environment. Regularly inspecting these connections for any signs of wear or damage is a good practice.
The system itself is largely self-contained and requires minimal ongoing maintenance. The robust design of the i-Pilot controller and remote means they are built to withstand the rigors of outdoor use. However, like all marine electronics, keeping the components clean and dry when not in use can extend their lifespan. Wiping down the remote and controller with a damp cloth to remove salt residue or dirt is recommended.
The manual also highlights the importance of disconnecting all power to the trolling motor before performing any work or maintenance. This is a crucial safety measure to prevent electrical shock or damage to the motor and i-Pilot system.
In case of issues, the document provides contact information for Minn Kota's Technical Service Department and a list of Authorized Service Centers. This ensures that users have access to professional support and repair services if needed, rather than attempting complex repairs themselves. The availability of an online owner's manual and QR code access further supports users by providing comprehensive documentation and troubleshooting guides.
The design of the i-Pilot upgrade also considers future serviceability. The modular nature of the components, such as the control box cover and internal boards, allows for easier replacement of individual parts if necessary. The use of standard fasteners (e.g., Phillips head screws) means that common tools can be used for disassembly and reassembly during maintenance or repair.
Overall, the i-Pilot system is designed to be a durable, low-maintenance upgrade that significantly enhances the functionality of Minn Kota PowerDrive trolling motors, providing advanced navigation and positioning capabilities for a more efficient and enjoyable fishing experience.
| i-Pilot GPS | Yes |
|---|---|
| Blade Material | Composite |
| Foot Pedal | Optional |
| Digital Maximizer | Yes |
| Weedless Wedge 2 Prop | Yes |
| Speed Settings | Variable |
| Battery Requirement | 12V or 24V deep cycle marine battery |
| i-Pilot Features | Spot-Lock, Advanced AutoPilot, Record a Track, Cruise Control |
| Voltage | 12V (45, 55 lbs), 24V (70 lbs) |