Do you have a question about the MINN KOTA TALON and is the answer not in the manual?
Register your Talon to receive full warranty benefits and product support.
Locates and explains the importance of the 11-character serial number for product identification and service.
Space to record personalized Talon details like model, serial number, and purchase information.
Details the 5-year warranty for mechanical components, covering defects in materials and workmanship.
Details the 2-year warranty for electrical components, covering defects in materials and workmanship.
Provides a lifetime warranty for the Talon's spike against material and workmanship defects.
Outlines the specific terms, conditions, and limitations applicable to the Minn Kota Talon warranties.
Provides instructions on how to obtain warranty service, including contact details and procedures.
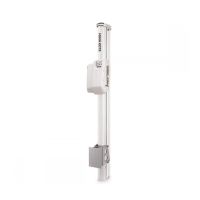
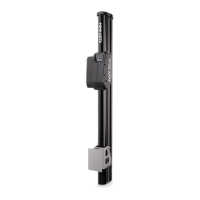
Comprehensive guide for physically mounting the Talon anchor to a boat's transom using provided hardware.
Critical checks and advice for selecting an appropriate, safe, and optimal location for Talon installation.
Specifies the minimum required distance between the Talon and the boat's hull to prevent spray and drag.
Ensures adequate space between the Talon and the boat's engine for unimpeded operation.
Instructions for attaching the Water Deflection Shield to the Talon mounting bracket for spray mitigation.
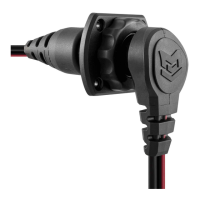
Detailed steps for routing and connecting the Talon's power and alarm wires to the boat's electrical system.
Procedure to test the deployed and retracted functionality of the installed Talon anchor.
General guidelines for safe boat rigging and product installation following ABYC standards.
Recommendations for choosing and maintaining marine batteries for optimal Talon performance and longevity.
Step-by-step instructions for securely connecting the Talon to a 12-volt battery system, ensuring correct polarity.
Highlights key capabilities of the Talon, including Wave Absorption, 3-Stage Anchor, Work Light, and Auto-Drive.
Explains how the Depth Indication LEDs visually represent the anchor's deployment progress.
Describes the three anchoring modes (Standard, Soft Bottom, Rough Water) and their operational differences.
LEDs that display the anchor's deployment depth in 20% increments.
Buttons used to control anchor deployment, retraction, pausing, and device pairing.
Button to cycle through and select the desired anchoring mode (Standard, Soft Bottom, Rough Water).
Controls the work light and adjusts the brightness of the indicator panel LEDs.
An LED that indicates the currently selected anchoring mode.
Procedure for initiating the anchor deployment sequence using the Indicator Panel buttons.
Procedure for retracting the Talon anchor using the buttons on the Indicator Panel.
How to switch between Standard, Soft Bottom, and Rough Water modes using the Indicator Panel.
Instructions to turn the Talon's integrated work light on or off via the Indicator Panel.
Adjusting the color and brightness levels of the Talon's work light through the Indicator Panel.
Modifying the brightness of the Indicator Panel's LEDs for user preference or ambient conditions.
Method to choose which Talon unit (Port, Starboard, or both) the remote control will manage.
Steps to deploy the Talon anchor by using the buttons on the Talon Remote.
Steps to retract the Talon anchor by using the buttons on the Talon Remote.
How to change the Talon's anchoring mode using the Anchor Mode button on the remote control.
Operating the Talon's work light, including on/off, color selection, and intensity adjustment via remote.
Step-by-step instructions for opening the remote control and replacing its battery.
Process to erase all previously paired remote controls and devices from the Talon's memory.
Step-by-step procedure for the physical replacement of the Talon's anchor spike.
Recommended routine for rinsing the Talon anchor after use to prevent debris build-up.
Alternative procedure for thoroughly rinsing the Talon anchor using a hose and extending it.
Periodic checks and tightening of mounting hardware, inspection of cables, and spike condition.
Information on how to purchase replacement parts for the Talon directly from the manufacturer's website.
Accessing the online FAQ section for answers to common questions about Minn Kota products.
Contact details for Minn Kota's US and Canadian consumer service representatives.
Instructions on how to contact Minn Kota customer support via email for inquiries.
Guidance on locating official Minn Kota service centers for repairs and support.
Minn Kota's commitment to environmental responsibility and compliance with relevant regulations.
Information on the European Union's WEEE Directive concerning the disposal of electrical and electronic equipment.
Guidelines for the proper disposal of the Talon unit and its battery, adhering to local regulations.
Details of the Talon's regulatory compliance, including FCC ID, IC, and controller/remote specifications.
Information regarding the device's compliance with Part 15 of the FCC Rules for digital devices.
Details on the product's adherence to Industry Canada's technical specifications.
Specifies the ambient operating temperature, humidity range, and maximum operating altitude.
Technical details on the frequency band and maximum RF power transmitted by the controller and remote.
Lists the trademarks and registered trademarks associated with Minn Kota and its products.
Diagrams and lists for the hardware components used in Talon installation and the remote control.
A comprehensive list of all parts included in the Talon installation hardware and remote control kits.
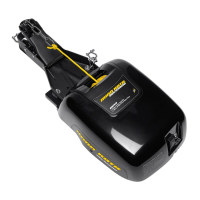
Diagrams illustrating the internal motor assembly and its various components.
A detailed list of individual parts that constitute the Talon motor assembly.
Diagrams showing the components of the Talon's outer extrusion assembly.
A comprehensive list of all parts belonging to the Talon's outer extrusion assembly.
Diagrams illustrating the components of the third stage of the Talon anchor.
A detailed list of individual parts specific to the third stage of the Talon anchor assembly.
Diagrams illustrating the components that make up the second and first stages of the Talon anchor.
A detailed list of individual parts for the second and first stages of the Talon anchor assembly.
Information on Minn Kota chargers designed to protect and extend battery life.
Details on adapter brackets offering strength and modular design for optimal Talon positioning.
Description of a tilt bracket for low-clearance areas and storage, offering stability.
| Brand | Minn Kota |
|---|---|
| Model | Talon |
| Type | Shallow Water Anchor |
| Deployment Depth | 12' |
| Control | Wireless Remote |
| Power | 12V |
| Material | Composite |
| Color Options | Black, White |
| Operation | Push-button |
| Mounting | Transom |