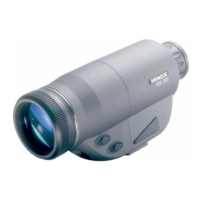
Get familiar with your
Night-Vision scope
Control elements
1. Objective lens
2. Front focusing ring
3. Image intensifier tube
4. Eyepiece and focusing ring
5. Battery compartment
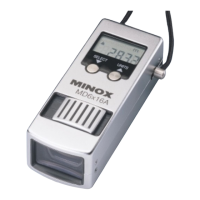
6. Infra-red illuminator power switch
7. Main power switch
8. Infra-red illuminator
General Notes
This top quality optical-electronic product is fitted with a
Generation 1+ residual light amplifier.
The field of use includes observation and orientation aid in
twilight, moonlight, starlight or darkness (in combination
with the infra-red illuminator).
The temperature range is from –20° C to 40° C.
With its compact dimensions it is easy to handle and ready
for use at any time.
When used and cared for correctly this Night-Vision scope
guarantees satisfactory operation for many years.
Operating instructions
For use in daylight
Inserting the battery
Please ensure that the lens of your Night-Vision scope
is covered by the lens cap. Remove the battery compart-
ment lid and insert the battery (2 AAA for NV 200 / 1 CR
123A for NV 300). Always observe correct poling. Fully
close the battery compartment again.
Switching on
To protect the sensitive image tube against irreparable
damage, never remove the lens cap in daylight.
The small opening in the center of the cap is adequate-
ly dimensioned for daylight use. Actuate the main
switch.
The green LED display lights up. When you look through
the eyepiece you will see a bright, green, fluorescing
image.
Switching off
Actuate the main switch. When you look through the
eyepiece you will still see the green image for a few
4