Important: Mirolin Acrylic Showers was carefully
inspected and packed for shipment. You should check
your unit and if there are any problems contact your dealer
before installation. Protect the shower from dirt and
damage by leaving the polyethylene protective film in
place until installation and other related construction is
complete.
Follow Local Building Codes.
Tools and Materials Required
Tools: Tape Measure, Electric Drill, Drill Bit (3/16”), Level,
and Caulking Gun
Materials: Mildew Resistant Silicone Bathroom Caulking,
Drywall Screws and Shims (if required).
Caution:
Assembly and installation of this shower unit requires 2
persons.
General Installation Notes
Note: Dimensions are clear openings. Refer to
specification sheet for dimensions of shower unit.
" The Shower is to fit into formed recess as shown in
Figure 1 and Figure 2.
" Clear opening is required with the flange outside of the
opening:
1-Piece Shower 3-Piece Shower
A 88 ¹⁄" 2248 mm 85" 2159 mm
B 87" 2210 mm 83 ¹⁄" ²¹²¹ mm
C 15 ³⁄" 400 mm ¹⁶ ³⁄" 425 mm
D ⁹ ³⁄" 248 mm 9 ³⁄" 248 mm
Rough-in dimensions: 88 ½” x 61” 85” x 61”
Framing
" Inside dimension of the studded alcove are to be as
specified in Figure 1.
" Follow Figure 2 as specified to ensure width is 57 1/2”
between the 2” x 2” recessed studs. (See enlarged
detail.)
3-Piece Units
" To facilitate moving through door ways 3-piece units
may be taken apart.
" On the 3-piece units remove the 2 - 2”x2” wood blocks
on the side flange before installation. They are for
shipping only. Use the holes on each side for fastening
the acrylic unit into the framing.
Shimming May Be Required
" The unit will rest on the front edge and the two legs at
the rear of the unit. Shims may be required to level the
shower to ensure adequate drainage. Insert the bottom
section in the alcove and shim accordingly. Then
remove and assemble as per instructions.
" The shower is fastened in place using dry wall screws.
Holes are to be drilled in the flange on both sides and
across the top. The holes are to be drilled by the
installer, installation is illustrated in figures 3 and 3A.
" If there is a gap at the seam on the front post, then shim
the flange as illustrated in Figure 3B.
1
FIGURE 1, FIGURE 2
LAYOUT DIMENSIONS
57 ½”
1460 mm
61”
1550 mm
A
B
D
2” x 4”
WOOD BLOCK
DRYWALL
TUB FLANGE
2” X 2”
WOOD BLOCK
³⁄”
DRYWALL
SCREW
C
36”
914 mm
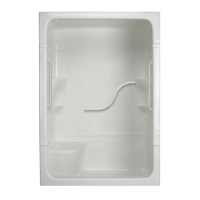
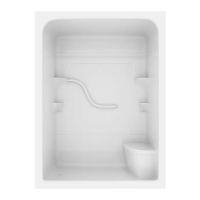
SH5L/R, SH5LS/RS - ONE PIECE SHOWER STALL
SH53L/R, SH53LS/RS - THREE PIECE SHOWER STALL
INSTALLATION INSTRUCTIONS AND OWNER’S MANUAL
READ ALL INSTRUCTIONS CAREFULLY BEFORE STARTING THE INSTALLATION
PLEASE RECORD THE SERIAL NUMBER _________ OF YOUR SHOWER
SAVE THIS MANUAL FOR FUTURE REFERENCE
mirolin.com
57 ½”
1460mm
61"
1550mm
36"
914mm
9 ³⁄"
²⁴⁸mm
MADISON 5
TM
©
2018 Mirolin Industries Corp.