EasyManua.ls Logo

Mission Plus Hb User Manual

Mission Plus Hb
3 pages
To Next Page IconTo Next Page
Page #1 background imageLoading...
Page #1 background image
Mission Plus Hb Hemoglobin Measuring Device
SETUP
First setup
Put the 4 batteries provided into the device. The meter will prompt you to enter the current
Date and Time. Use the left () and right () key to change the date and time, and the
power button ( ) to save.
Upon setting the date and time, the meter will turn itself off.
Configuring the Measuring Device
You must configure the meter for the first use. This only needs to be done once.
1. Press and hold the On/Off button for four seconds. The meter will show
No
SET.
Press to set the first day of testing. Press once (Left) and set number to 99 to
start the first test as day 1. Press to save. The display will show
No
.SET.
2. Press twice right to continue to SET, and On-Off to enter the settings mode.
3. Use and to choose a 12 or 24-hour time format.
Press to save and continue.
4. Use and to set the correct year.
Press to save and continue.
5. Using and to choose the month and date.
Press to save and continue.
6. Use and to set the current hour and minutes.
Press to save and continue.
7. Use and to select
No
.SET ON. to switch the RESET of the test number on or off. The
test number will reset to 1 each new test day if this is turned on. .
Press to save and continue.
8. Use and to toggle between g / dl, g / L of mmol / L units.
Press to save and continue.
9. Use and to turn the meter sound on or off.
Press to save and continue.
10. The display shows
No
SET.
Press once Left to navigate to ELT (exit)
Press to exit the setup.
The meter is now ready for use.
Question and Answer IconNeed help?

Do you have a question about the Mission Plus Hb and is the answer not in the manual?

Mission Plus Hb Specifications

General IconGeneral
SampleCapillary and venous whole blood
Sample Volume10 μL
Hb Measurement Range4.0-24.0 g/dL
Intended UseFor quantitative determination of Hemoglobin (Hb) and Hematocrit (HCT) in capillary and venous whole blood.
Test Time15 seconds
Memory1, 000 test results
Operating Temperature10°C to 40°C
Operating Humidity10% to 90% RH
Power Source2 x AAA batteries
Battery LifeApproximately 1000 tests

Summary

Configuring the Measuring Device

Initial Power On and Setting Day

Press and hold On/Off, set first day of testing to 99 for day 1.

Entering Settings Mode

Navigate to SET and press On-Off to enter settings.

Setting Time Format and Year

Choose 12/24 hour format and set the current year.

Setting Date and Time

Set the month, date, current hour, and minutes.

Configuring Test Number and Units

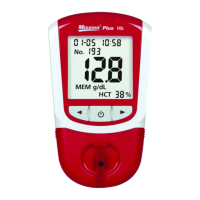
Set test number reset and toggle measurement units (g/dL, mmol/L).

Configuring Sound and Exiting Setup

Turn meter sound on/off and exit setup mode.

Testing Protocol Overview

Required Testing Materials

List of items needed for testing: meter, lancets, test strips, transfer tubes, wipes, gloves.

Important Testing Notes

Read manual, use by professionals only, handle sensitive strips with gloves.

Fingertip Blood Testing Procedure

Steps for performing fingertip blood testing, including code chip verification.

Blood Sample Application and Measurement

Test Strip Insertion

Insert test strip correctly into the device channel until the white part is no longer visible.

Puncturing the Fingertip

Clean finger, puncture fingertip, and wipe first drop of blood; apply light pressure for second drop.

Collecting Blood Sample

Collect 10 µL blood with capillary tube to black fill line, tilting tube slightly.

Applying Blood to Teststrip

Apply blood from transfer tube to teststrip; meter shows testing progress.

Viewing Results

Hb results displayed in 15 seconds with Hct value; 'Lo' shown for low Hb.

Related product manuals