5
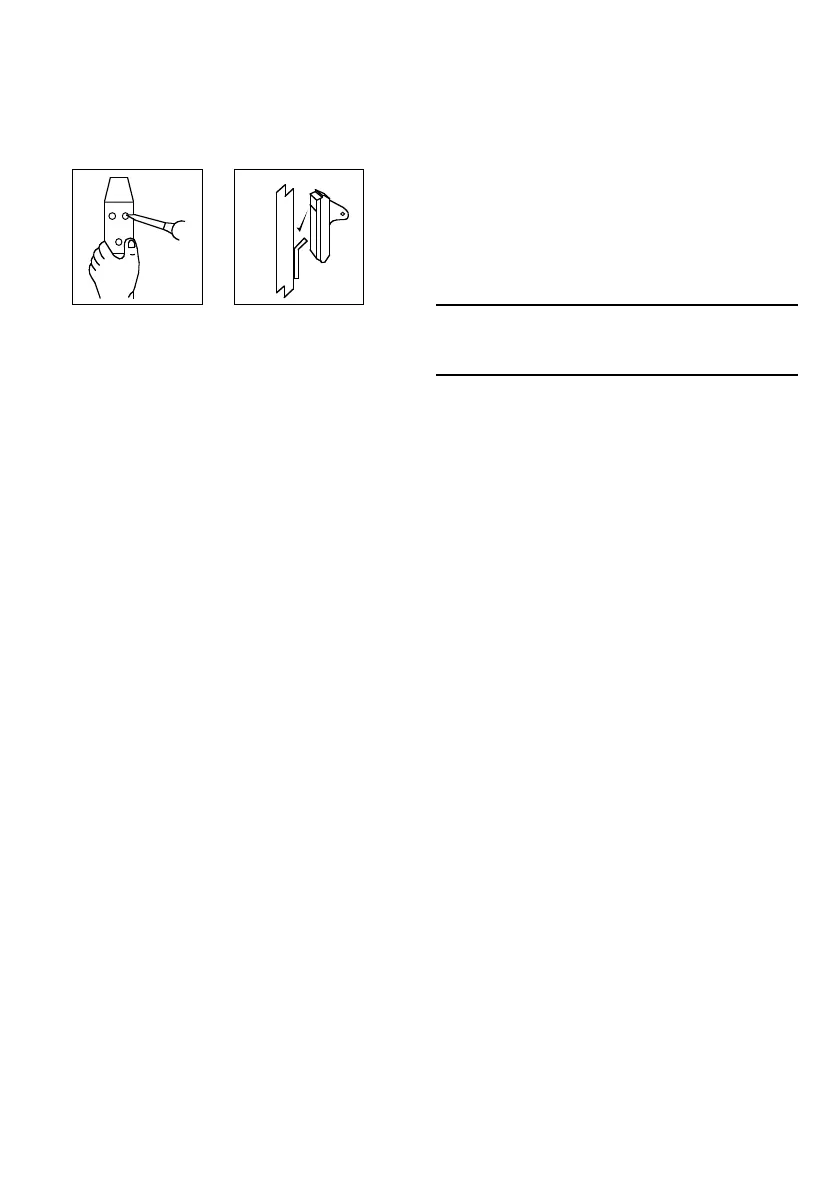
Mount the install plate (13) on the wall with three
fixing screws (14) provided (Fig 1).
Hang the motor and base (17) with the hang hook
(15) onto the hanging bracket (Fig 2).
Remove the plastic shaft protector from the motor
shaft (10) .
Loosen the rear guard securing ring (6) from the
motor & housing assembly.
position the rear guard (8) firmly to the motor &
housing assembly and fasten by turning the rear
guard securing ring (6) clockwise tightly.
Push the fan blade (5) along the motor shaft. Fasten
securely using the fan blade securing nut (4) with the
spinner by turning anticlockwise.
Attach the front guard (2).
Always disconnect electrical appliances before
cleaning them.
Wipe them clean with a slightly damp sponge.
Clean the motor housing and body assembly with a
clean, damp cloth and wipe dry.
Never spray the Wall Fan with liquids or submerge
it in water or any other liquid.
Note: If the cordset of this appliance becomes
damaged, discontinue use. Repairs should be
undertaken only by a qualified electrician.
Care and Cleaning
MWF40R
3 Speed, 40cm Wall Fan.
For indoor use only.
230-240V a.c., 50Hz, 55 Watt
Approval No. S/10
Specifications
Operation of Your Wall Fan
Add-up-type timer measure time by the 0.5 hour, the
longest time is 7.5 hours. If you touch the timer once.
That means the fan will run for 0.5 hous, if you touch
the timer twice, that means it will run for 1 hour.
when the time indicator lamp is a light at the 0.5h,
2H, and 4H, that means the fan will run for 0.5 + 2 +
4 = 6.5 hours. You can enjoy the three different, sleep,
rhythmical, and normal wind types. You could choose
the low, medium or high wind speeds for each wind
type.
You remove the cover from the back of the remote
control, and insert the two batteries, aim it at
switchboard when operating.
Wall
Fig 1 Fig 2