Do you have a question about the Mistral MSF1679R and is the answer not in the manual?
Basic safety precautions for electrical appliances to reduce risk of fire, electric shock, and injury.
Specific safety guidelines for stand fan use, including placement, oscillation, and avoiding foreign objects.
Details on model, rated voltage, and rated power of the stand fan.
Diagram and labels identifying all components of the stand fan.
Step-by-step instructions for assembling the fan stand and attaching the motor unit.
Instructions for attaching the fan blades, plastic nut, and securing the front and rear grills.
Explanation of remote control buttons: Power, Speed, Timer, and Oscillation functions.
Details on operating modes: Normal, Natural, Sleep, and Silent modes, and battery installation.
Guidance on using the remote, battery disposal, and overheat motor protection.
Instructions for tilt adjustment, height adjustment, and power off/memory function.
Guidelines for minimal maintenance, ensuring air circulation, and avoiding disassembly.
Instructions for cleaning plastic parts with mild soap and a soft cloth.
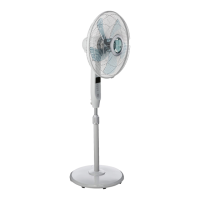
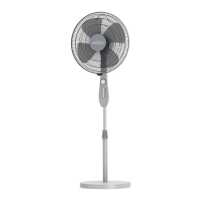
The Mistral MSF1679R is a 16-inch stand fan designed to provide cooling and air circulation in various indoor environments. This appliance is equipped with a remote control, offering convenient operation from a distance. Its primary function is to generate airflow to help cool down a room or provide a refreshing breeze.
The fan offers multiple operational modes and settings to cater to different user preferences and environmental conditions.
The assembly process involves several straightforward steps. First, the 7-shape bolt needs to be unscrewed from the extension pole. The extension pole is then inserted into the chassis, and the 7-shape bolt is tightened to secure it. To adjust the fan's height, the height adjustment ring on the extension pole is loosened, allowing the internal pole to be moved to the desired position. If the internal pole is not immediately visible, it is likely housed within the extension pole and can be pulled out. Finally, the head unit is attached to the internal pole by loosening the thumb screw on the bottom of the head unit, placing it onto the internal pole, and then tightening the thumb screw, ensuring it aligns with the groove on the internal pole. A crucial caution during assembly is to ensure the height adjustment ring is fully fastened before attaching the motor section to the internal pole.
To assemble the fan blade and grills, first, the spinner is unscrewed clockwise (or taken from the bag) and the plastic nut counterclockwise to remove them. The rear grill is then fixed to the motor, and the plastic nut is tightened again. The blade is inserted onto the shaft, making sure the rotor shaft pin fits into the blade's groove. The spinner is then turned counterclockwise to tighten the blade. Finally, the front grill and rear grill are fastened together using the grill clips, and the fan grill locking screw and nut are tightened.
The fan can be operated using either the remote control or the control panel located on the fan's body. The remote control functions by pointing it at the receptor on the fan's body and pressing the desired button. It operates effectively at distances up to approximately five meters and within a 30-degree angle from the receptor.
The power button on the remote control or control panel is used to switch the fan on and off. When switched on, the fan will start at the "breeze" step.
The fan offers multiple speed settings, which can be cycled through by repeatedly pressing the speed button. The available settings are "0-1-2-3-4," corresponding to Off, Breeze, Low, Medium, and High, respectively.
The timer function allows users to set a specific operating duration for the fan. By repeatedly touching or holding the timer button, the desired time can be increased in steps of 0.5 hours, up to a maximum of 7.5 hours over 15 steps. For example, to set the fan to operate for 5.5 hours, the button must be pressed until the pilot lamps for 0.5, 1, and 4 hours illuminate simultaneously. The set time, indicated by the pilot lamps, will gradually decrease in units of 0.5 hours as the fan operates. If continuous operation is desired, the timer key should not be pressed, and in this state, all pilot lamps will remain off.
After the fan is started, pressing the oscillation key will initiate the fan's oscillating movement. Pressing the key again will stop the oscillation at the desired direction. The fan head can also be rotated manually to achieve a wider oscillation angle.
The fan features different operational modes: Normal, Natural, and Sleep. These modes can be selected by repeatedly or continuously pressing the mode button. An indicator light will show the currently active mode.
The fan also includes a silent mode for quiet operation. When not in silent mode, pressing the silence button will activate it, and the silence icon will light up. Simultaneously, the indicator icons for other wind types and wind levels will turn off. In silent mode, pressing the wind type, blast volume + and – buttons will not elicit a response, though other buttons will function normally. Pressing the silence button again will exit silent mode, returning the fan to its previous working state. The silence icon will turn off, and "00" will be displayed on the digital screen.
The remote control requires "AAA" manganese or alkaline batteries, which are not included in the packing. Rechargeable batteries should not be used. To insert batteries, slide open the battery compartment cover, insert the batteries as shown in the diagram, and then slide the cover back into place.
The airflow direction can be adjusted by gently pushing the grilles upward or downward to the desired angle.
The fan's height can be adjusted by loosening the height adjustment ring, carefully raising or lowering the fan, and then firmly re-tightening the ring.
The motor is equipped with a thermal-fuse. In the event of overheating due to an unexpected reason, the fuse will burn out, switching off the fan. This prevents the motor temperature from rising further and protects the plastic parts from deformation or burning.
If the fan is shut down or loses power, when it is switched on again, it will resume operation in the state it was in before the shutdown or power loss, provided the timing function was not active.
Regular maintenance is essential to ensure the fan's longevity and safe operation.
The stand fan requires minimal maintenance, and users should not attempt to repair it themselves. Before cleaning or assembling, always ensure the power cord is unplugged from the socket. To maintain adequate air circulation to the motor, keep the vents at the rear of the motor housing free from dust, fluff, and other debris. A vacuum cleaner should not be used to clean these vents before unplugging the fan. The fan should not be disassembled to remove fluff.
Before cleaning, always unplug the fan from the electrical supply mains. The exterior parts should be wiped with a soft cloth moistened with a mild detergent. After cleaning, thoroughly remove any soap film with a dry cloth. It is crucial not to use abrasive detergents or solvents that could scratch the surface. Additionally, cleaning agents such as gasoline, thinner, or bending agents should not be used. Water or any other liquid must not be allowed to enter the motor housing or any interior parts of the fan.
Batteries should not be disposed of in fire, as they may explode or leak. Old and new batteries should not be mixed. Similarly, alkaline, standard (carbon-zinc), or rechargeable (nickel-cadmium) batteries should not be mixed. When the remote controller is to be scrapped, the batteries must be removed and disposed of safely.
| Model | MSF1679R |
|---|---|
| Category | Fan |
| Speed Settings | 3 |
| Remote Control | Yes |
| Voltage | 220-240V |
| Frequency | 50Hz |
| Size | 16 inches |
| Blade Size | 16 inch |
| Material | Plastic |
| Color | White |