4
Fan Blade Assembly
•
•
•
Remote Control
Power
•
•
Speed
•
Timer
•
•
•
•
Oscillation
•
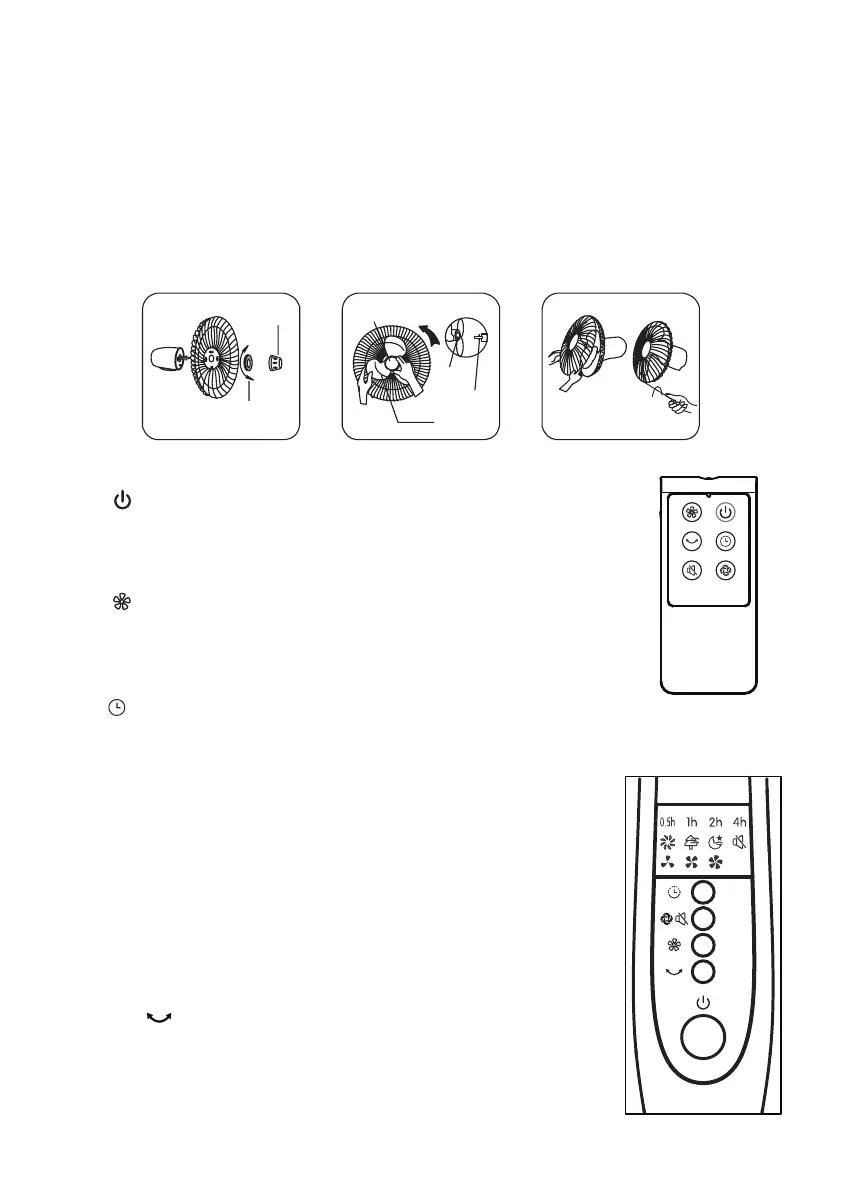
Unscrew the spinner clockwise (or take the spinner out from the bag) and the plastic nut
counterclockwise to remove both of them. Fix the rear grill to the motor then tighten the
plastic nut again. (Fig. 5)
Insert the blade into shaft, and make sure the rotor shaft pin is tted into groove of the
blade. Turn the spinner counterclockwise to tighten the blade. (Fig. 6)
Fasten the front grill and the rear grill by the grill clip and then tighten the fan grill locking
screw and nut. (Fig. 7)
This button is for switching on the fan .The fan will be started at breeze step.
Press the button if the fan needs to switch o.
When the fan started, press this button repeated, the fan will work
with “0-1-2-3-4(O-Breeze-Low-Medium-High)” circulatory.
When this button is touched repeatedly or kept in pressed state, the time to be set for air
delivery increased step by step of each 0.5 hour and sums to 7.5 hours in 15 steps.
For instance, if the fan operation is required to be set for 5.5 hours,
this button must be touched repeatedly so that the pilot lamps for
0.5, 1 and 4 hours lighten together. It means that the set time is
0.5+ 1+ 4= 5.5 hours.
The time setting indicated by the pilot lamp will decrease gradually
by a unit of 0.5 hour.
Don’t press the TIMER key when the fan is required to operate
continuously. At the moment all pilot lamps don’t light.
After the fan is started, press this key to oscillate the fan, and
stop the oscillation at desired direction by pressing again. By
rotating the fan head by hand, you can get wider oscillation angle.
Fig.5
Spinner
Spinner
Tight
Tight
Loose
Plastic nut
Slot
Retaining
Pin
Blade
Fig.6 Fig.7