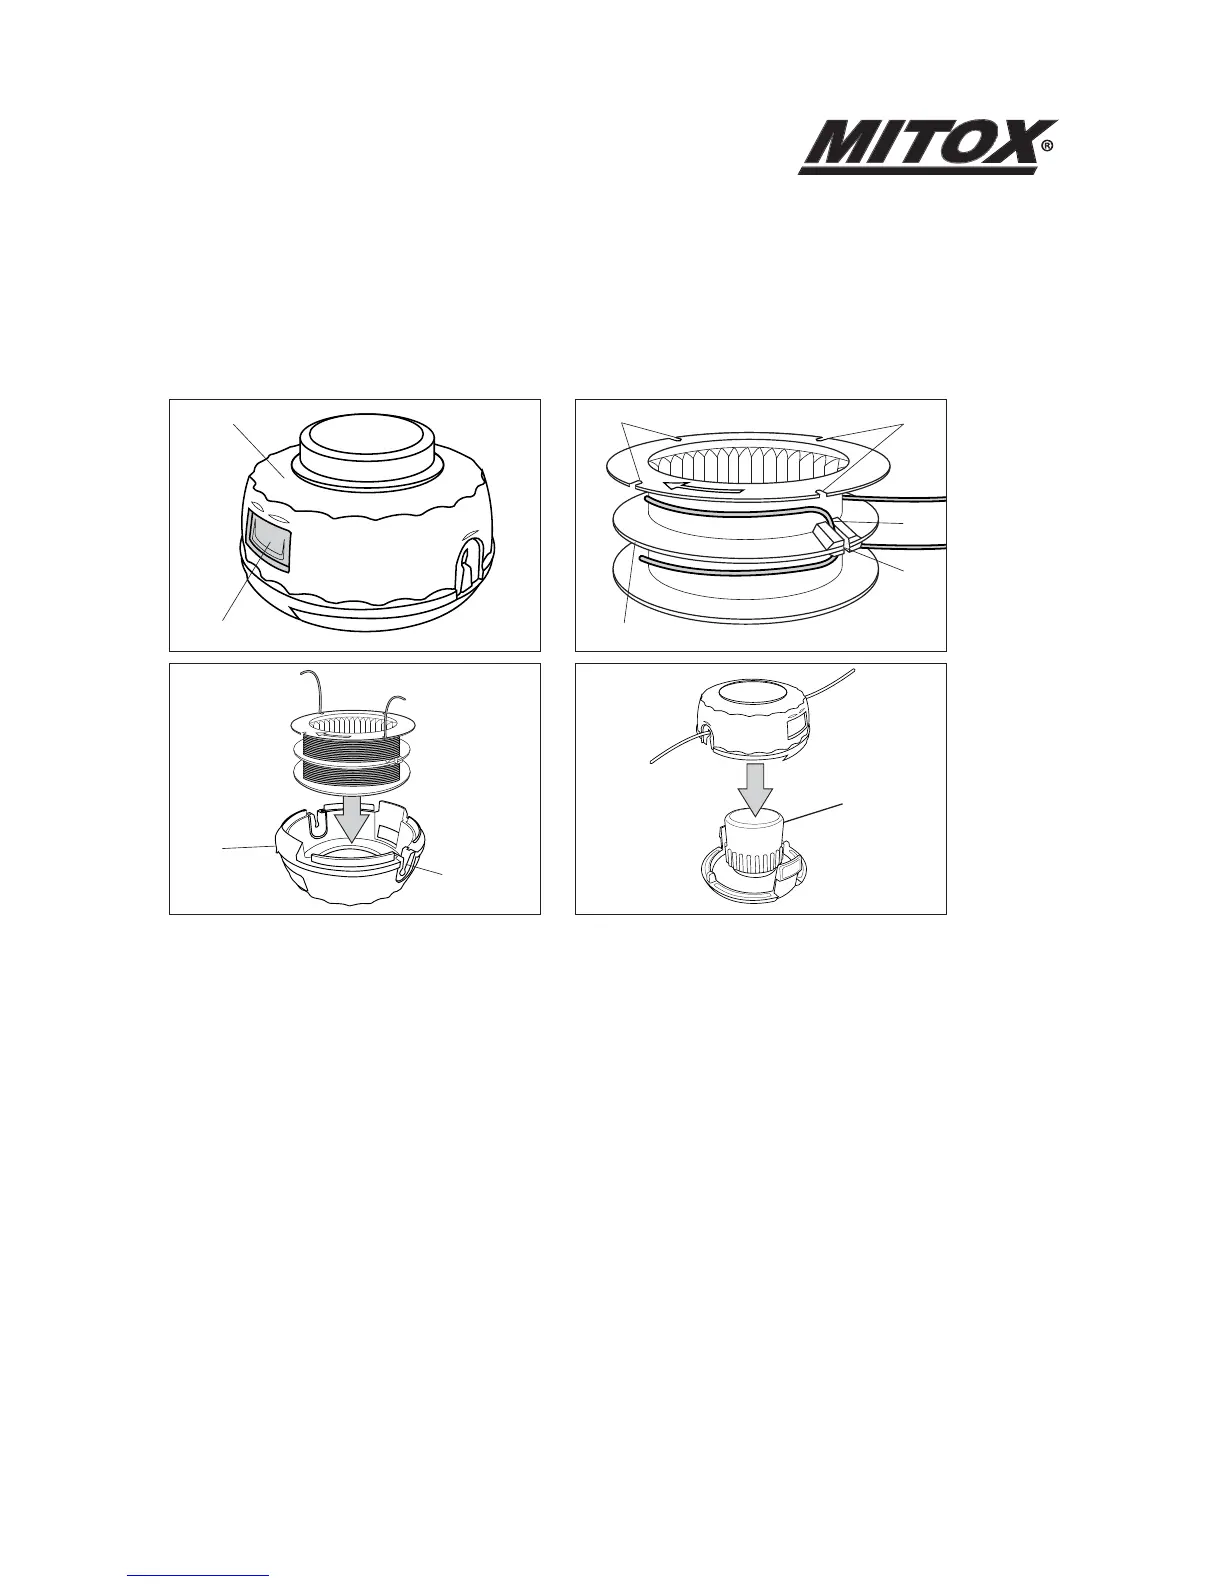
Replacing the Nylon Cord
Check to see if the nylon head is damaged before replacing the cord. If you can see serious traces
of wear or damage, you must replace the complete nylon head.
1. Stop the engine.
2. Open the nylon head by pushing on the catch, (a), and lifting the cover (b).
3. Pull the bobbin out of the nylon head and take out the rest of the nylon cords.
4. Cut a new length of cord, 2.0mm Ø and 3 meters long.
5. Fold the new cord in half and place the centre of the fold (c) into the clip (d) in the empty bobbin.
6. Wind the line in the direction of the arrows on the bobbin, with half of the line above and half
below the divider (e). Maintain an even and firm tension onto the bobbin, being careful not to twist
the line.
6. fter winding the cord, insert both ends into the notches on the bobbin, (f).
7. Put the filled bobbin back into the carrier (g). Release the cords from the notches in the bobbin
and thread them into the eyelets in the carrier (h). The cords should stick out appx 15 cm either
side.
8. Refit the carrier to the head (i), ensuring it is securely clicked into place.
**NOTE** To watch a video on fitting the nylon cutting line visit www.mitox.co.uk
Never use a cutting device other than those supplied by the manufacturer. (Steel cord is never
allowed) lways use original spare parts in order to benefit from continuous warranty.
(a)
(b)
(f)
(c)
(d)
(e)
(i)
(g)
(f)
(h)