Do you have a question about the Mitsubishi Electric MSZ-FT25VG-E1 and is the answer not in the manual?
| Brand | Mitsubishi Electric |
|---|---|
| Model | MSZ-FT25VG-E1 |
| Category | Air Conditioner |
| Language | English |
Details new model introductions and changes in specifications or features.
Lists all included accessories with the indoor unit for proper installation and operation.
Provides detailed electrical and operational specifications, including ratings for main components.
Allows shortening of timer settings for service purposes, affecting ON/OFF and compressor start times.
Guides on setting remote controller exclusivity for specific indoor units in multi-unit setups.
Explains how the unit remembers and resumes operation settings after a power interruption.
Instructions for connecting the Wi-Fi interface to a network for remote monitoring and control.
Procedure to adjust room temperature correction value during heating operation for better comfort.
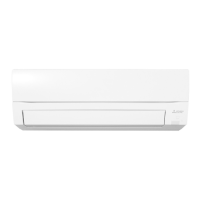
Overview of the wireless remote controller, its sections, and signal transmission details.
Details the operation, modes, and specific functions during cooling cycles.
Explains the function and operation modes specific to the dry (dehumidification) mode.
Describes the fan-only operation mode, where the outdoor unit remains off.
Outlines the operating procedures and modes for heating cycles.
Explains automatic switching between COOL and HEAT modes based on room temperature.
Details the automatic adjustment and control of horizontal and vertical vane positions.
Instructions on setting and using the ON and OFF timers for automated operation.
Programming daily and weekly schedules for unit operation to optimize comfort and energy.
Describes the NIGHT MODE function, which reduces noise and adjusts indicator brightness.
Procedure for saving and recalling custom settings for temperature, fan speed, and airflow.
Explains the FAN operation mode that circulates indoor air after reaching the set temperature.
How to use the emergency operation switch for testing or when the remote is unavailable.
Describes the compressor protection feature that delays restart for 3 minutes after shutdown.
Important safety and procedural precautions to follow before and during troubleshooting.
Method to recall and diagnose past abnormal conditions using indicator lamps and remote signals.
A systematic flowchart guiding the diagnosis process based on unit operation and indicator lamp behavior.
Step-by-step guide to troubleshoot issues with Wi-Fi connectivity and smartphone control.
Correlates indicator lamp patterns with abnormal conditions and their corresponding remedies.
Details methods for checking and verifying the condition of key internal components.
A systematic approach to diagnose issues based on unit operation and indicator lamp behavior.
Procedure to check the remote controller's functionality and its interaction with the indoor P.C. board.
Steps to inspect and test the indoor P.C. board and indoor fan motor for faults.
Guide to identify and resolve issues related to incorrect wiring or communication errors.
Troubleshooting steps for electromagnetic interference affecting TV sets and radios.
Provides diagrams of P.C. boards with test points and expected voltage readings for diagnosis.
Step-by-step guide for safely removing the front panel and related covers.
Guide for disassembling various internal P.C. boards and their associated components.
Instructions for disassembling the nozzle assembly and vane motor components.
Guide for removing the vertical vane motor unit from the air conditioner assembly.
Steps to detach and remove the horizontal vane motor from its mounting.
Instructions for removing the fan motor, thermistor, and line flow fan assembly.
Procedure for detaching and removing the Wi-Fi interface module from the unit.
Steps to remove the indoor electrical box housing internal wiring and components.
Guide for disassembling various internal P.C. boards and their associated components.
Steps for disassembling the nozzle assembly and vane motor for specific models.
Guide for removing the vertical vane motor unit for specific models.
Instructions to detach and remove the horizontal vane motor for specific models.
Steps for removing the fan motor, thermistor, and line flow fan for specific models.
Procedure for correctly mounting the indoor coil thermistor using clip or holder parts.