EasyManua.ls Logo

Mitsubishi Electric RedLINK MHK2 User Manual

Mitsubishi Electric RedLINK MHK2
17 pages
To Next Page IconTo Next Page
Page #1 background imageLoading...
Page #1 background image
RedLINK™ Wireless
Remote Controller Kit
Installation Manual
MHK2:
MRCH2 Controller, MIFH2
Receiver, and MRC2 Cable
DISCONNECT POWER BEFORE BEGINNING INSTALLATION.
Can cause electrical shock or equipment damage.
Must be installed by a trained, experienced technician.
Read these instructions carefully. Failure to follow these instructions can damage the product or cause a
hazardous condition.
Installation at a Glance
This manual covers the installation and setup of the MHK2 Remote Controller with Mitsubishi Electric
indoor units.
Before you begin, you must attach the cable to the CN105 connector on the indoor unit control
board, then follow the steps in this document.
Note: Remote Controllers are linked to specific indoor units. Each indoor unit must have a
dedicated Remote Controller and Wireless Receiver.
Note: Your device's PIN code is your date code added to 1234. For example, a date code of
2010 plus 1234 would give you a device PIN of 3244.
© 2019 Mitsubishi Electric US, Inc.
Suwanee, GA 30024 All Rights Reserved.
https://mhk2.meushvac.com/
1-800-433-4822
MHK2 is compatible
with kumo cloud
®
when
connected with the Wireless
Interface 2 or later.
RedLINK
Technology
33-00446EFS_B.indd 1 10/17/2019 3:08:58 PM
Question and Answer IconNeed help?

Do you have a question about the Mitsubishi Electric RedLINK MHK2 and is the answer not in the manual?

Mitsubishi Electric RedLINK MHK2 Specifications

General IconGeneral
TypeWireless Remote Controller
DisplayLCD
Temperature Range50°F to 99°F (10°C to 37°C)
BacklightYes
CompatibilityMitsubishi Electric indoor units with RedLINK wireless technology
Communication ProtocolRedLINK
RangeUp to 100 feet
ProgrammableYes
Power Source2 AA batteries

Summary

Product Overview and Safety Precautions

Installation at a Glance

Overview of MHK2 Remote Controller installation and setup for Mitsubishi Electric indoor units.

Important Safety Warnings

Disconnect power before installation to prevent electrical shock or equipment damage. Professional installation is required.

Mounting and Controller Installation

Mounting the Wall Plate

Instructions for mounting the wall plate, including drilling and securing with screws.

Installing Batteries

Guide for inserting AA batteries into the MHK2 controller.

Attaching the MHK2 Controller

Steps to attach the MHK2 controller to the wall plate and advice on placement.

Installation Details and Components

Optional Decorative Cover Plate

Guidance on installing an optional decorative cover plate for aesthetic purposes or gap coverage.

Install Cable and Wireless Receiver

Steps to connect the MRC2 cable to the indoor unit and mount the RedLINK Wireless Receiver.

RedLINK Network Setup

Link Devices to RedLINK Network

Procedure for linking the MHK2 controller and receiver to the RedLINK network, including LED status.

Indoor Air Sensor (IAS) Setup

Steps to link the Indoor Air Sensor (IAS) to the RedLINK network and troubleshooting tips.

Linking and System Exit

Link Remote Controller to Receiver

Steps to establish a wireless link between the MHK2 controller and the RedLINK receiver.

Exit RedLINK Setup Mode

Procedure to exit the RedLINK wireless setup mode on the receiver.

Installer Setup Procedures

Initial Installer Setup Process

Initial setup process for the MHK2 controller after communication with the indoor unit is established.

Advanced Menu Options Overview

Overview of advanced setup options including Function Codes, Device Setup, Screen Lock, and System Test.

M-Series & P-Series Indoor Unit Function Codes

Installer Setup Options (ISU) – Advanced Menu

Static Pressure Settings

PEAD-AA Static Pressure

Static pressure settings for the PEAD-AA indoor unit model.

SEZ Static Pressure

Static pressure settings for the SEZ indoor unit model.

SVZ-Downflow Static Pressure

Static pressure settings for the SVZ-Downflow indoor unit model.

PVA - Vertical/Horizontal Static Pressure

Static pressure settings for PVA units installed vertically or horizontally.

PVA - Downflow Static Pressure

Static pressure settings for PVA units installed in downflow configuration.

SVZ - Vertical/Horizontal Static Pressure

Static pressure settings for SVZ units installed vertically or horizontally.

Vane Settings

Mode No. 11 Vane Settings

Specific vane angle settings for Mode No. 11 across various unit types.

System Testing and Time Synchronization

Performing a System Test

Procedure to perform a system test on the controller to verify setup and equipment operation.

kumo cloud® Connectivity

Requirements for connecting the MHK2 controller to the kumo cloud® service via Wireless Interface 2.

Automatic Time Synchronization

How the MHK2 controller automatically syncs its time and date from the Wireless Interface.

Key Controller Features

System Status and Schedule Information

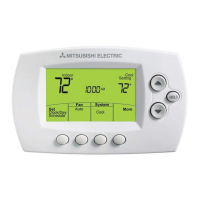
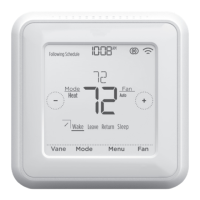
Displays system status like Cool/Heat On and follows time-based temperature schedules.

Temperature and Vane Control

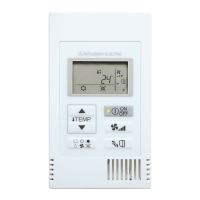
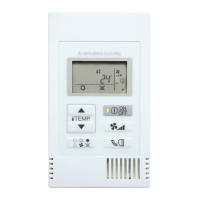
Shows current indoor temperature and allows selection of air direction (vane settings).

Mode, Lock, and Communication Status

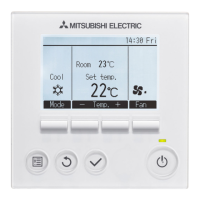
Controls system mode, screen lock features, and RedLINK™™ communication status.

Troubleshooting and Component Replacement

RedLINK™™ Error Codes

List of RedLINK™™ error codes, their meanings, and recommended actions.

Replacing System Components

Procedure for replacing the RedLINK™™ Wireless Remote Controller and Receiver, including unenrollment.

Regulatory Compliance Information

Product Specifications and Compliance

Related product manuals