3. Please dress it with an attached insulation sheet for heat insulation. (Please dress both liquid and gas sides)
Attention
①
A1pply an attached insulation sheet along a pipe, tape the joining line with a joint tape (to be procured on the installer's part) for complete sealing, and wrap the pipe and insulation sheet
entirely with a tape.
②
Dress both liquid and gas pipes with attached insulation sheets for heat insulation.
③
Ensure that the liquid pipe is given the heat insulation as good as that of the gas pipe. The absence of heat insulation can cause dripping water from dew condensing on the pipe or performance
degradation.
・
In the case of a header set (model type HEAD)
④
⑤
Always apply nitrogen gas when soldering joints. If nitrogen gas is not applied, a large amount of film oxide will be formed which could lead to a critical failure in the unit. Use caution to prevent
moisture or any foreign matters from entering the pipe when connecting pipe ends.
For the method of air tightness testing and pulling air, please refer to the installation manual of the outdoor unit.
⑥
Do not leave piping with any open ends uncovered to prevent water or foreign matters from entering inside.
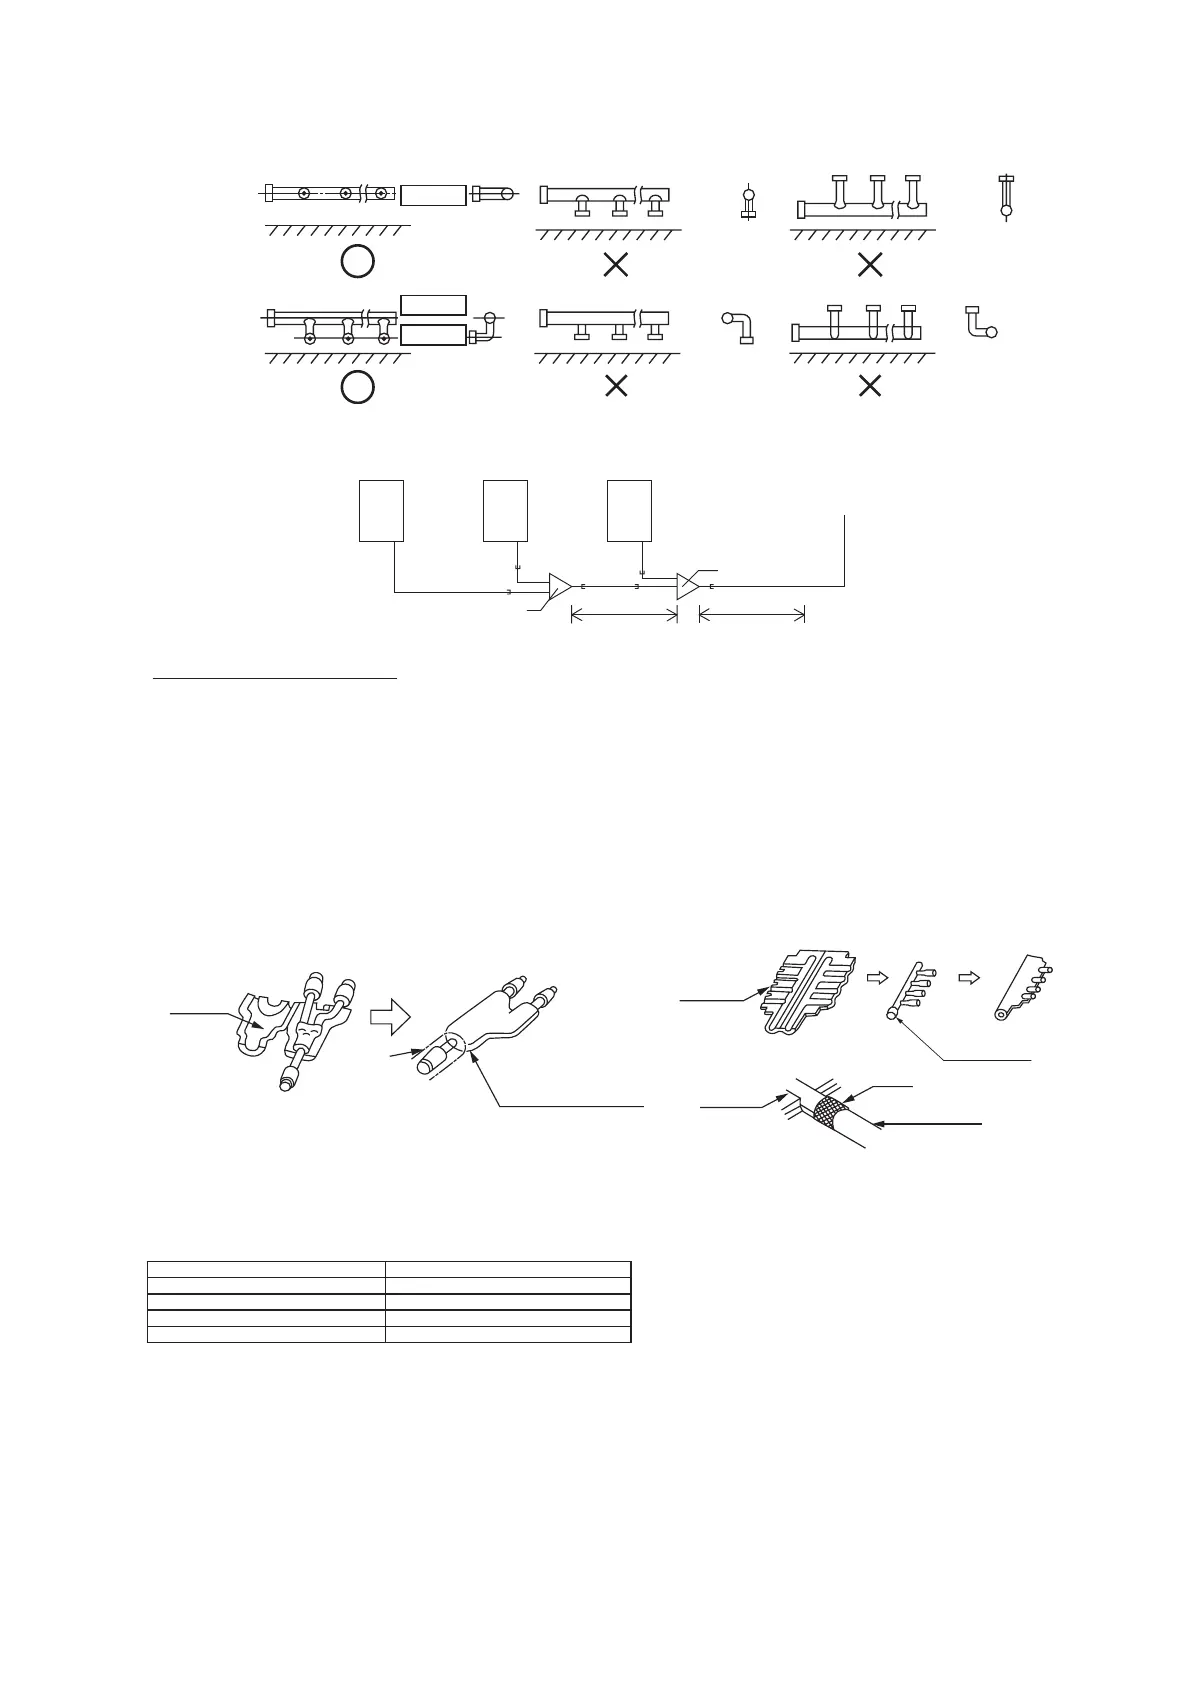
4. How to select a branching pipe
⑴
Method to select a branch pipe set (Type DIS)
●
An appropriate branching pipe size varies depending on the capacity of connected indoor units (combined total capacity connected downstream), so please choose from the table below.
●
In the case of a 140/160 (5/6HP) outdoor unit, however, select DIS-22-1G. (Even if the capacity of connected indoor units reaches 180 or higher, select DIS-22-1G.)
Total capacity downstream Branching pipe set model type
less than 180 DIS-22-1G
180 or higher – less than 371 DIS-180-1G
371 or higher – less than 540 DIS-371-1G
540 or more DIS-540-3
Attention
①
Use a pipe conforming to a pipe size specified for indoor unit connection for the section between an indoor unit and an indoor unit side branching pipe.
②
A branching joint (for both gas and liquid) must always be positioned in such a way that it branches either horizontally or vertically.
⑵
How to select a header set
●
Depending on the number of units connected, connect plugged pipes (to be procured on the installer's part) at a branching point (on the indoor unit connection side).
●
For the size of a plugged pipe, please refer to the documentation for a header set (optional part).
●
In the case of a 140/160 (5/6HP) outdoor unit, however, select HEAD4-22-1G. (Even if the capacity of connected indoor units reaches 180 or higher, select HEAD4-22-1G.)
 Loading...