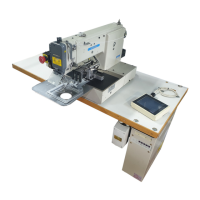
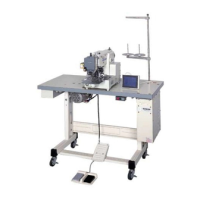
Do you have a question about the Mitsubishi LU2-410 and is the answer not in the manual?
Details on connecting power cables and lamp leads for the sewing machine.
Instructions for wiring the control box and ensuring correct machine head/control box combinations.
Procedure to adjust the needle bar stop position using timing marks on the light shielding disc.
Instructions for filling and checking the oil reservoir to the 'H' mark.
Guidance on applying oil to specific points when using a new or long-idle machine.
How to check lubrication status by observing oil drips through the oil sight port.
Steps for adjusting the oil flow to the rotating hook using an adjustment screw.
Important safety and operational guidelines for using the sewing machine and its components.
Procedure for correctly inserting needles, ensuring prime grooves face correctly for proper stitching.
Guidance on thread tension, winding type, and quantity for bobbins.
Recommended thread twist types for left and right needles for optimal sewing performance.
Step-by-step guide for passing needle threads through guides and tension discs.
How to adjust stitch length and utilize the touch-back switch for reverse sewing.
Instructions for mounting the bobbin case and ensuring correct thread winding and rotation.
Steps for picking up bobbin thread with needle threads and aligning them correctly.
How to adjust bobbin thread tension using the tension adjust screw.
Visual guide to achieving balanced thread tension for consistent stitches.
How to adjust needle thread tension relative to bobbin tension.
Method for adjusting presser foot pressure based on fabric type.
Precise steps for aligning the rotating hook and needle for optimal timing.
How to set the feed dog height correctly for different fabric types.
Ensuring correct alignment between the rotating hook and take-up lever motions.
Adjusting the gap between the opener and bobbin case holder for smooth operation.
Aligning needle and feed dog motions for proper stitch formation.
Understanding the function and setting procedure of the safety clutch.
Adjusting the upper feed stroke to improve stitch uniformity on different fabrics.
Adjusting the operating height and alternate strokes of the presser feet.
Steps for installing the movable knife and setting its protrusion from the fixed knife.
Adjusting the gap between the movable knife and the stopper for proper trimming.
Procedure for correctly positioning the thread trimmer cam relative to the feed cam and bushing.
Setting the thread trimmer cam to ensure the movable knife moves at the correct point.
Adjusting the thread tension release cam and roller for proper thread release during trimming.
Fine-tuning the pressure between the movable and fixed knives for effective thread trimming.
Instructions on how to sharpen the fixed knife when it becomes dull.
Adjusting the distance between needles and hooks for optimal thread trimming.
Correctly installing the solenoid crank with the specified gap to the rotary solenoid.
Steps for removing the hook bracket (left and right) from the machine.
Using specified parts for thread trimming and notes on slip prevention spring and bobbin.
Adjusting the needle UP stop position based on fabric thickness for precise trimming.
Choosing between two stop positions for the sewing machine's operation.
Understanding the two-step pedal operation for running, trimming, and presser foot lift.
How to adjust the pressure for pedal toe-down and heel-down operations.
Adjusting maximum and positioning speeds using internal and external controls.
Overview of how internal switches and external connectors enable various machine functions.
Setting and adjusting the timing for automatic thread trimming operations.
Using external connectors for various operations like speed control and touch-back.
Activating reverse sewing using the touch-back switch during machine operation.
| Brand | Mitsubishi |
|---|---|
| Model | LU2-410 |
| Category | Sewing Machine |
| Language | English |

