– 35 –
Removal and installation of the front panel
Open/close and detachment/attachment of air inlet panel
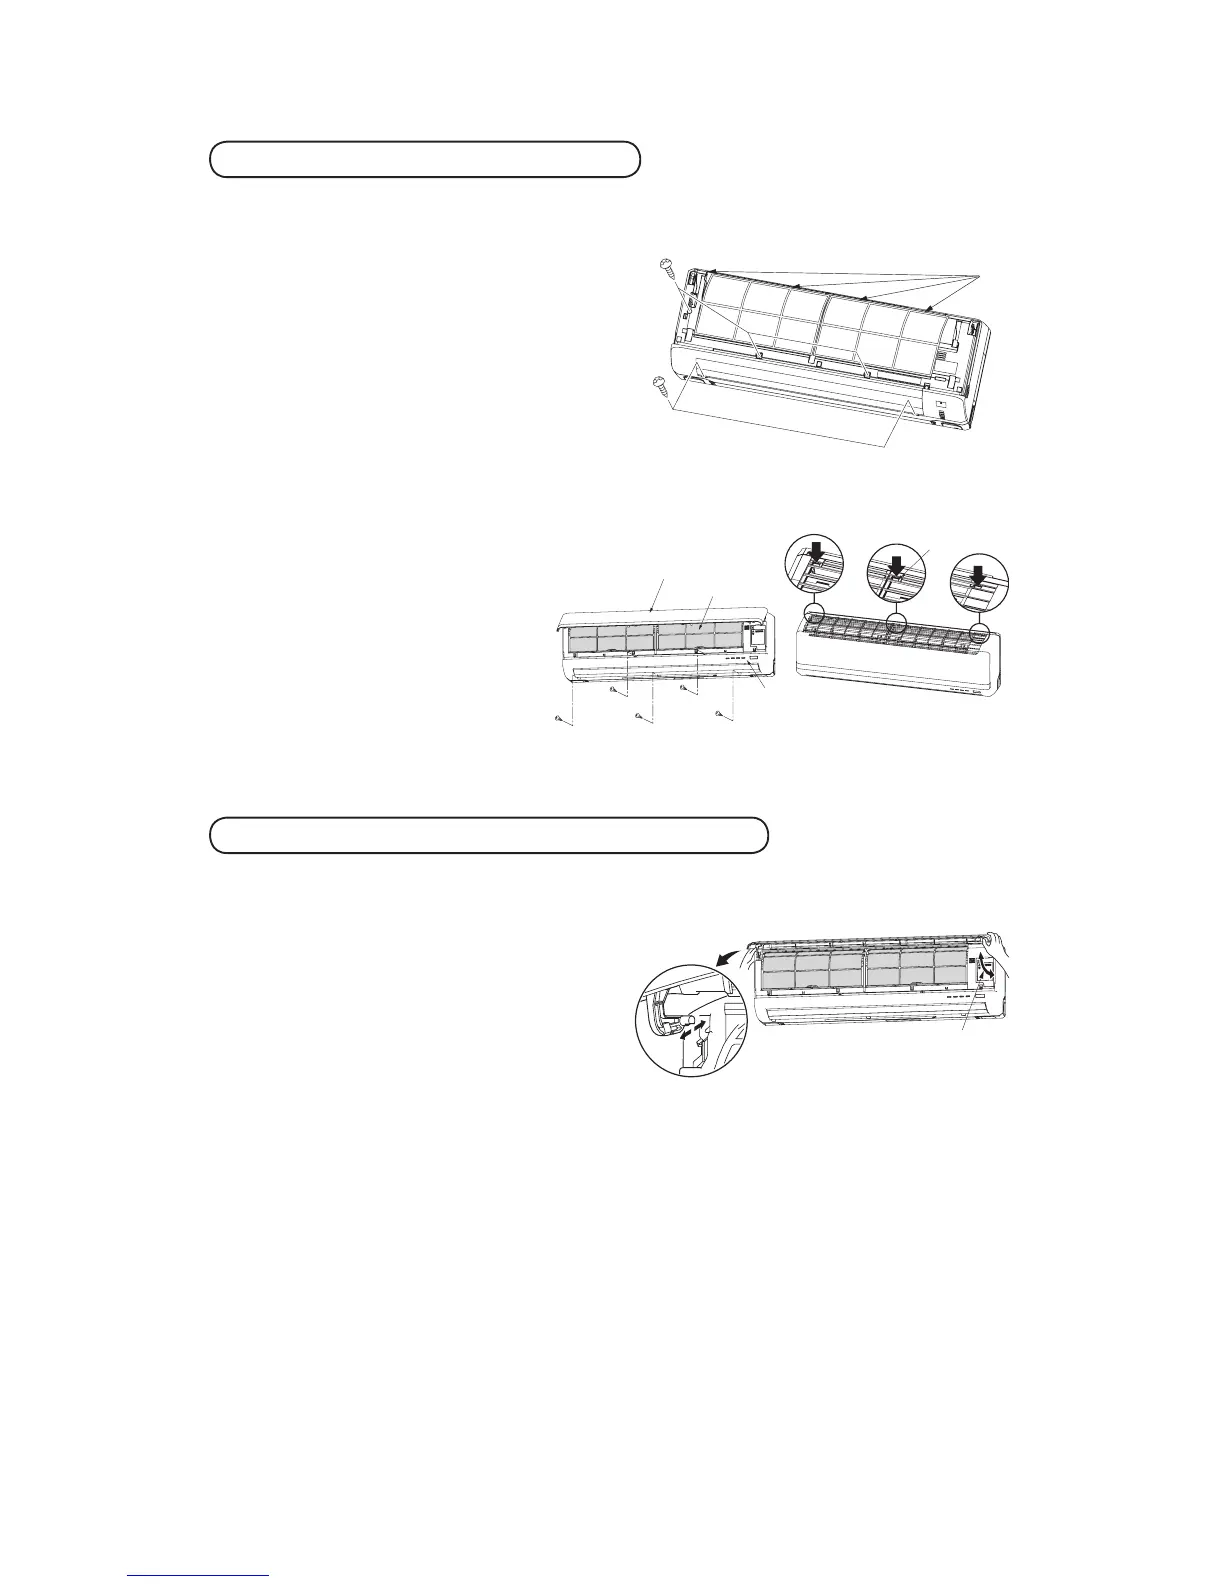
① Removing
• Remove the air inlet panel.
• Remove the screw(A) 2pcs/screw(B) 3pcs fixing to
the front panel.
• Remove the 3 latches in the upper section of the front
panel and then remove the front panel from the unit.
② Installing
• Remove the air filter.
• Cover the unit with the front panel.
• Tighten the screw(A) 2pcs/screw(B) 3pcs to fix the
front panel.
• Install the air filter.
• Install the air inlet panel.
① Removing
• Remove the air inlet panel.
• Remove the 5 set screws.
• Remove the 4 latches in the upper section.
• Move the lower part of the panel forward and puch
upwards to remove.
② Installing
• Remove the air filter.
• Cove the unit with the front panel.
• Install the 4 latches in the upper section.
• Tighten the 5 set screws.
• Install the air filter.
• Install the air inlet panel.
① To open, pull the panel at both ends of lower part and release
latches, then pull up the panel until you feel resistance. (The air
inlet panel stops at approx. 60˚ open position.)
② To close, hold the panel at both ends of lower part to lower
downward and push it slightly until the latch works, then push
the center portion slightly.
③ To remove, pull up the panel to the position shown in right il-
lustration and pull it toward you.
④ To install, insert the air inlet panel arm into the slot on the front
panel from the position shown in right illustration, hold the
panel at both ends of lower part, lower it downward slowly,
then push it slightly until the latch works and further push the
center portion slightly.
Air inlet panel
Air filter
Screw (B) Screw (B) Screw (B)
Screw (A)
Screw (A)
Front panel
Latch
Approx. 80
To remove / To install
21 Series
26 Series
Set screws
latch
RMA012A076A_En.indb 35 22-Jan-14 09:00:40
 Loading...