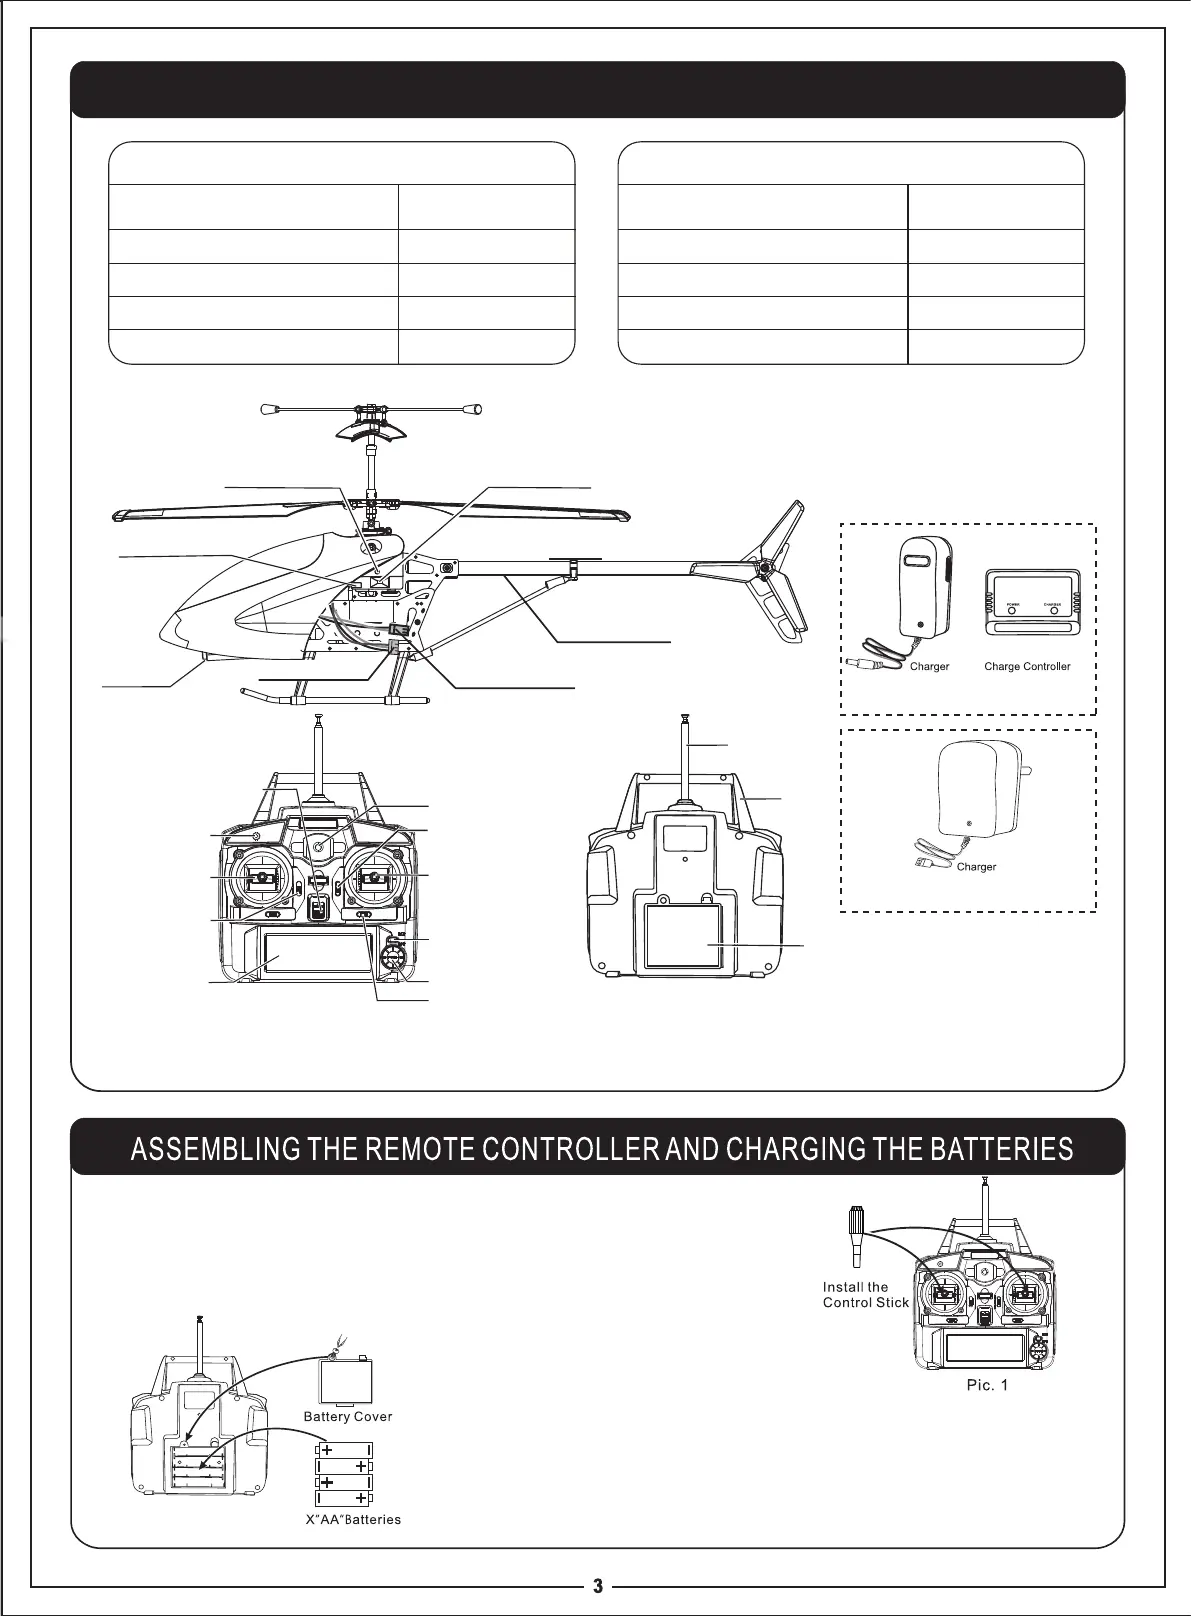
PRODUCT/SPARE PARTS INCLUDED IN THIS PACKAGING
LCD Remote Controller
Remote control
1
1
1
Charge controller
Antenna
Control stick
2
Description
QT Y (pc)
Main Units & Accessories
Helicopter
1
1
1
Rechargeable battery pack
Charger
Manual
1
Description
QT Y (pc)
Main Units & Accessories
1.
Insert the antenna into the small hole locating at the top of the remote control unit.
Screw it until it is well tighten by turning clockwise . Insert the two control sticks
into the holes locating at the left and the right side of the remote controller
respectively.
(
Pic.1
)
2.
Installing the Batteries: Open the battery compartment cover by
turning the battery compartment screw counterclockwise. Insert
4X “AA”batteries into the battery compartment. Ensure the
batteries are inserted properly by matching the “+”and “-” symbols
as indicated.
(
Pic.2
)
Indicator Light
Parameter Setting Knob
Power Switch
Throttle Stick
Up/Down
Speed Setting
LCD Screen
Forward/Backward
Regulation Button
Joystick Controls For
Forward / Backward /
Left / Right
Gyro Regulation Button
Antenna
Handle
Battery
Cover
Remote Controller
Channel Selector
Searchlight
Indicator Light
Power Switch
Power Plug
Tail Light
Helicopter
Charging Socket
Battery Charging Plug
Pic.2
(Not included)
4
EXIT/LIGHT
MENU/OK
split charging device
all-in-one charging device